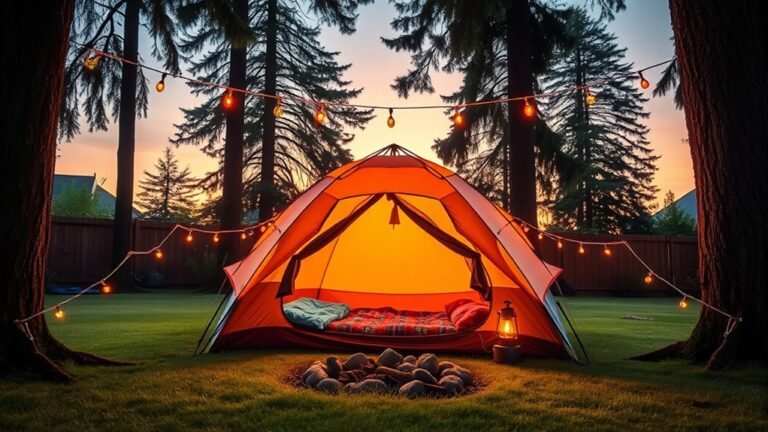
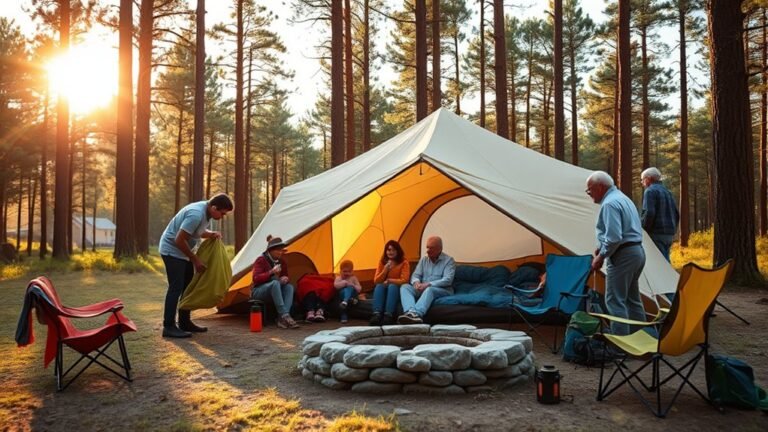
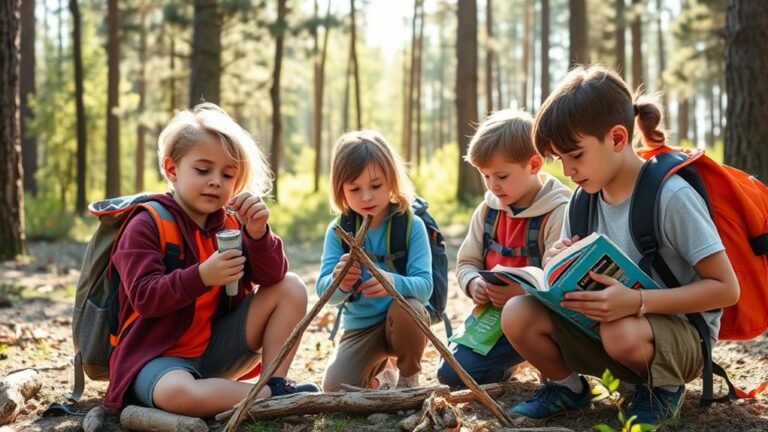
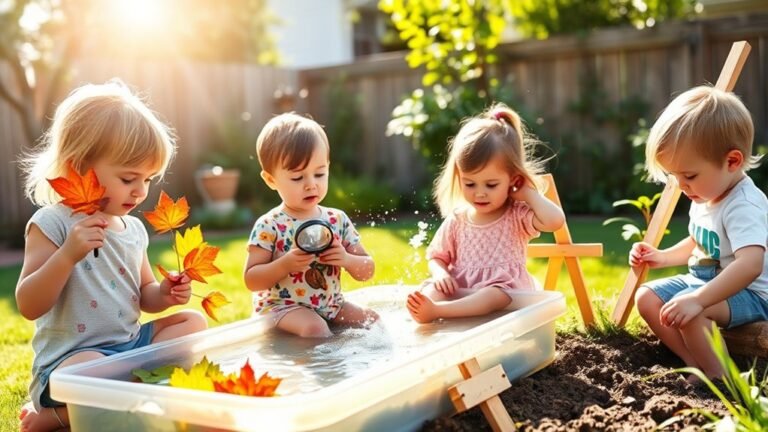
17 Nature Craft Projects for Outdoor-Loving Kids
You’ll discover creative ways to connect your kids with nature through hands-on projects like leaf rubbing art, painted rock garden markers, and stick fairy houses. These crafts use simple materials found outdoors—fallen leaves, smooth stones, twigs, and pine cones—to create both decorative and functional items. Your children will develop fine motor skills while learning environmental stewardship through pressed flower bookmarks, pine cone bird feeders, and nature mandalas. Each project encourages creativity, teamwork, and appreciation for the natural world while providing educational experiences that extend far beyond traditional classroom learning.
Key Takeaways
- Leaf rubbing art creates textured prints using fallen leaves, crayons, and thin paper with overlapping techniques for unique designs.
- Pressed flower bookmarks combine beauty and function using flat flowers, parchment paper, and laminating sheets for weather-resistant durability.
- Pine cone bird feeders teach wildlife care while developing fine motor skills using peanut butter, birdseed, and natural materials.
- Nature mandalas offer meditative circular art patterns built from center outward using leaves, flowers, stones, and other gathered materials.
- Painted rock garden markers provide functional plant labels using clean stones, acrylic paints, and weather-resistant clear sealant.
Leaf Rubbing Art With Crayons and Paper

Leaf rubbing art transforms ordinary fallen leaves into beautiful textured prints that capture nature’s intricate details. You’ll need fresh leaves with prominent veins, unwrapped crayons, and thin paper like printer or newsprint.
Discover the hidden beauty of fallen leaves by transforming them into stunning textured prints with simple materials you already have at home.
Start by collecting various leaf types—oak, maple, and fern work exceptionally well due to their distinct vein patterns. Place each leaf vein-side up on a flat surface, then position your paper over it. Hold the paper steady while rubbing the crayon’s side across the leaf in consistent strokes.
Master different rubbing techniques by varying your pressure and direction. Light strokes reveal delicate details, while firmer pressure creates bold impressions.
Try overlapping multiple leaves or using different crayon colors to design unique compositions. You’ll create stunning nature-inspired artwork perfect for greeting cards or wall decorations.
Painted Rock Garden Markers

Painted rock garden markers combine functionality with creativity, turning smooth stones into charming plant labels for your outdoor or indoor garden.
You’ll need clean, flat rocks, acrylic paints, and a sealer to protect your designs from weather.
Start with basic rock painting techniques like applying a white base coat for vibrant colors. Let your kids paint vegetable or herb names directly on the rocks, or draw pictures of the plants instead.
Tomatoes, carrots, and basil make excellent subjects for beginning artists.
For garden marker ideas, try painting the entire rock to resemble the plant it represents—red for tomatoes, orange for carrots.
Add a clear sealant once dry, then place the markers at the base of corresponding plants. These durable labels last multiple growing seasons.
Stick and Twig Fairy Houses

Stick and twig fairy houses transform fallen branches into magical miniature dwellings that spark imaginative play while connecting children to nature.
Building fairy houses turns simple woodland treasures into enchanted homes that inspire creativity and deepen children’s bond with the natural world.
You’ll gather fairy house materials during woodland walks—twigs, bark pieces, acorns, moss, and pebbles create authentic structures. Start by forming walls with vertical sticks, securing them with mud or clay. Add a twig roof, then decorate with natural treasures.
Your kids can expand these creations into miniature fairy gardens by arranging multiple houses around a designated outdoor space. They’ll design pathways with small stones, plant tiny flowers, and create furniture from seed pods.
This project teaches construction basics, encourages problem-solving, and develops fine motor skills. Best of all, these enchanting homes weather naturally, changing with the seasons.
Pressed Flower Bookmarks
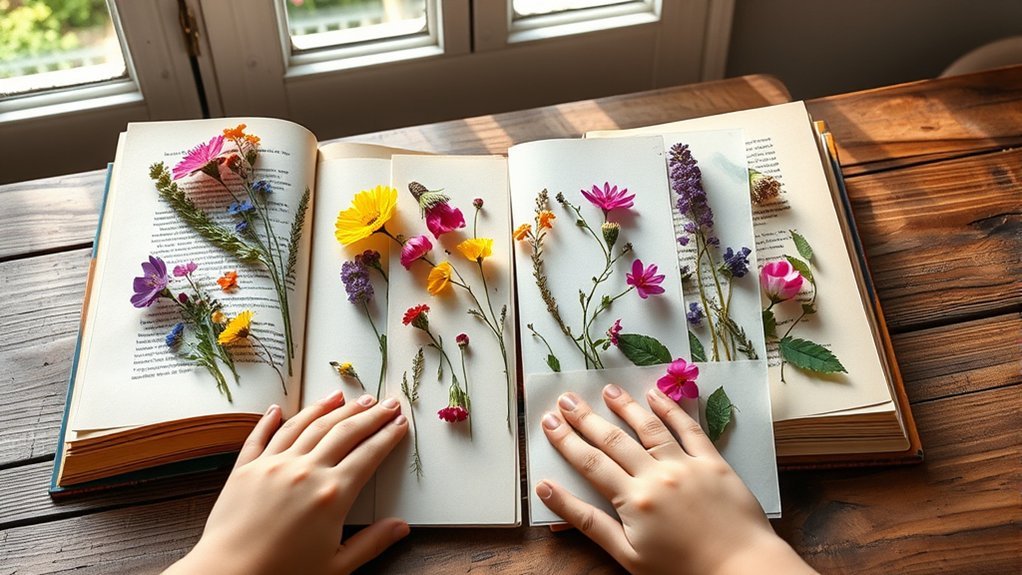
While exploring meadows and gardens, you’ll discover delicate blooms perfect for transforming into lasting keepsakes. Pressed flower bookmarks combine natural beauty with practical function, making them ideal gifts or personal treasures.
Start by collecting flat flowers like pansies, violets, and daisies. Master basic flower pressing techniques by placing blooms between parchment paper inside heavy books. Wait two weeks for complete drying.
Once pressed, arrange flowers on cardstock strips measuring 2×6 inches. Experiment with creative bookmark designs using single blooms, scattered petals, or symmetrical patterns. Secure flowers with clear adhesive or mod podge, then seal with contact paper or laminating sheets.
Punch holes at the top and thread ribbons for finishing touches. These personalized bookmarks preserve summer’s beauty while encouraging year-round reading habits.
Pine Cone Bird Feeders
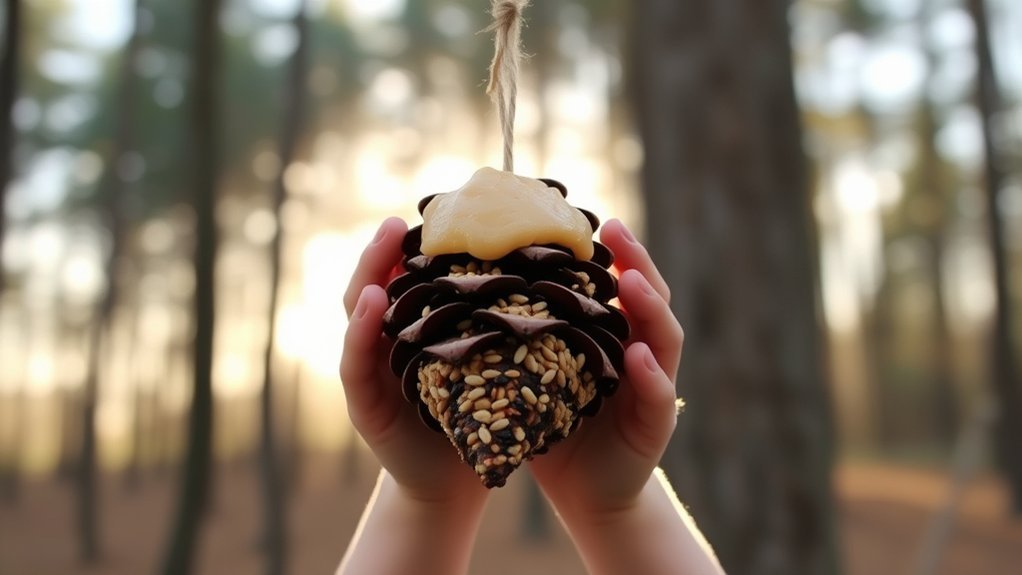
As winter approaches and natural food sources become scarce, pine cone bird feeders offer an easy way to help feathered friends while creating a meaningful outdoor craft.
You’ll need large pine cones, peanut butter, birdseed, and string. Tie string around the top of each cone, then spread peanut butter between the scales using a butter knife or spoon. Roll the coated cone in birdseed until it’s completely covered.
Explore bird feeder variations by adding dried fruit, unsalted nuts, or suet mixtures. Hang your pine cone decorations from tree branches where you can observe visiting birds.
This project teaches kids about wildlife care while developing fine motor skills. Watch cardinals, chickadees, and finches enjoy their handmade treats throughout the season.
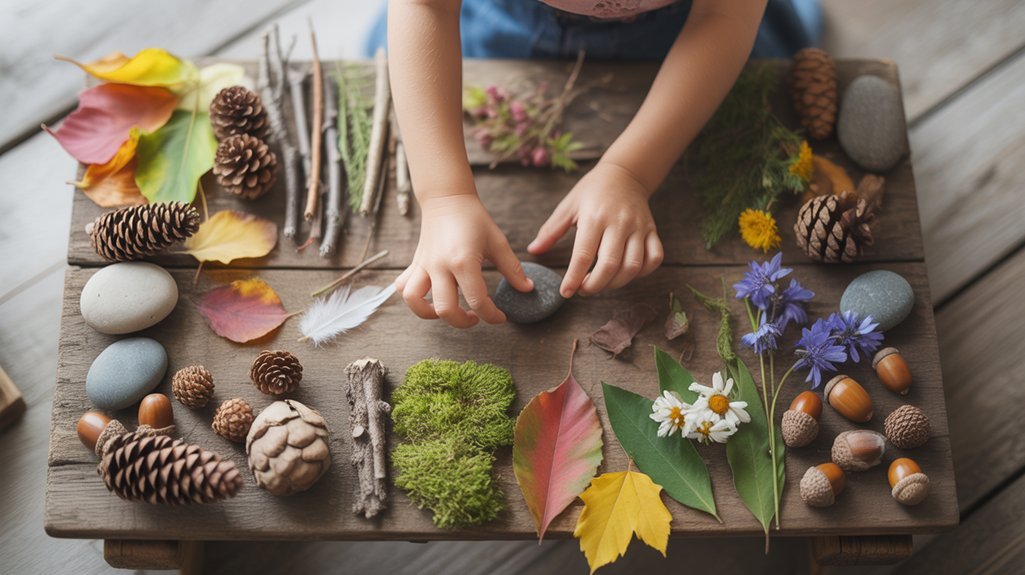
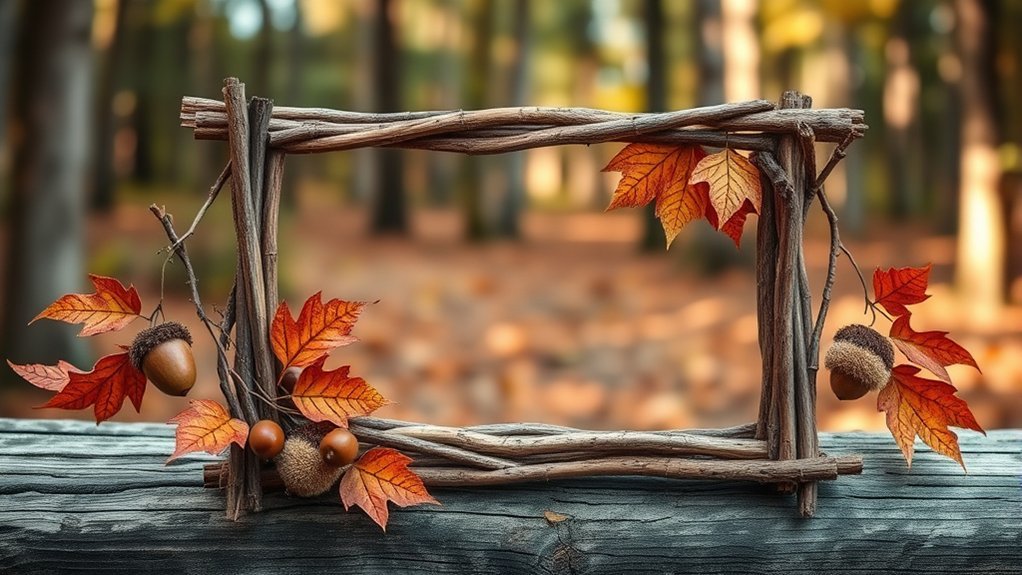
Nature Collage Picture Frames
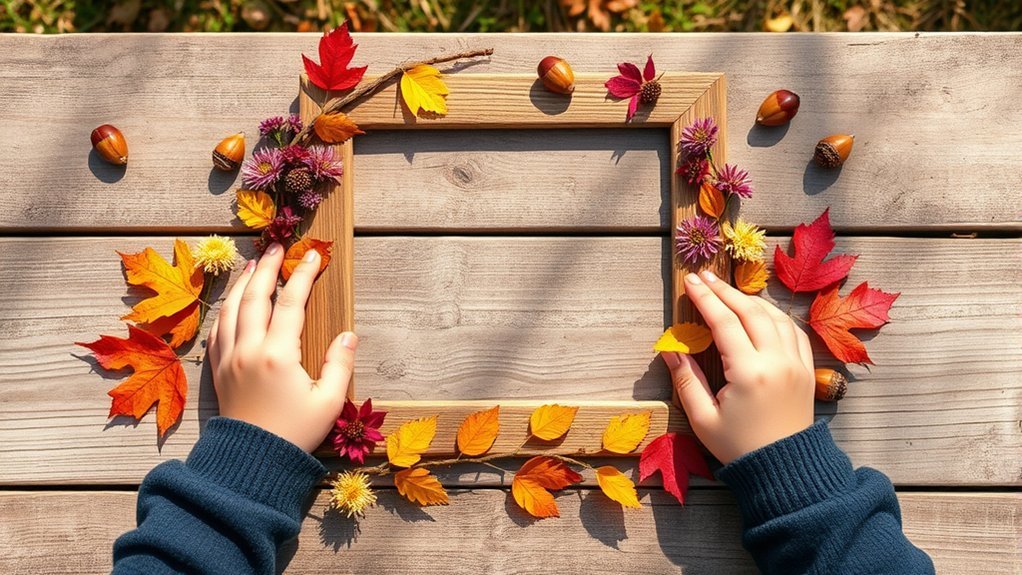
Transform ordinary picture frames into natural masterpieces by collecting leaves, flowers, acorns, and small twigs from your backyard or local park.
You’ll need a plain wooden or cardboard frame as your base, along with strong craft glue to attach your treasures.
Arrange your collected items around the frame’s border before gluing them down. Mix different nature themes like woodland, garden, or beach elements for unique designs.
Press flowers flat between heavy books for a week before using them to prevent curling.
The frame materials you choose will affect durability—wooden frames handle heavier items like pinecones better than cardboard.
Seal your finished creation with clear acrylic spray to preserve it. These personalized frames make thoughtful gifts for family members.
Acorn Cap Miniatures
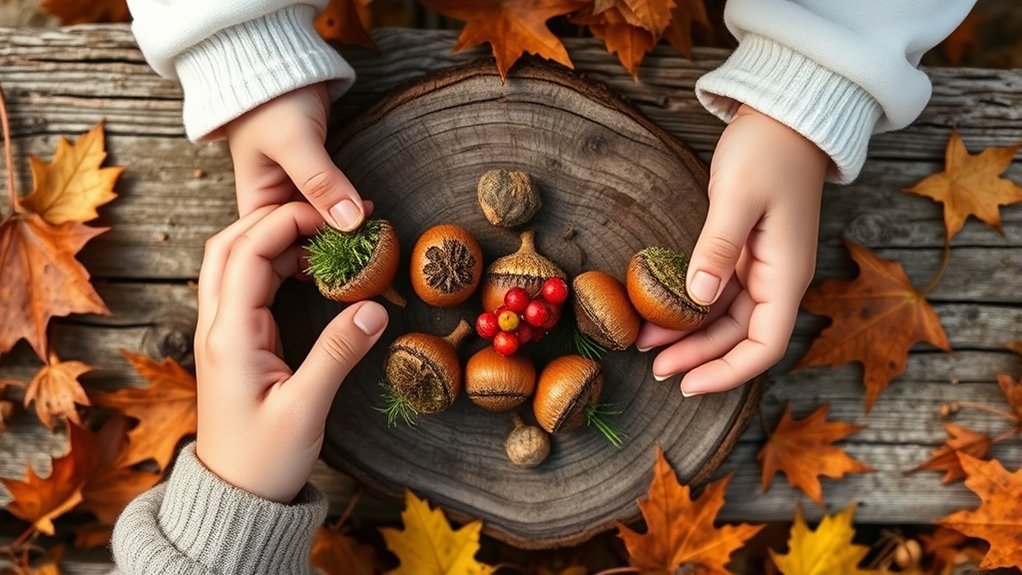
Acorn caps become tiny bowls, hats, and fairy teacups when you unleash your creativity with these miniature wonders.
Start by collecting clean, intact caps during autumn walks. You’ll transform them into adorable miniatures that spark imaginative play.
Create acorn cap crafts by painting the caps in vibrant colors, then gluing small pom-poms inside to make fuzzy creatures.
Add googly eyes and pipe cleaner legs for instant charm. Fill caps with modeling clay to craft mushroom stools or bells by attaching string through small holes.
Design acorn cap games like matching sets where kids pair painted patterns, or create a memory game with hidden treasures underneath.
You can also build tiny boats by adding toothpick masts with leaf sails, perfect for racing in puddles or streams.
Mud Pie Kitchen and Bakery
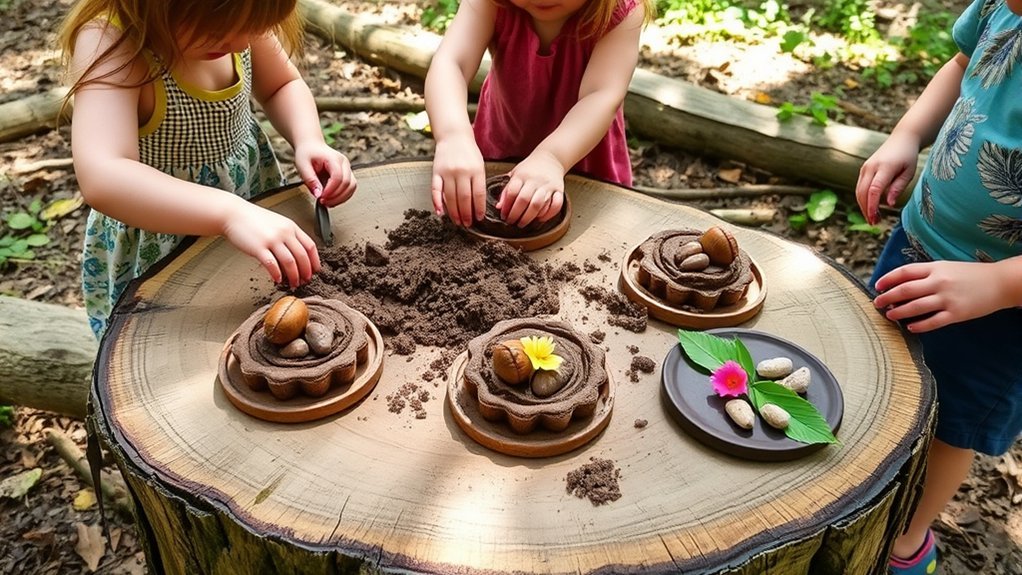
While acorn caps offer delightful tiny treasures, bigger natural creations let kids work on a grander scale. Transform your backyard into a mud pie kitchen where imagination runs wild. This messy adventure encourages mud pie creativity while children explore textures, measurements, and kitchen adventures.
Set up your outdoor bakery with these essentials:
- Mixing station: Old pots, bowls, and wooden spoons for stirring various mud consistencies
- Decorative toppings: Pebbles, leaves, flower petals, and twigs for garnishing masterpieces
- Baking tools: Muffin tins, pie plates, and cookie cutters for shaping creations
- Display area: A flat surface or shelf where kids can proudly showcase their culinary works
You’ll find children naturally experimenting with water-to-dirt ratios, developing fine motor skills, and engaging in imaginative play. This timeless activity costs nothing yet provides hours of entertainment.
Flower Petal Sun Catchers
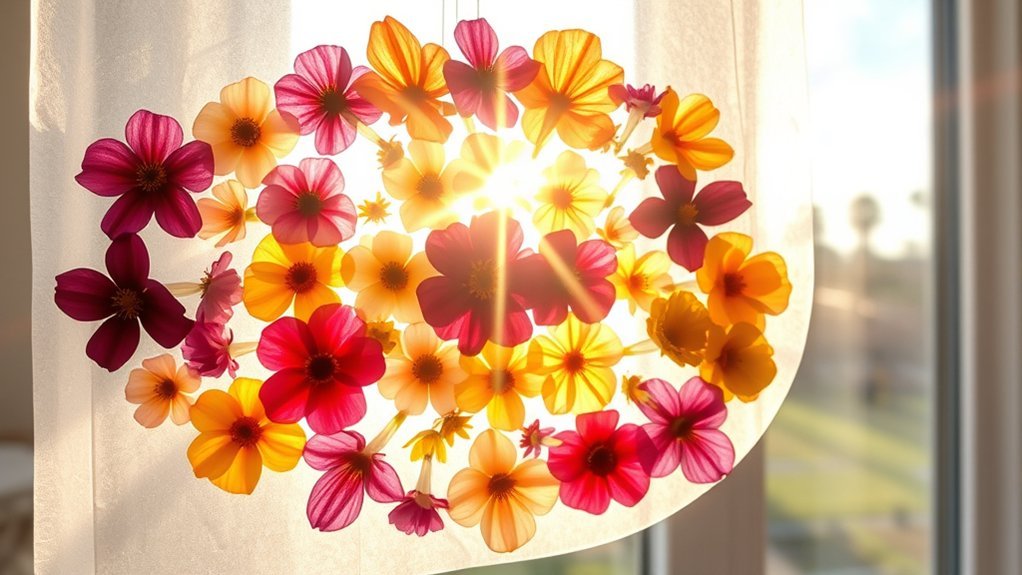
Capture sunlight’s magic by pressing fresh flower petals between clear contact paper to create stunning window decorations. You’ll need two sheets of contact paper, fresh petals, and scissors. Collect various blooms during your nature walk, choosing different sizes and textures.
Peel one contact paper sheet and place it sticky-side up. Arrange petals in patterns, experimenting with flower color combinations like purple violets with yellow buttercups or red roses with white daisies. Press the second sheet on top, sealing petals inside.
Master sun catcher techniques by trimming edges into circles, hearts, or butterflies. Punch a hole at the top and thread string through for hanging. Mount your creation on windows where morning light streams through, transforming ordinary petals into radiant stained glass.
Driftwood and Shell Mobiles
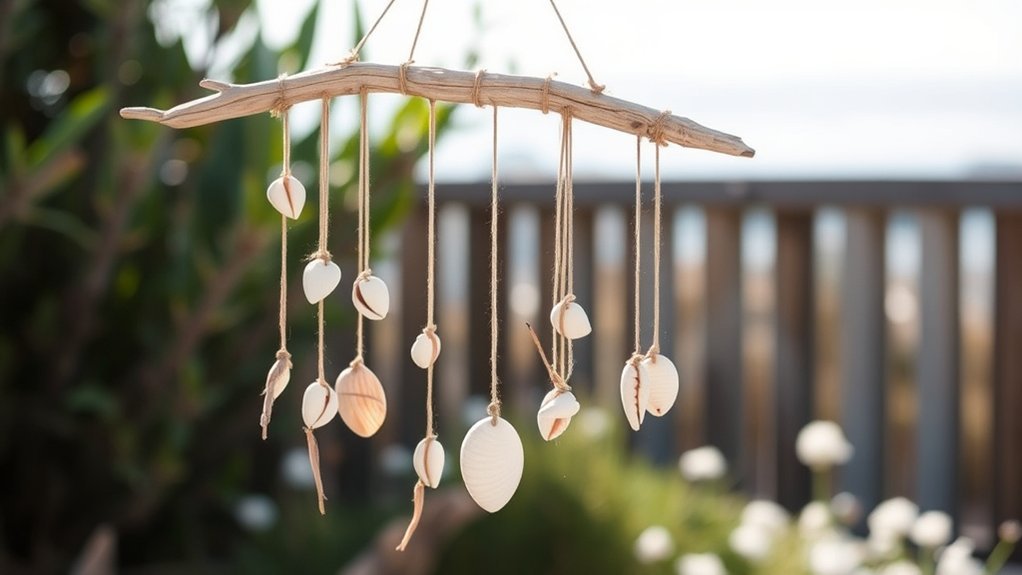
Transform beachcombing treasures into elegant hanging art by combining driftwood branches with seashells you’ve collected along the shore.
This driftwood art project teaches kids balance and spatial awareness while creating beautiful shell decoration for their rooms.
Essential Steps for Creating Your Mobile:
- Select a sturdy main branch – Choose driftwood pieces with interesting shapes and multiple connection points.
- Drill small holes – Make attachment points in shells using a hand drill or ask an adult for help.
- Use fishing line or twine – Thread your shells at varying lengths to create visual interest and movement.
- Balance carefully – Adjust string positions until your mobile hangs level, testing weight distribution.
Hang your finished creation near windows where breezes bring gentle movement and sunlight highlights your coastal collection.
Grass and Wheat Weaving
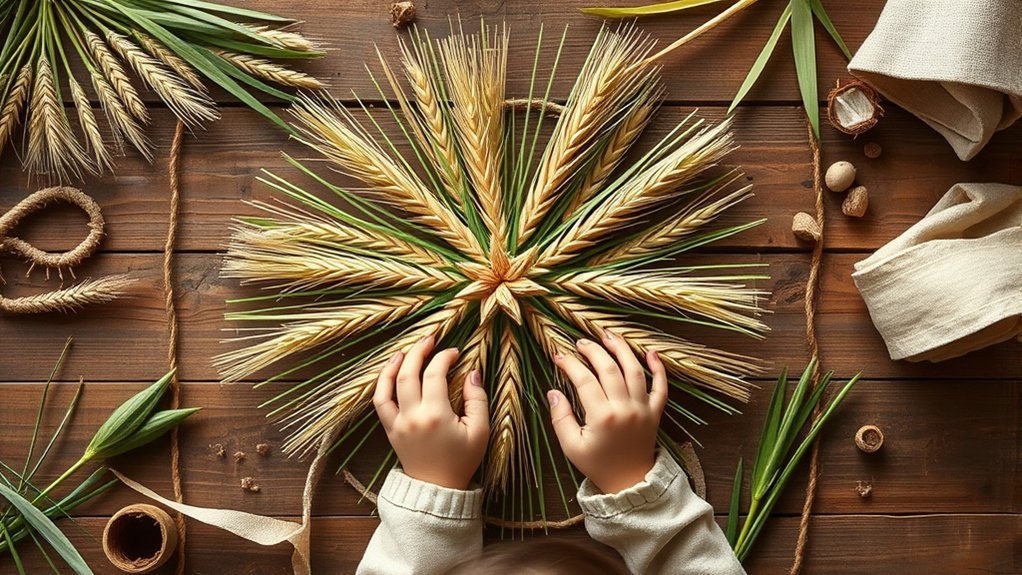
Long before modern crafts existed, children learned traditional weaving techniques using simple grasses and wheat stalks gathered from fields and meadows.
You’ll discover that these natural materials create stunning grass patterns when interlocked together. Start by collecting long, flexible grass blades and wheat stems during late summer walks.
Begin with basic three-strand braiding before advancing to more complex designs. The contrasting wheat textures add visual interest to your woven creations. You can make bracelets, bookmarks, or decorative wall hangings.
Keep materials slightly damp while weaving to prevent breakage. This ancient craft connects you directly to historical traditions while developing fine motor skills and patience.
Your finished pieces showcase nature’s beauty in their golden hues and organic forms. Try experimenting with different grass varieties for unique results.
Nature Mandalas and Circular Designs
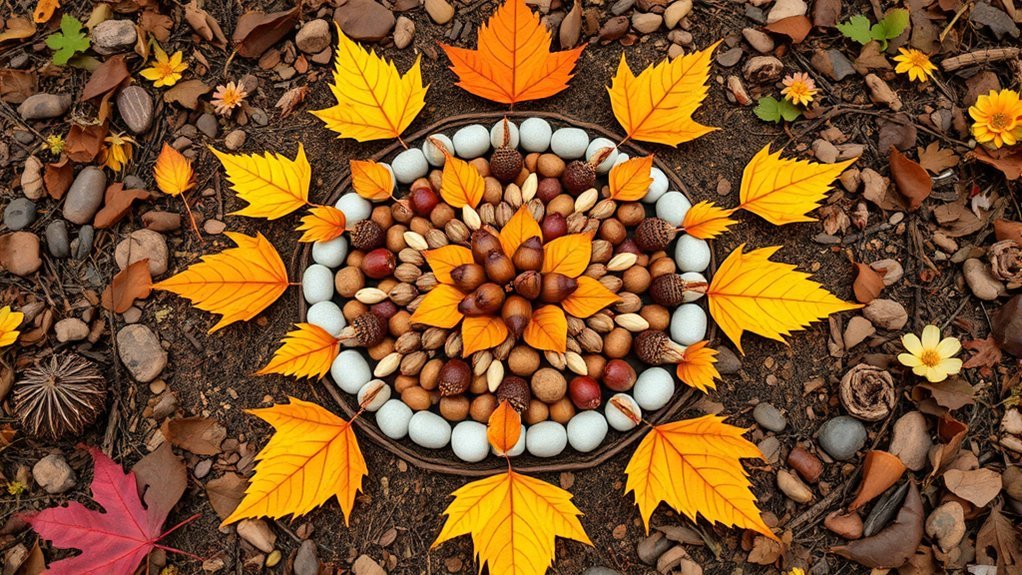
Creating circular patterns from natural materials invites children into a meditative art form practiced across cultures for centuries.
Nature mandalas transform collected treasures into stunning geometric designs that encourage patience and creative thinking. You’ll find endless mandala inspiration in your backyard’s seasonal offerings.
Essential steps for creating nature mandalas:
- Select a flat surface – Use sidewalks, patios, or cleared ground as your canvas.
- Gather diverse materials – Collect leaves, flowers, stones, pinecones, and seed pods in varying colors and textures.
- Start from the center – Place a focal object first, then build outward in symmetrical rings.
- Create repeating patterns – Arrange materials in circular patterns that radiate from your centerpiece.
These temporary artworks teach children about symmetry, balance, and impermanence while celebrating nature’s beauty.
Bark Rubbing Texture Studies

Bark rubbing reveals the hidden textures and patterns of trees through a simple yet captivating activity that sharpens children’s observation skills.
You’ll need white paper, masking tape, and unwrapped crayons or charcoal. Secure the paper against tree bark with tape, then rub the crayon sideways across the surface. Different trees create distinct bark texture patterns—oak produces deep ridges while birch offers smoother, papery designs.
Encourage your kids to collect nature prints from various species and label each rubbing with the tree’s name and location. They’ll discover that bark texture varies dramatically between young and mature trees.
Create a classification book by mounting these impressions on cardstock, transforming observations into a personal field guide. This hands-on exploration connects children with their environment while developing scientific thinking and artistic expression.
Seed Mosaic Artwork
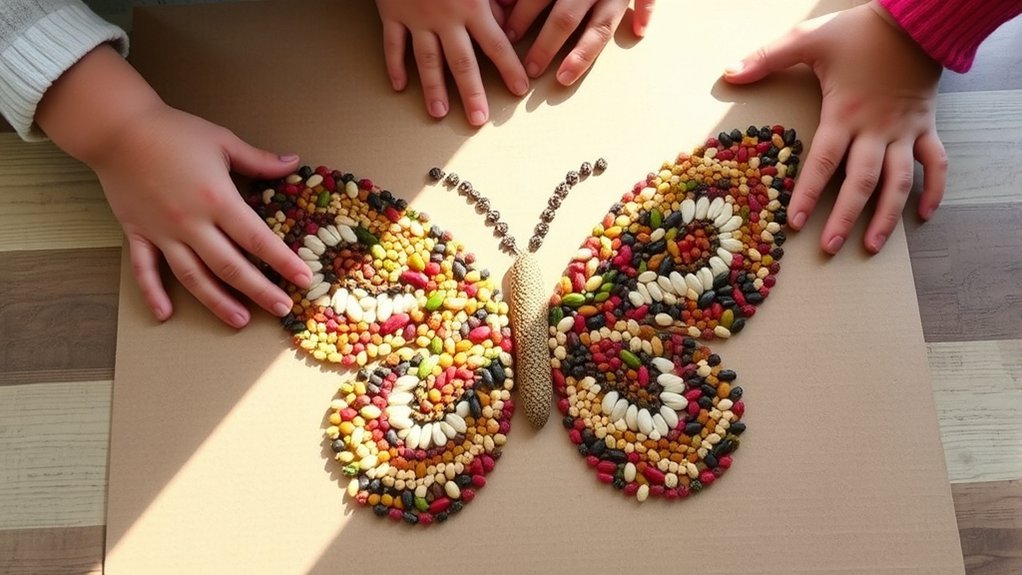
Seeds transform into stunning works of art when arranged thoughtfully on cardboard or wood bases, offering children an accessible introduction to mosaic techniques.
You’ll find that different seed color combinations create striking visual effects—black beans contrast beautifully with white rice, while lentils and split peas add warm earth tones.
Your child can master basic mosaic design techniques through these projects:
- Sketch the design lightly in pencil before gluing seeds
- Apply glue section by section to prevent drying before seed placement
- Group similar seeds together in small containers for easy access
- Press seeds firmly into glue and allow 24 hours for complete drying
You’ll discover that sunflower seeds, pumpkin seeds, and dried beans work exceptionally well for beginners’ projects.
Twig and Branch Picture Frames
Natural materials from your backyard can extend beyond flat artwork into three-dimensional projects that showcase children’s creativity. Twig and branch picture frames transform ordinary photos into rustic masterpieces while teaching kids about different wood textures and colors.
Nature’s treasures become teaching tools when children transform backyard findings into dimensional art that celebrates organic textures and creative expression.
Start your twigs collection during nature walks, selecting pieces of varying thicknesses and lengths. You’ll need a plain wooden or cardboard frame base, hot glue, and pruning shears for cutting.
Arrange twigs around the frame’s perimeter, experimenting with parallel, crisscross, or random patterns. Frame embellishments add personality—try acorns, pinecones, moss, or dried flowers.
Younger children can paint their twigs beforehand, while older kids might prefer the natural wood aesthetic. These frames make thoughtful gifts for grandparents and create lasting memories of outdoor adventures.
Dandelion Wish Jars
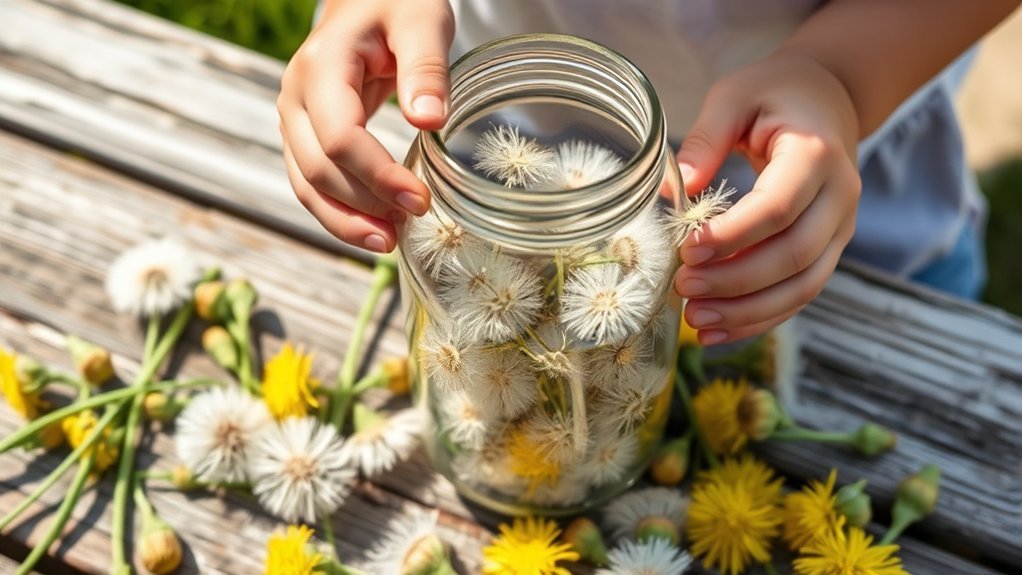
Childhood magic meets botanical preservation when you capture dandelion seedheads inside glass jars.
You’ll create enchanting keepsakes that hold those fleeting white puffballs perfectly intact. These dandelion wishes become decorative treasures your kids can display year-round.
Materials and steps:
- Collect mature seedheads on dry days when they’re fully formed and fluffy
- Choose clear glass jars with wide mouths to prevent damaging delicate seeds during insertion
- Carefully place seedheads inside without shaking or disturbing the fragile structures
- Begin jar decoration using twine, ribbon, or painted lids to personalize each container
Your children can write wishes on tags attached to their jars, creating meaningful gifts for friends and family.
This project teaches gentle handling while celebrating nature’s ephemeral beauty in lasting form.
Nature Sculpture Installations
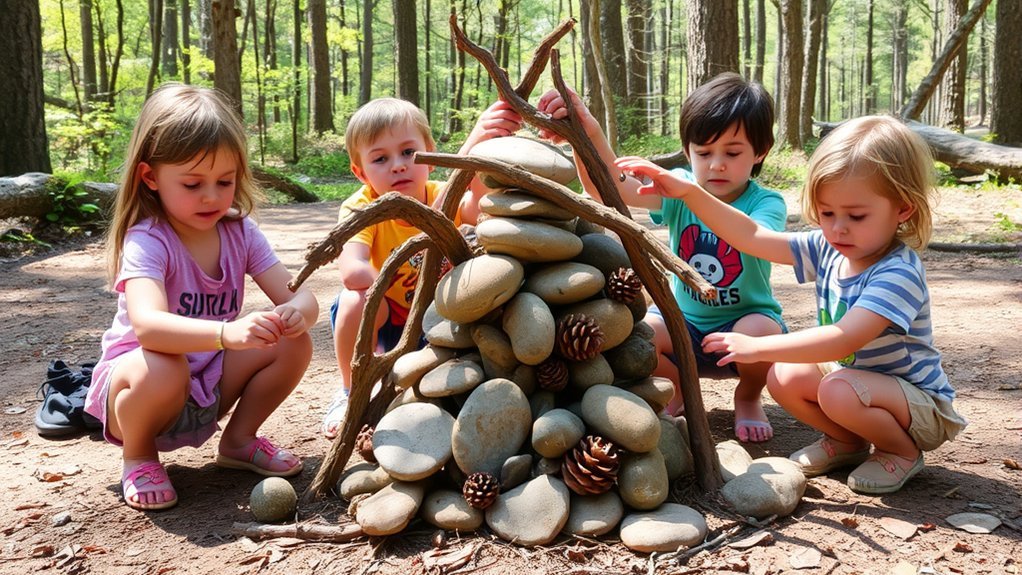
When twigs, leaves, and stones come together in unexpected arrangements, your backyard transforms into an outdoor art gallery. Nature installations encourage outdoor creativity while teaching kids about environmental art and ephemeral art—creations designed to change with weather and time.
Start with simple sculpture techniques like stacking rocks, weaving branches, or arranging pinecones in spirals. Your children can create temporary masterpieces using natural materials found during walks. These projects foster artistic expression without permanent impact on the environment.
Consider expanding into community projects where neighborhood kids collaborate on larger installations. They’ll learn teamwork while building mandalas from flower petals or constructing twig towers.
Document these creations through photos, as nature installations naturally evolve and eventually return to the earth.
In case you were wondering
What Age Is Appropriate for Children to Start Nature Crafts Independently?
Most children can begin independent crafting around ages 8-10, though age guidelines vary by skill level. You’ll find younger kids need supervision, while older ones handle tools safely. Consider your child’s maturity when determining their readiness for independent projects.
How Do You Safely Remove Harmful Insects From Collected Natural Materials?
You’ll inspect a million pieces! Practice insect identification first, then gently shake materials outdoors. Freeze items overnight to eliminate pests, or use natural repellents like cedar chips. Always supervise kids during collection and cleaning processes.
What Sealants Are Non-Toxic for Preserving Children’s Nature Craft Projects?
You’ll find eco-friendly options like beeswax, food-grade mineral oil, and water-based polyurethane work perfectly. These sealing techniques protect your child’s nature crafts safely. They’re non-toxic, easy to apply, and won’t harm kids during creative projects.
How Long Do Natural Materials Need to Dry Before Crafting?
Drying times vary by material types you’ve collected. Leaves need 1-2 weeks pressed between books, while thicker branches require 2-4 weeks. Pine cones dry within days, and flowers take about two weeks when properly preserved.
Where Can You Forage for Craft Materials Without Damaging the Environment?
You can forage responsibly in your own yard, public parks (with permission), and designated nature areas. Follow foraging etiquette by taking only what you’ll use and practice sustainable sourcing—never harvest from protected areas or endangered plants.
Conclusion
You’ve got enough nature craft ideas to keep your kids busier than a telegraph operator on deadline! These projects’ll transform your backyard adventures into lasting memories while teaching little ones to appreciate the natural world. So grab your collection basket, round up those budding artists, and head outside. Whether you’re pressing flowers or building fairy houses, you’re creating more than crafts—you’re nurturing a lifelong connection with nature that’ll stick better than any glue.