DIY Valentine’s Day Cards Kids Can Make in Under 10 Minutes
You can whip up adorable Valentine’s Day cards with your kids in just 3 to 10 minutes flat. Grab construction paper, markers, and heart stickers—that’s really all you need. For the speediest option, fold paper, slap on a heart sticker, and write “You’re awesome.” Got five minutes? Cut out a heart and add marker dots. Ten minutes lets you layer hearts and add ribbon for extra wow factor. Below, you’ll find even more time-saving tricks and creative ideas.
What you will leave with
- Use the 3-minute strategy: place a heart sticker on folded paper with a simple message for quick bulk production.
- Flat postcard valentines skip folding, allowing kids to decorate twenty cards faster without envelope sizing concerns.
- Tiny tag cards with punched corners can be tied to lollipops or pencils, completing 25 names in about eight minutes.
- Simple pop-up cards for ages 7+ use two parallel slits and a heart tab, looking impressive with minimal time investment.
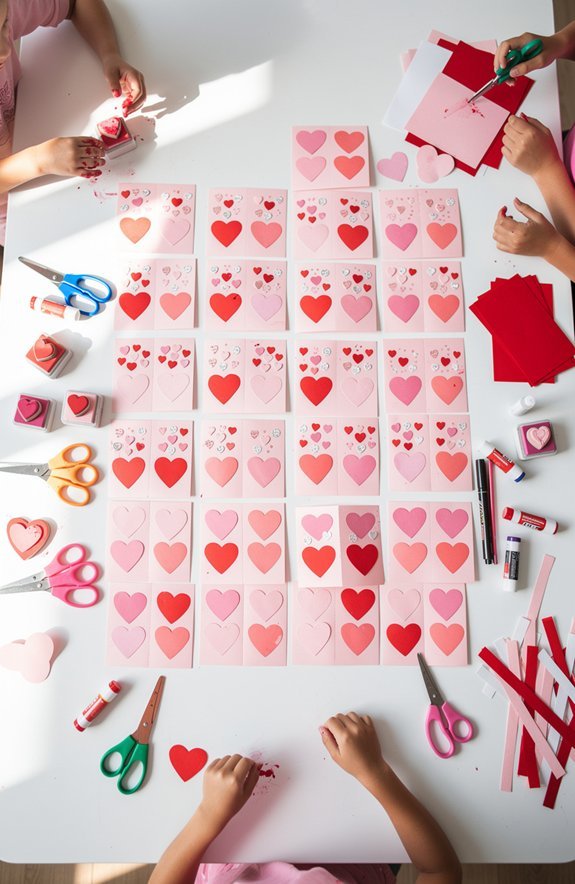
- Celery or potato stamps dipped in paint create instant heart designs with messy fun and minimal skill required.
Valentine Card Ideas Sorted by Time: 3, 5, and 10 Minutes
Let’s be honest—you’ve probably got about ten minutes before you need to hand someone a Valentine’s Day card, and you’re panicking just a little.
Don’t worry. We’ve got you covered with timing tricks that actually work.
3-Minute Cards: Grab a heart sticker, slap it on folded paper, and scribble “You’re awesome.” Done.
Perfect for bulk batching when you need twenty cards by tomorrow morning. These sticker heart activities also enhance fine motor skills while keeping little hands busy.
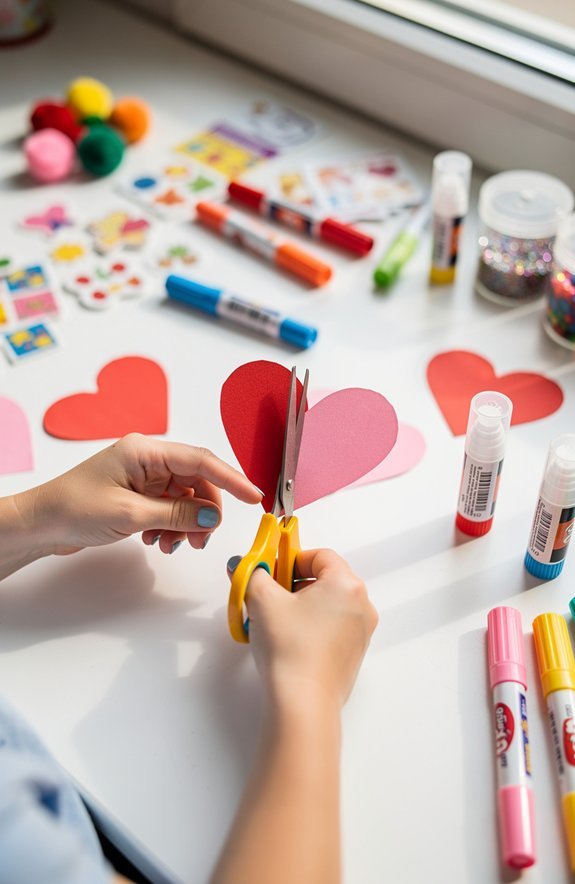
5-Minute Cards: Cut out a heart shape, add some dots with markers, and write a punny message.
Fancy enough to look intentional.
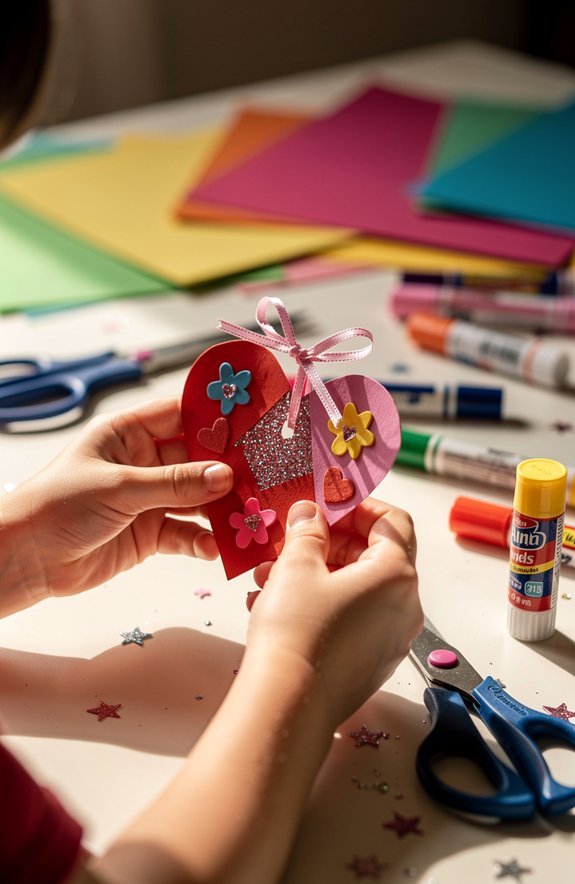
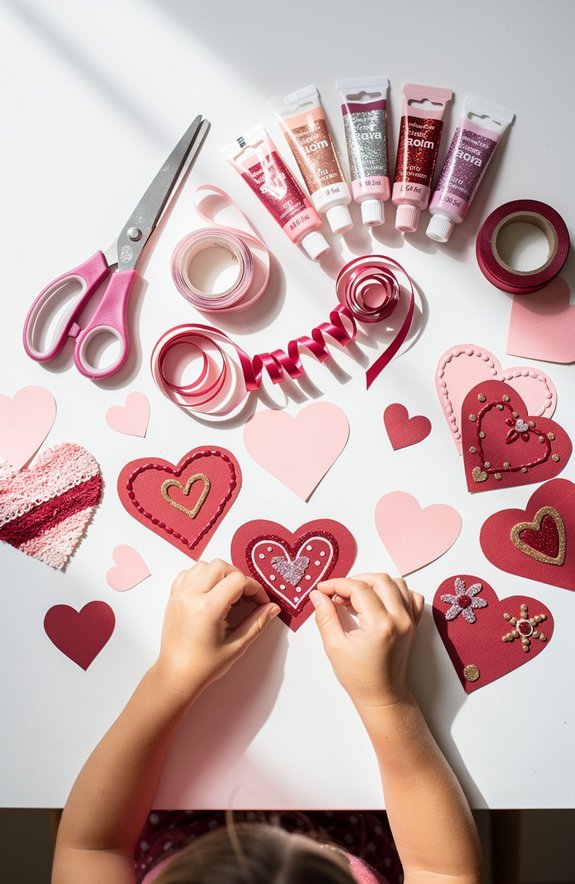
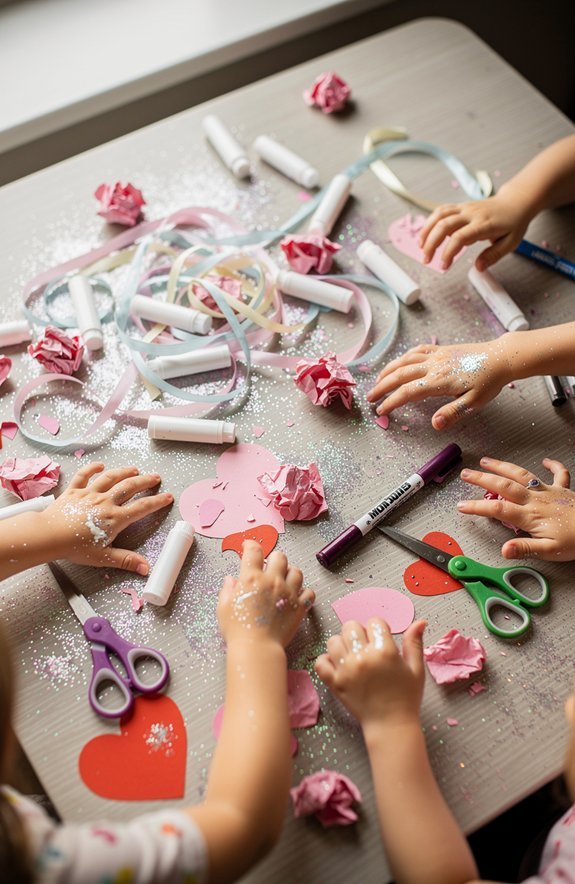
10-Minute Cards: Now you’re cooking. Layer two heart cutouts, add a ribbon, maybe throw on some glitter if you’re feeling dangerous.
Your kid looks like a craft genius, and nobody knows it took less time than making toast.
Why 10-Minute Valentine Cards Work Best for Kids

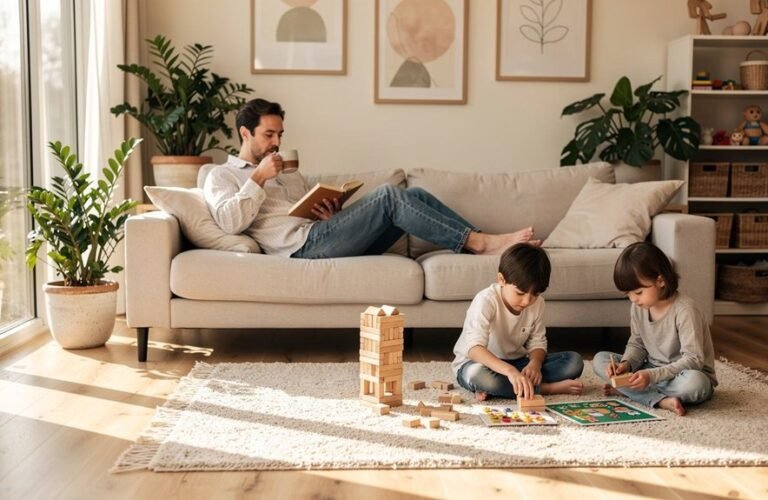
When you’re wrangling a kid with the attention span of a goldfish on caffeine, ten minutes hits the sweet spot.
Any longer and you’ve lost them to snack requests or random YouTube rabbit holes.
Any shorter and the card looks like a crumpled napkin tragedy.
Ten minutes keeps cognitive load manageable while still producing something cute.
Here’s why this timeframe works:
- Short enough to finish before meltdowns – Nobody wants glitter tears
- Long enough to feel proud – Kids actually see results
- Matches their natural attention span – Science backs this up
- Reduces your stress too – You’re not micromanaging for an hour
Plus, quick projects using common household materials mean you can skip the craft store run entirely.
You’ll end up with happy kids, decent cards, and maybe even time for coffee.
That’s the dream right there.
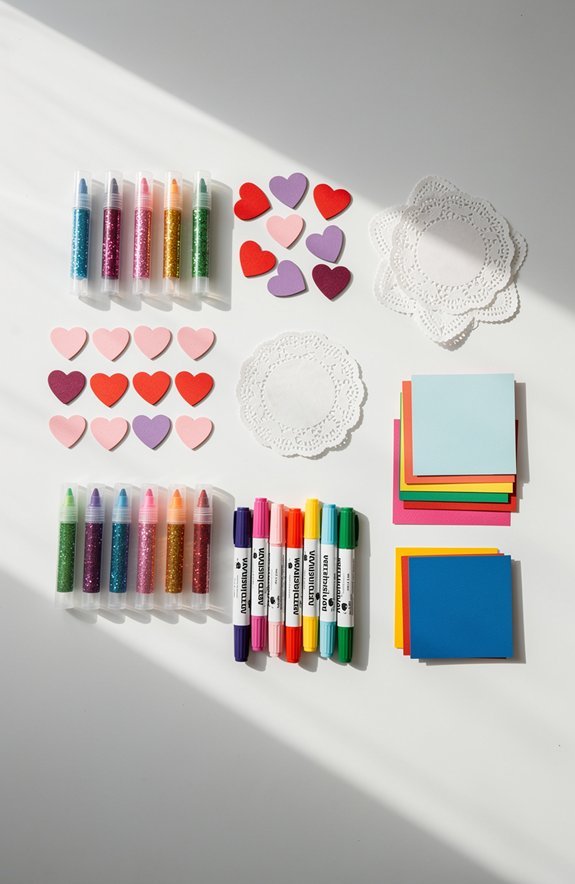
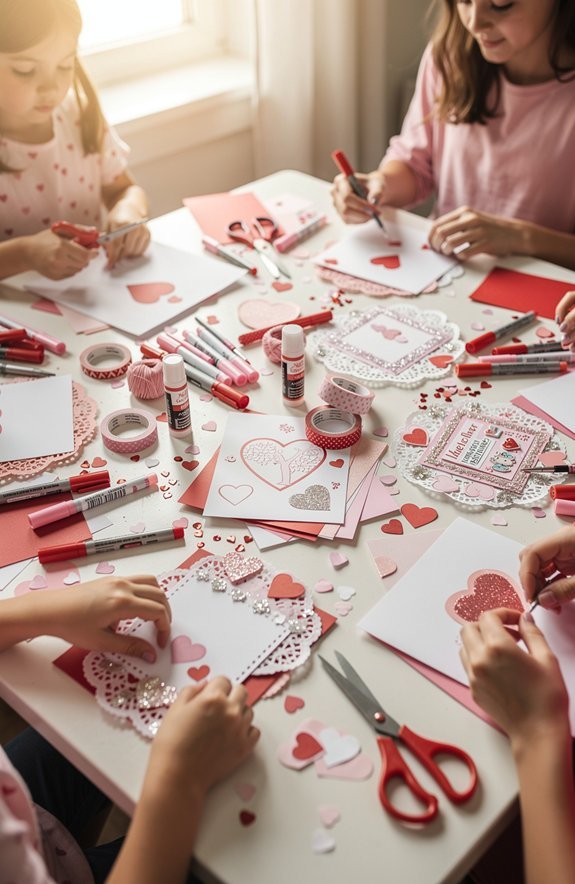
Essential Supplies for 10-Minute Valentine Cards
Gathering your supplies beforehand saves you from the dreaded mid-project kitchen scavenger hunt.
Trust me, nothing kills creative momentum like frantically searching for scissors while glitter spills everywhere.
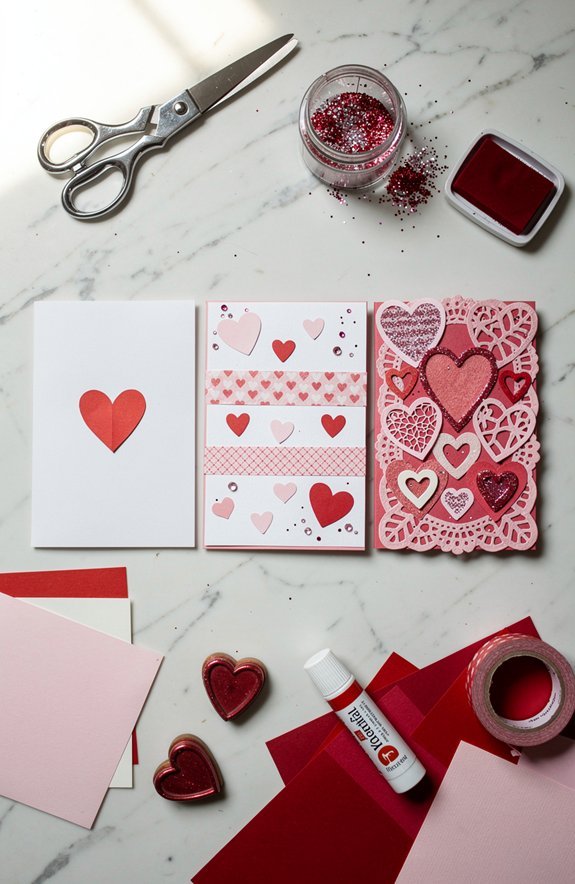
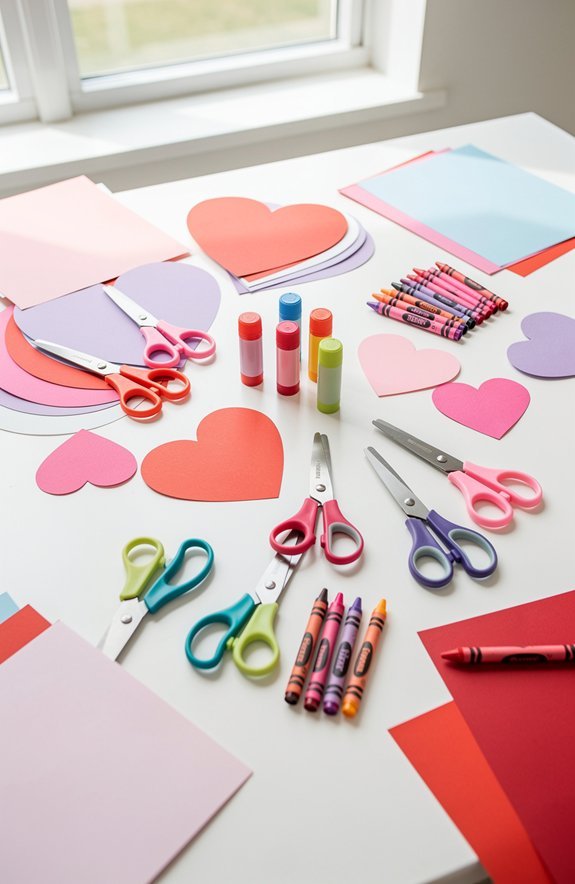
Here’s your quick checklist: construction paper, safety scissors, markers, and stickers.
For glue alternatives, try tape runners or glue dots—they’re way less messy than liquid glue and dry instantly.
No more waiting around while your kid pokes wet glue puddles!
Keep everything in a plastic bin or shoe box.
Using clear bins with labels makes sorting materials by type effortless and helps kids find what they need independently.
These simple storage ideas mean you’ll find supplies in seconds next time.
Toss in some heart-shaped hole punches and foam stickers for extra pizzazz.
Pro tip: Lay down newspaper first.
Future you’ll be extremely grateful when cleanup takes thirty seconds instead of thirty minutes.
Best Cardstock and Paper for Kid-Made Valentines
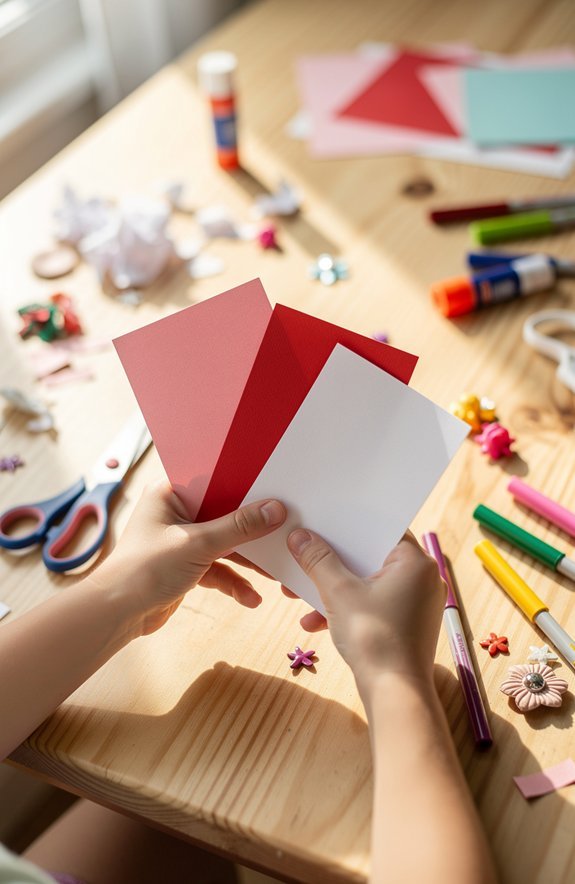
Picking the right paper makes or breaks your valentine masterpiece.
Trust me, flimsy paper turns into a crumpled disaster the second tiny hands grab it.
You’ll want to explore different weight options—anything from 65 to 80 lb cardstock works great for little crafters.
Finish textures matter too! Smooth paper takes markers like a champ, while textured stuff adds fancy vibes.
The tactile interactions with materials during crafting help preschoolers process information better while they create.
Here’s your quick guide:
- White cardstock – the classic blank canvas that works with everything
- Construction paper – cheap, colorful, and totally forgiving of glue mishaps
- Glitter cardstock – instant sparkle without the mess (your vacuum says thank you)
- Kraft paper – gives those trendy rustic vibes kids somehow nail perfectly
Grab a variety pack and let your kiddo go wild!
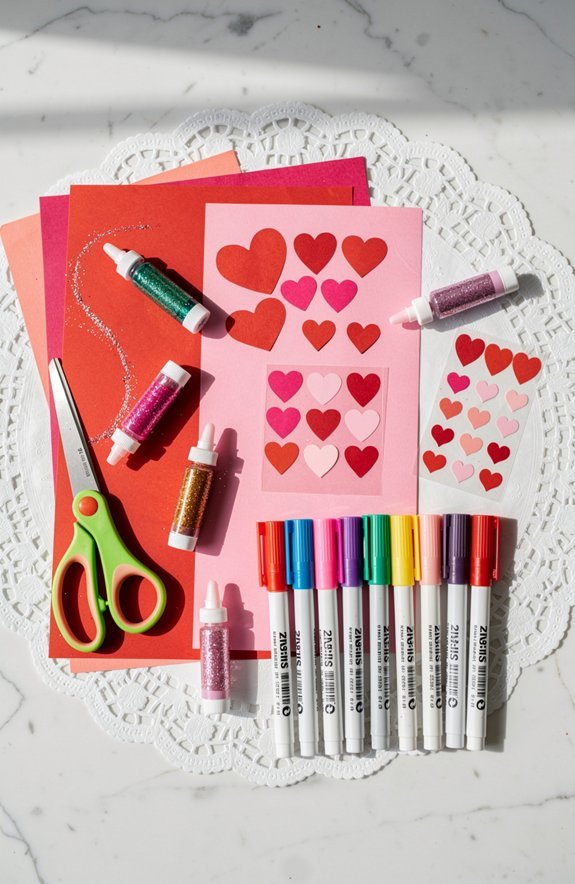
No-Mess Supplies That Cut Card-Making Time in Half
Streamlining your supply list saves sanity—and probably your kitchen table too.
Forget the glitter explosions and paint puddles.
You want washable markers that wipe off skin, furniture, and mysteriously your dog.
Foam stickers are absolute game-changers—peel, stick, done.
No glue rivers spreading across homework assignments.
Grab spill proof paint cups if your kid insists on watercolors.
These little heroes have lids that actually work.
Revolutionary, right?
Pre-cut paper shapes save serious time.
Hearts, circles, and stars ready to go means no scissor disasters.
Your six-year-old won’t accidentally give a valentine one arm anymore.
Glue sticks beat liquid glue every single time.
They dry fast, don’t pool, and won’t cement cards to the table.
Stock up now—you’ll thank yourself mid-craft chaos.
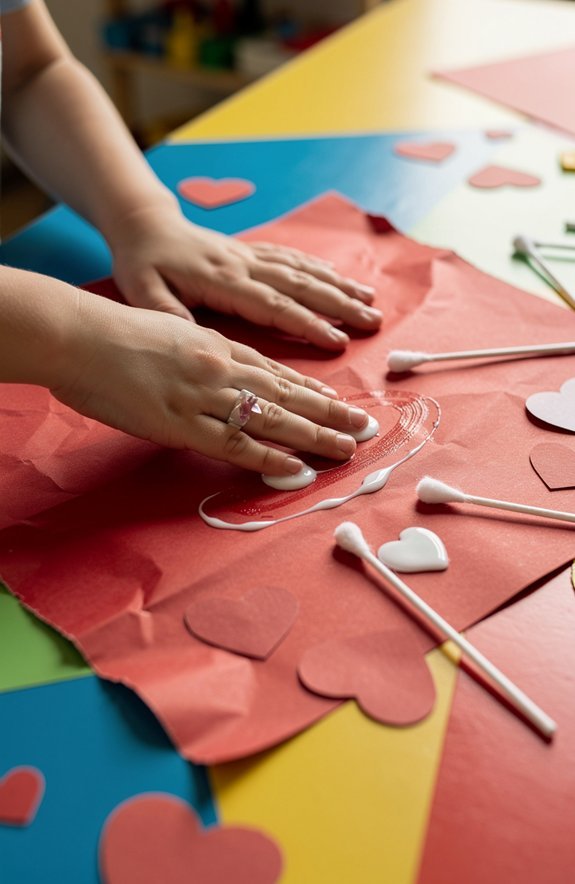
For an even cleaner painting option, cotton swab painting lets kids dab and blend colors without getting paint all over their fingers.
How to Set Up a Kids’ Valentine Card Station
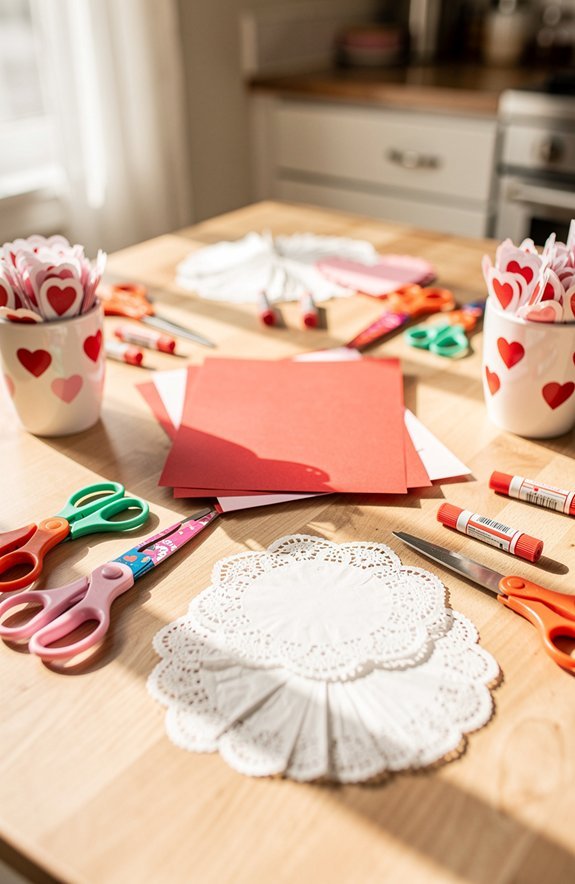
Before you unleash a pack of excited kids on cardstock and stickers, you’ll want a game plan.
Trust me, a solid station layout saves you from glitter-covered chaos.
Cover your table with a plastic cloth (future you’ll be grateful), and set out supplies in separate bins so tiny hands aren’t fighting over the same scissors.
Quick Station Setup Tips:
- Place safety guidelines front and center—no running with scissors, no eating the glue
- Keep wet supplies like paint far from the dry stuff
- Assign each kid their own workspace zone
- Stock extra napkins because spills happen fast
Put a trash bin within arm’s reach. Kids won’t walk across the room to throw anything away—they’ll just stuff wrappers under the table!
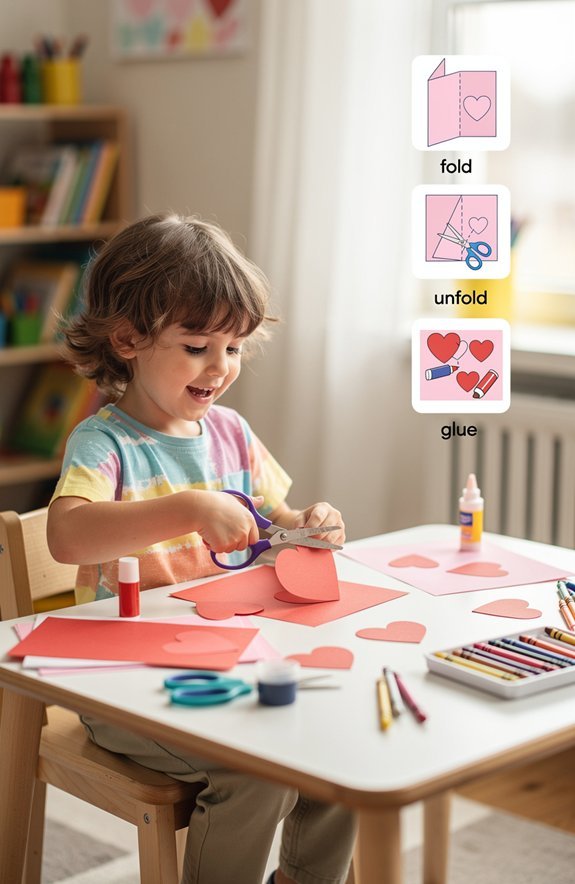
Single-Fold Valentine Cards Kids Finish in 5 Minutes
Now that your station’s ready to roll, let’s talk about the fastest cards in the game.
Single-fold cards are your secret weapon for time management when you’ve got a dozen valentines due tomorrow.
Yep, we’ve all been there.
Here’s the deal: fold cardstock in half, done.
That’s literally the base.
Your kid slaps a heart sticker on front, scribbles “Be Mine,” and boom—finished in under five minutes.
The trick to instructional pacing? Show them once, then let them loose.
Don’t hover.
These cards practically make themselves.
Try a simple monster valentine—googly eyes, a zigzag mouth cut from paper, and “I Think You’re Monstrously Cool” written inside.
Kids eat this stuff up, and you’re not losing your mind in the process.
Flat Postcard Valentine Cards for Classroom Sets
Flat postcards skip the folding altogether, which means you’re cranking out valentines at lightning speed.
Skip the folds and speed through valentine-making—flat postcards are the ultimate classroom hack for busy parents.
Your kid can decorate twenty cards before their juice box runs dry.
Seriously, it’s that fast.
Here’s why postcards rock for classroom sets:
- No wrestling with envelope sizing—just stack and go
- Kids master basic postal etiquette by writing on the back
- You’ll save a fortune on envelopes (cha-ching!)
- They’re sturdy enough to survive backpack chaos
Grab some cardstock, cut it into rectangles, and let your little artist loose.
Stickers? Stamps? Crayon masterpieces? All fair game.
The back gets a simple “To” and “From” section, and boom—done.
Your future mail carrier would be proud.
These valentines are classroom-ready in minutes flat.
Mini Valentine Tags That Save Time and Materials
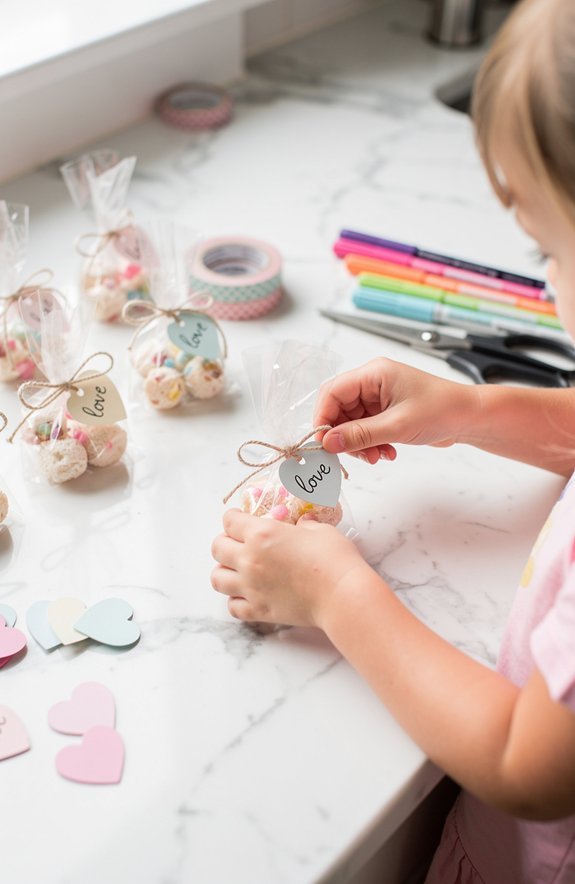
Mini valentine tags are the ultimate shortcut when you’re staring down a class list of twenty-five names. These tiny cards are basically the cheat code of Valentine’s Day crafting. You’ll use way less paper, scissors work takes seconds, and your kid won’t have a meltdown halfway through.
Here’s the deal with tag etiquette: keep them simple. A quick “You’re awesome!” works perfectly. No need for Shakespeare here.
Think of it like tag marketing for the elementary school crowd. You want something eye-catching but fast. Cut small rectangles, punch a hole in the corner, and tie them to lollipops or pencils. Done!
The best part? Kids can crank out twenty-five of these bad boys in about eight minutes flat. That’s parent-winning territory right there.
Printable Valentine Templates for Fast Assembly
Downloading printable valentine templates is basically like having a crafting fairy godmother who did all the hard work for you.
You just hit print and boom—instant card magic! Getting your template sizing right means no awkward cropping or cards that look like they went through a shrink ray.
Print, done, perfect—no shrink ray disasters or awkward cropping when your template sizing is on point.
Here’s why templates are total game-changers:
- They eliminate the “I can’t draw” panic attack
- Your printing workflow becomes grab, print, cut, done
- Kids feel like pros without the meltdown
- You save brain cells for more important stuff (like snacks)
Seriously, templates turn chaos into a smooth operation.
Your kiddo gets to focus on the fun parts—adding stickers, scribbling names, maybe some glitter if you’re feeling brave.
Ten minutes? You’ll finish in five!
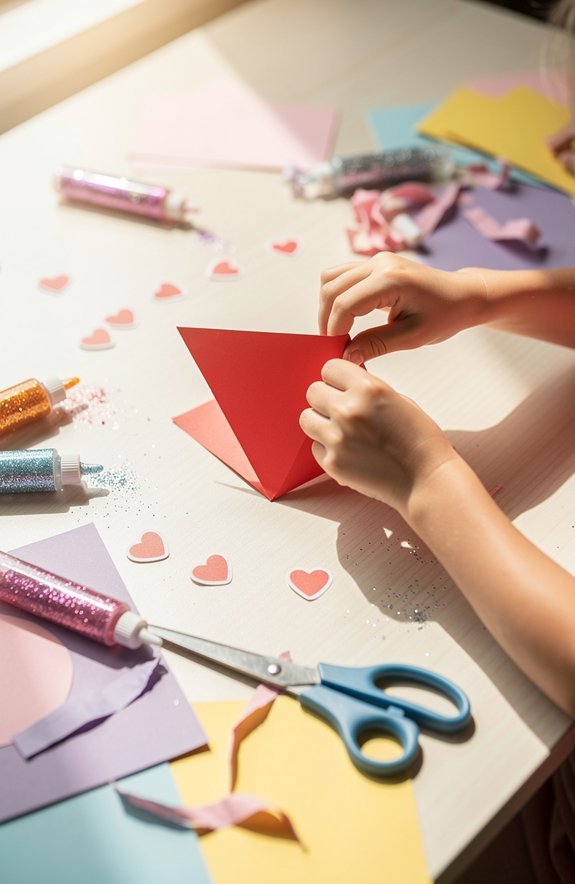
Simple Pop-Up Valentine Cards for Ages 7 and Up
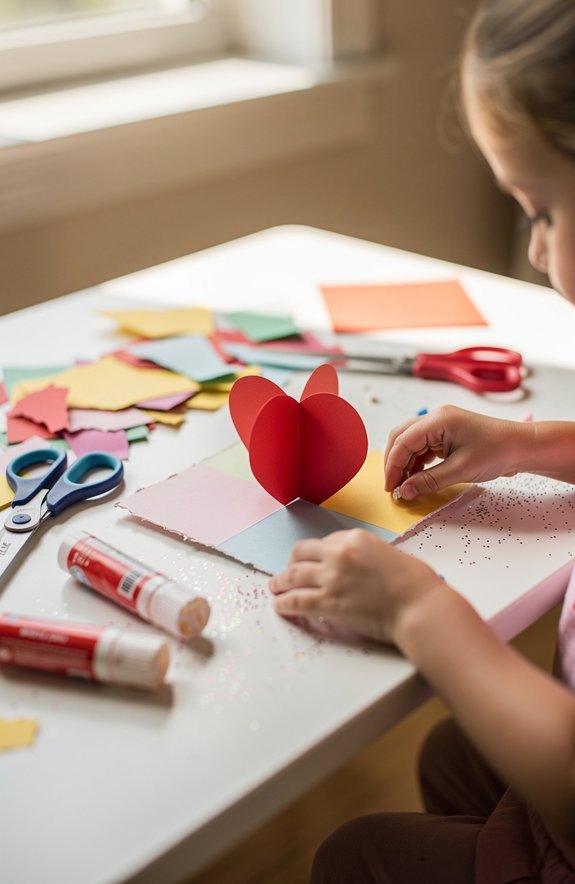
Why settle for a flat card when you can make jaws literally drop? Pop-up cards look impressive, but here’s the secret: they’re shockingly easy. Kids seven and up can totally nail this.
Fold your card in half.
Cut two parallel slits in the fold, about an inch long.
Push that tab inward.
Boom—basic paper engineering magic.
Now glue a heart or cute character onto that tab.
When someone opens the card, it springs forward like a tiny surprise attack of love.
Here’s the best part: glue avoidance is actually possible.
Use double-sided tape instead.
No sticky fingers, no waiting around, no accidental glue puddles ruining everything.
Your kiddo just became a card wizard.
Recipients will think you spent hours.
We won’t tell.
Stamped Heart Cards Using Celery or Potato Stamps
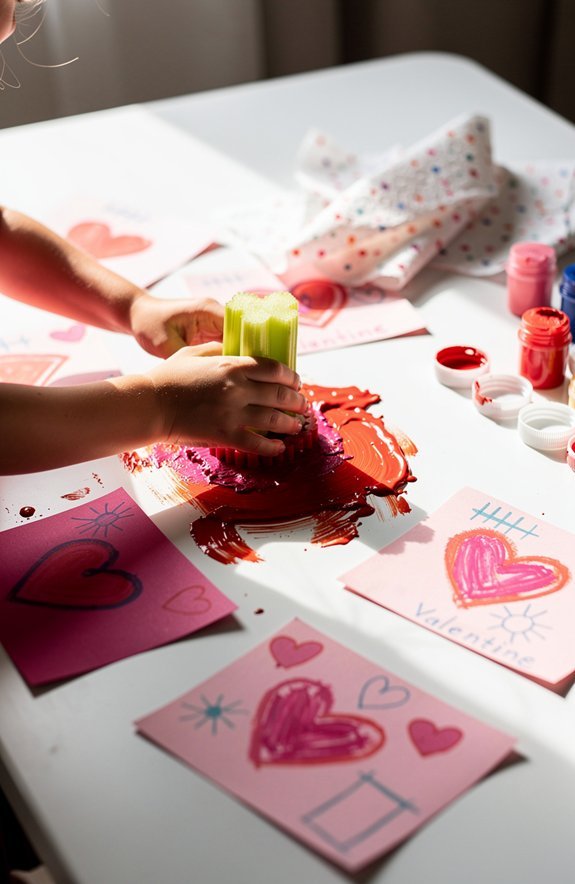
Grab a stalk of celery from your fridge and prepare to be amazed—that humble veggie bottom makes a perfect heart stamp.
Seriously, cut it at the base, dip it in paint, and boom—instant heart shape!
Veggie stamps are basically free art supplies hiding in your crisper drawer.
You can also carve a potato into a heart if you’re feeling fancy.
Here’s why kids go absolutely wild for this project:
- It’s messy in the best way—paint everywhere means fun happened
- Color blending creates magic—layer pink over red and watch jaws drop
- Every stamp looks different—perfectly imperfect vibes
- Zero artistic skill required—just dip and press
Let your kiddo stamp hearts all over cardstock. Five minutes, maximum cuteness, minimal cleanup drama.
Yarn Heart Valentine Cards With High Visual Impact
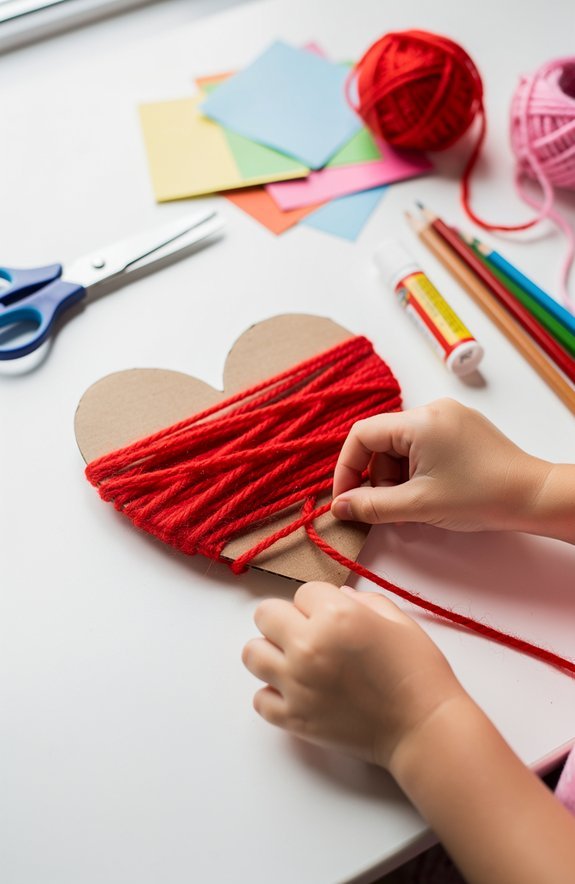
These yarn heart cards pack serious visual punch and they’re way easier than they look.
Your kid just draws a heart outline, pokes holes around it, and weaves yarn through.
Done.
The texture techniques here make these cards feel fancy and handmade in the best way.
Here’s the secret: color strategies matter more than perfect weaving.
Grab contrasting yarn colors—red on white cardstock or pink on kraft paper.
Even messy stitching looks intentional and artsy.
Little fingers might need help threading the yarn needle, but once they get going?
They’re unstoppable.
The chunky yarn creates this raised, touchable surface that grandparents absolutely lose their minds over.
Pro tip: Tape the yarn end to the back so it doesn’t unravel.
Nobody wants a sad, unspooling Valentine situation.
Animal Pun Valentines Kids Love to Make
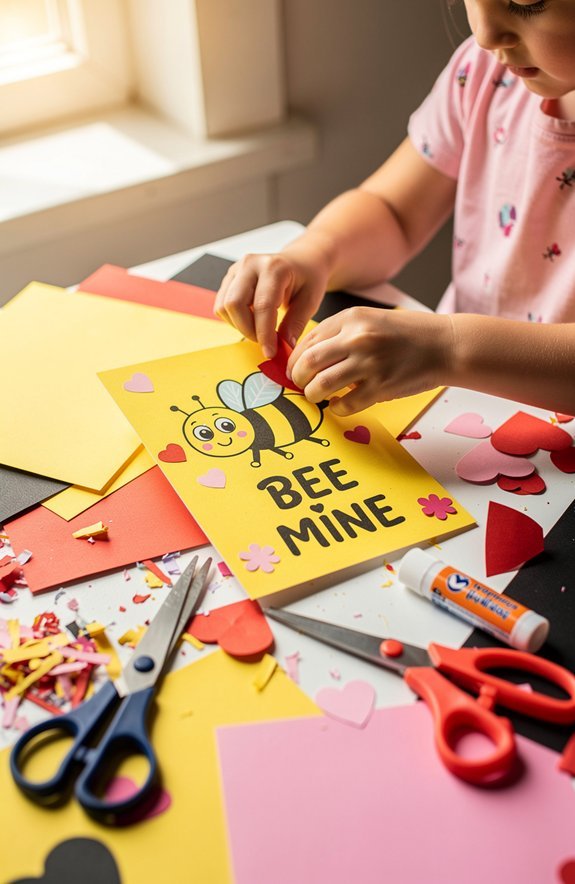
- They’re memorable – puns stick in kids’ brains way better than generic messages
- They spark creativity – children learn wordplay while crafting
- They’re inclusive – every kid can find an animal they connect with
- They build confidence – making others laugh feels amazing
Just grab some cardstock, draw a simple animal face, and slap that pun right underneath.
Done in five minutes, but the giggles? Those last all day!
Owl Always Love You Card With Cut Paper Shapes
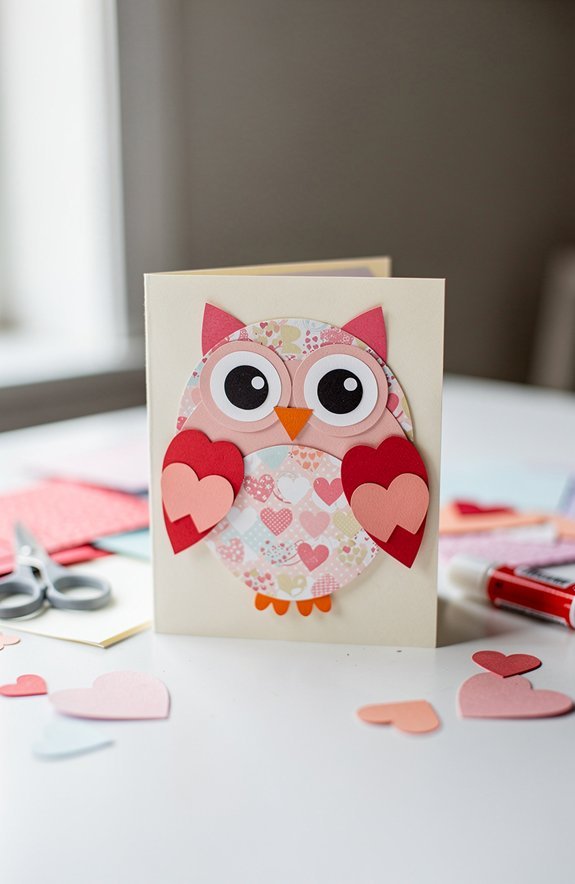
One animal pun card rises above the rest—literally, because owls hang out in trees.
This “Owl Always Love You” card is ridiculously cute and super easy to pull off.
Grab some colored paper and cut out a big oval body, two round eyes, and a small triangle for your beak design.
Now here’s where it gets fun—add wing patterns by cutting teardrop shapes and layering them along the sides.
Boom.
Instant feathers.
Glue everything onto a folded card, write your punny message, and you’re done.
The whole thing takes maybe seven minutes, tops.
Kids go absolutely bonkers for this one because they get to customize their owl’s personality.
Googly eyes? Yes.
Glitter wings? Obviously.
Heart-shaped belly? Chef’s kiss.
Heart People Cards Using Pipe Cleaners and Paper
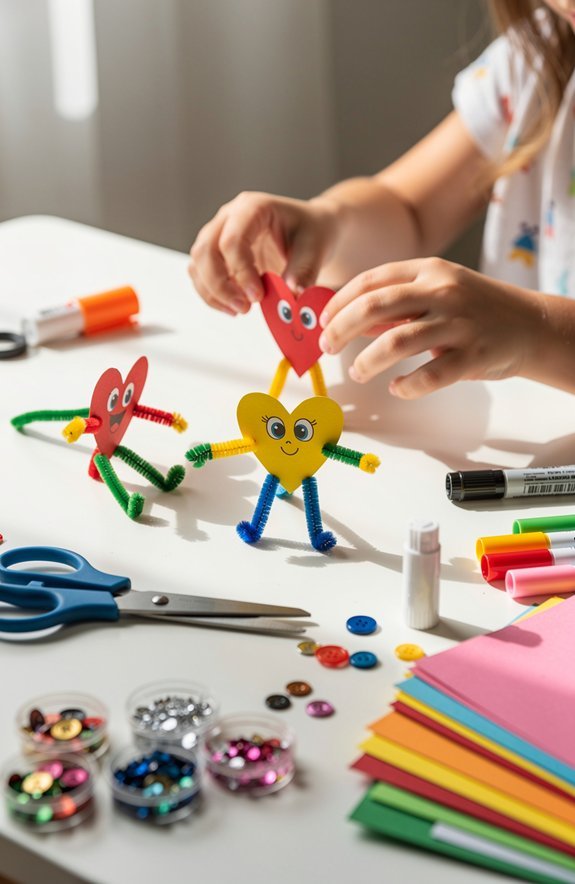
Heart people cards take the cute factor up about twelve notches because you’re basically creating tiny valentines with arms and legs.
Heart people cards turn simple paper hearts into adorable little valentines with wiggly arms, legs, and tons of personality.
Cut a heart from red or pink paper, then twist pipe cleaners into wiggly arms and legs.
Tape them to the back, add googly eyes, and boom—you’ve got a valentine buddy!
- Your kiddo practices fine motor skills while having a blast
- Each heart person has its own goofy personality
- Cleanup techniques are simple—just sweep up paper scraps and stash leftover pipe cleaners
- These cards stand up on desks like tiny cheerleaders
Seriously adorable.
Every. Single. Time.
Balloon Valentine Cards With a Fun 3D Effect
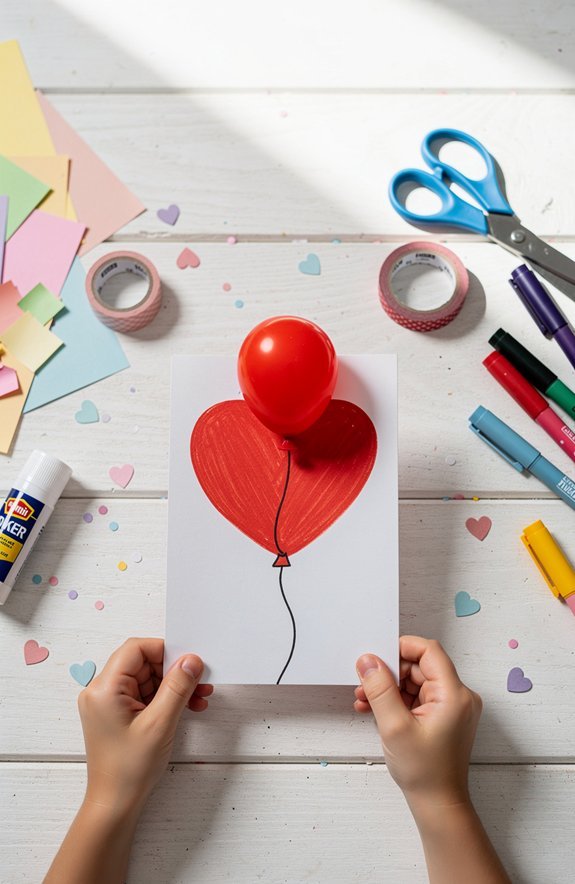
Balloon valentine cards literally pop off the page, and kids lose their minds over the 3D effect.
You’ll need small balloons, cardstock, and glue.
Cut the balloon’s neck off, then stretch it over a cotton ball or pom-pom.
Glue that puffy little guy right onto your card.
Here’s the thing about balloon durability—those cheap party balloons work fine, but thicker ones hold up better for grabby little hands.
Your inflation technique matters too.
Don’t actually blow it up!
Just stretch the balloon material over your fluff ball and secure the edges with strong adhesive.
Kids can draw balloon strings, add “You Make My Heart Float” messages, or go wild with glitter.
The tactile element makes these cards impossible to ignore.
Recipients literally can’t stop touching them.
Mosaic Heart Cards With Simple Shape Counting
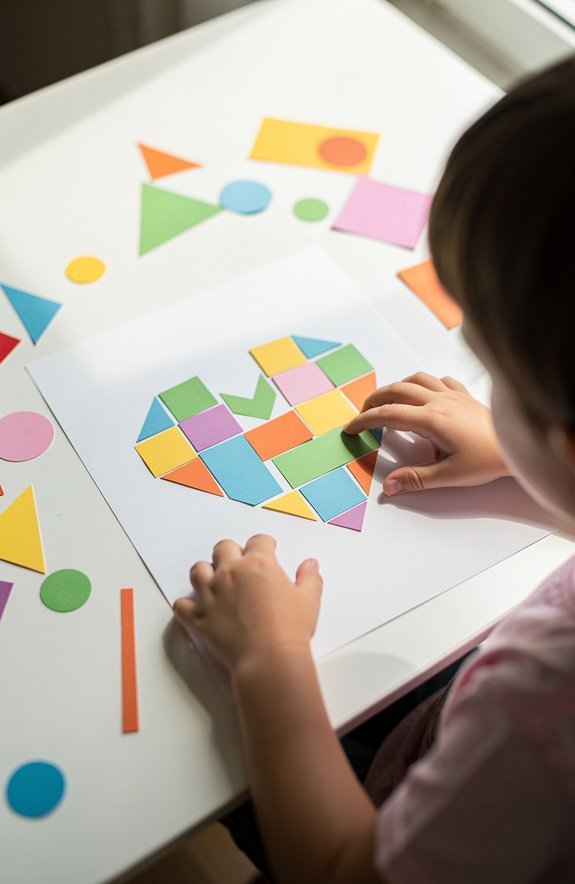
When you combine art projects with sneaky math lessons, magic happens.
Grab some colored paper squares and let your kid build a heart using tile geometry.
They’ll arrange tiny pieces into a bigger shape without even realizing they’re learning.
Honestly? It’s genius-level parenting.
The pattern symmetry here is *chef’s kiss*.
Kids match colors on both sides of the heart, creating balance that looks super impressive.
Plus, they’re counting squares the whole time!
- Sneaky learning: They practice shapes and numbers while having a blast
- Fine motor skills: Those little fingers get a serious workout
- Creative freedom: No two mosaic hearts look the same
- Confidence boost: Finishing feels like winning a tiny championship
Ten minutes, one awesome card, zero math tears.
Sticker-Only Valentines for the Youngest Crafters
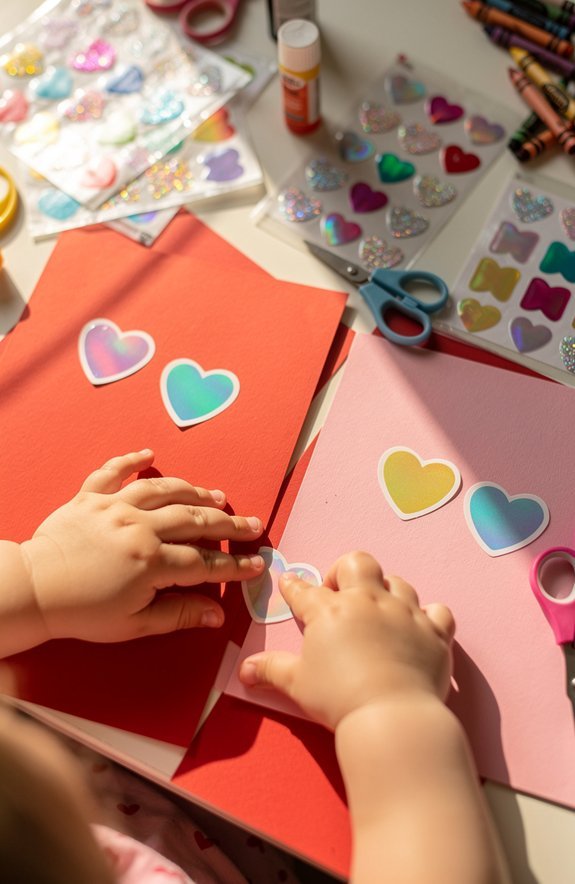
Tiny hands and scissors? Yeah, that’s a recipe for disaster. Let’s skip the drama entirely.
Sticker-only valentines are absolute lifesavers for toddlers and preschoolers.
You’ll hand them a blank card and a sheet of stickers, then watch the magic happen.
Hearts everywhere.
Upside down.
Overlapping.
Perfect chaos.
When it comes to sticker safety, grab options without small parts that could end up in mouths.
Large foam stickers work great for chunky fingers.
The age suitability here is spot-on for kids two and up.
They get independence, you get zero cleanup from glitter explosions.
Everybody wins.
Pro tip: peel the sticker backing halfway so little ones can grab them easier.
You’ll thank yourself when frustration meltdowns don’t happen.
Trust me on this one.
Washi Tape Valentine Designs That Skip the Glue
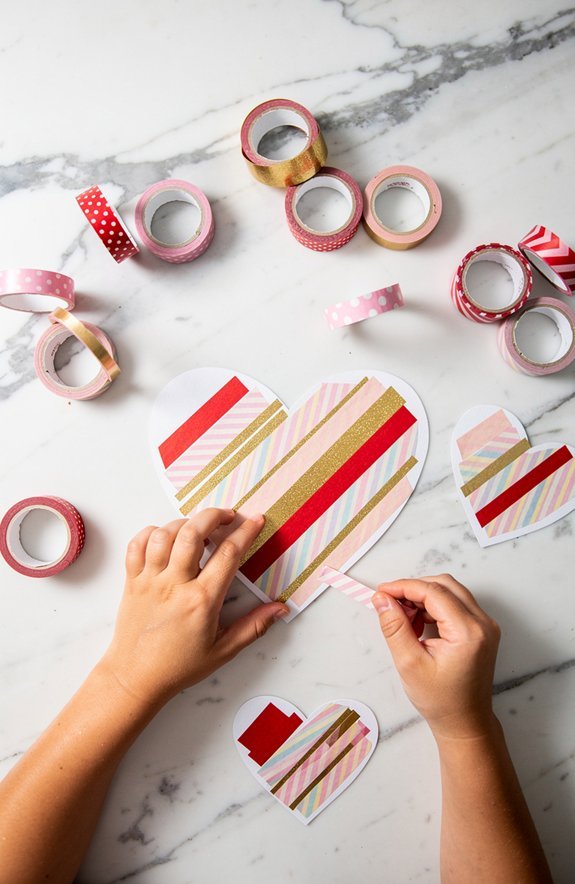
Swapping out messy glue sticks for washi tape is basically a parenting hack disguised as crafting.
Your kid can tear strips, stick them down, and boom—instant valentine magic without the sticky finger disaster.
Try diagonal tape patterns across card stock or create simple heart shapes with overlapping strips.
- Stripes galore: Layer different widths for a bold, graphic look
- Border frames: Outline the card edges for instant polish
- Tape flags: Fold strips over string to make tiny pennant banners
- Heart outlines: Shape tape into hearts without any cutting required
Pro tip: Let kids pick their own tape patterns.
Their choices might surprise you—in the best way.
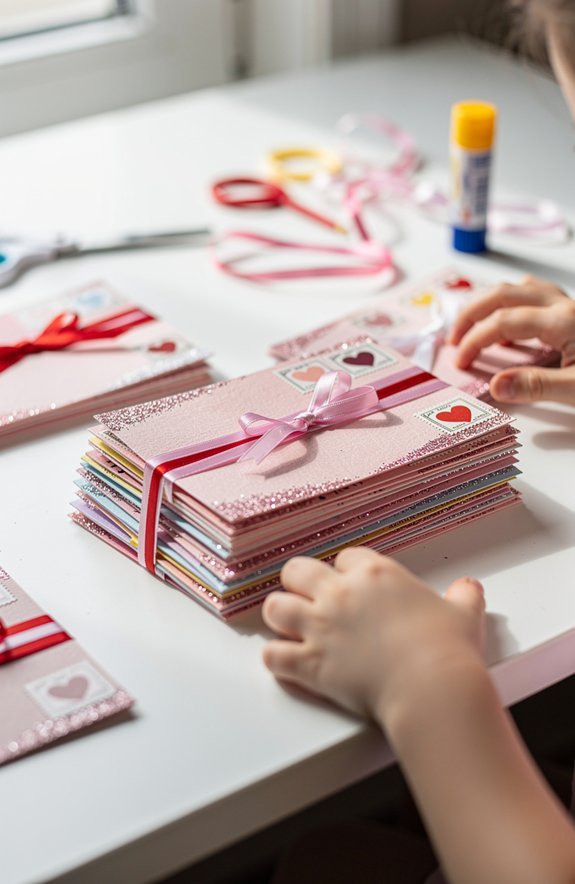
How to Batch-Produce 25 Valentines in One Session
Twenty-five valentines sounds like a nightmare until you set up an assembly line that would make a factory jealous. Bulk planning is your secret weapon here. Gather all your supplies, clear the dining table, and create stations. Station one: fold all cards. Station two: add stickers. Station three: write names. You get the idea.
Here’s where cost optimization saves your sanity and wallet.
Buy materials in multipacks instead of grabbing fancy individual items. Dollar store stickers work just as well as the expensive stuff.
Pro tip: recruit your kid’s siblings or friends. Many hands make light work, and honestly? It turns into a party. Crank up some music, set a timer, and watch those valentines stack up faster than pizza disappears at a sleepover.
Designs That Work When You Need 25 Identical Cards
Now that you’ve got your assembly line ready to roll,
Assembly lines turn chaotic craft sessions into smooth operations—get your system ready before the glue sticks start flying.
let’s talk about which designs actually make sense when you’re cranking out 25 of the same thing.
Forget anything with intricate cutting or twelve different paint colors.
Your sanity matters!
Stick with designs where bulk printing does the heavy lifting.
Think simple shapes—hearts, circles, or squares that you can punch out in seconds.
Color matching becomes way easier when you limit yourself to two or three shades max.
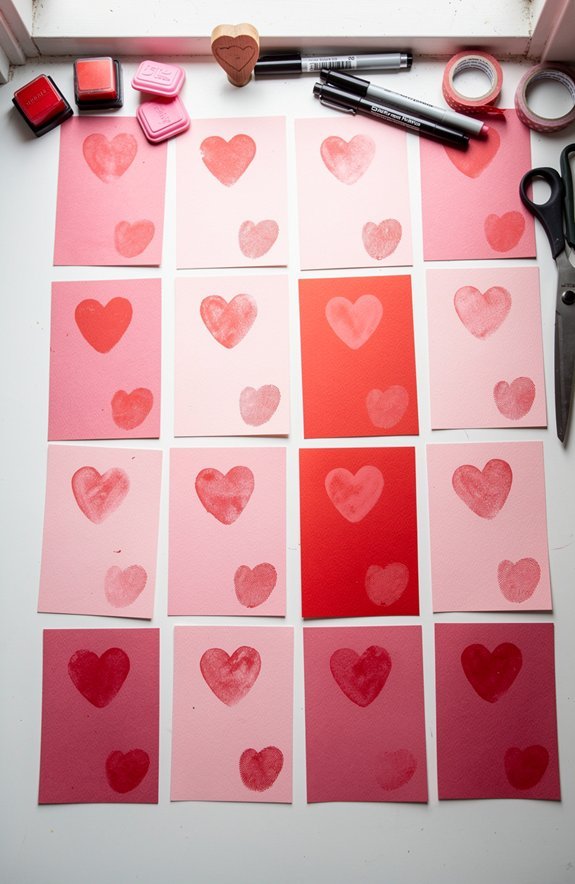
- Stamped hearts: One stamp, one ink pad, done
- Sticker collages: Let kids slap ’em on however they want
- Fingerprint animals: Pink thumbprints become tiny love bugs instantly
- Washi tape stripes: Tear, stick, repeat—no scissors needed
Simple designs mean happy kids and a mess-free table.
Win-win!
Valentine Cards Adapted for Mixed Age Groups
Making Valentine’s Day cards with kids of different ages sounds like a recipe for chaos—and honestly, it kind of is!
But here’s the secret: give everyone the same base card with different jobs.
Age adaptation is your best friend here.
Little ones get stickers and stamps—stuff that’s basically impossible to mess up.
Older kids handle scissors, glitter glue, and writing names.
Boom.
Everyone feels important.
The group dynamics actually work better than you’d think.
Big kids love being “helpers,” and tiny ones worship their older siblings for five whole minutes.
It’s beautiful.
Pro tip: set up stations.
Decorating zone here, assembly line there.
Kids rotate, nobody fights over the good markers, and you finish before anyone has a meltdown.
Victory!
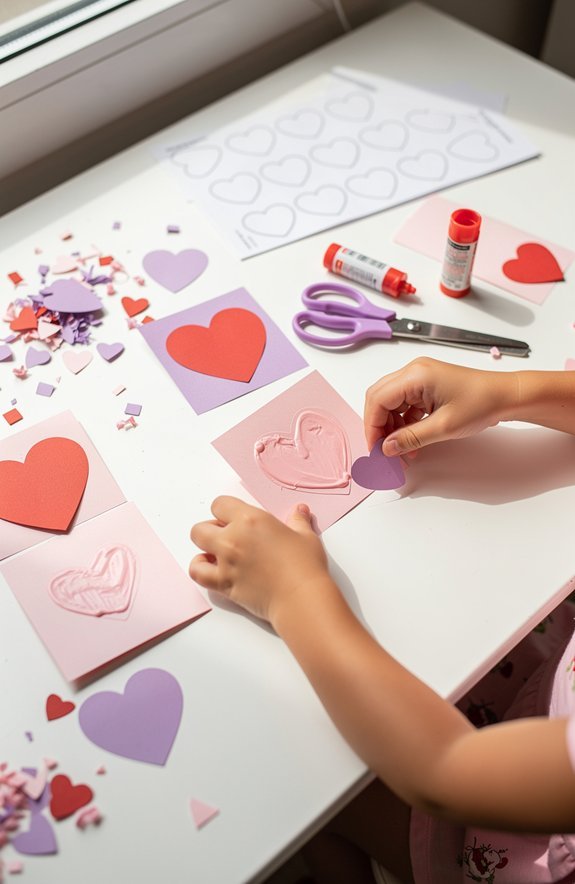
Pre-Cut Shapes That Reduce Frustration for Little Hands

Little hands and scissors are basically sworn enemies.
You’ve seen it—the crumpled paper, the frustrated tears, the “heart” that looks like a blob.
Skip the drama entirely with pre-cut shapes!
Smart shape selection makes everything easier.
Grab foam hearts, paper circles, and star cutouts from any craft store.
Your kiddo gets straight to the fun part: decorating.
- Hearts and circles work best for tiny fingers to grip and glue
- Edge safety matters—foam shapes have soft, rounded edges that won’t cause paper cuts
- Pre-cut pieces mean zero scissor supervision stress for you
- Kids feel successful instead of defeated by wonky cutting attempts
You’re not cheating.
You’re being smart.
Those store-bought shapes turn card-making from a meltdown into actual fun.
Big Easy Shapes for Kids Who Need Extra Help
Why do craft stores sell heart shapes the size of a dime?
Your kid can barely hold a crayon, and they’re supposed to cut out something that small?
Nope.
Go big or go home.
Grab hearts and circles at least 3-4 inches wide.
Your child can actually grip them, flip them over, and slap them onto paper without a meltdown.
It’s a game-changer.
Here’s the bonus: bigger shapes mean more room for texture exploration.
Let them feel fuzzy felt hearts or bumpy foam circles.
While they’re at it, sneak in some color naming practice.
“What color is this giant heart?”
Boom—learning happens.
Big shapes equal big confidence.
Your kid finishes the card feeling like a craft champion instead of a frustrated mess.
Picture Instructions for Kids Who Cannot Read Yet
So your kid crushed it with those big shapes—now let’s talk about getting them through the actual steps without you hovering like a helicopter.
Visual steps are your secret weapon here.
Visual steps turn chaos into calm—your kid sees exactly what to do without you saying a single word.
Think little drawings that show exactly what to do—fold this, glue that, stick the heart here.
Pictographic cues work like magic for tiny crafters who can’t decode words yet.
A simple picture of scissors means cut.
A glue stick icon means sticky time.
No reading required!
- Draw each step as a stick-figure action scene
- Use arrows to show where pieces go
- Color-code materials to match the instruction pictures
- Keep it to 3-4 steps max or you’ll lose them
Your kid follows along independently, and you get to drink your coffee.
Win-win!
Optional Extras for Older Kids Who Want More Challenge
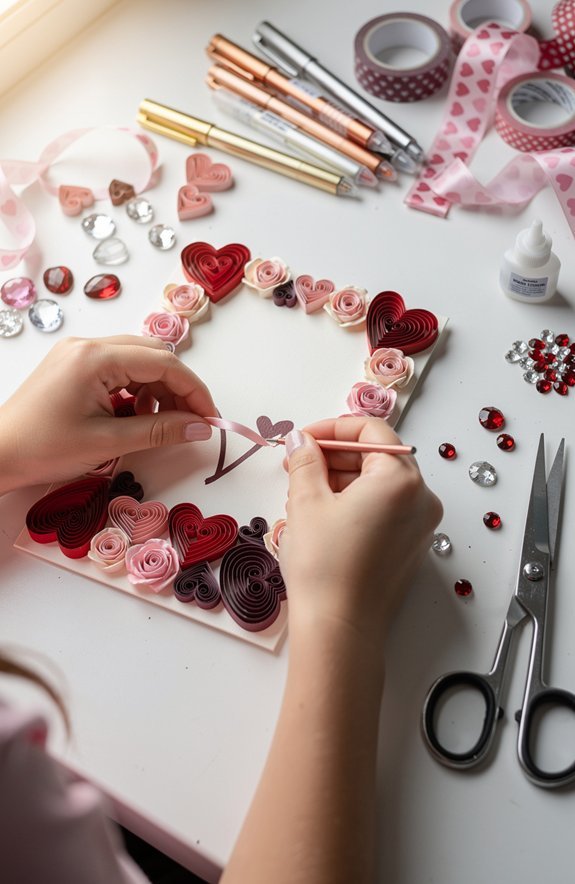
Once your older kids have mastered the basics, they’re probably itching for something that actually challenges them—and honestly, that’s when crafting gets really fun.
Advanced techniques to try: layered pop-up hearts that spring out when opened, woven paper strips that create checkerboard patterns, or tiny origami flowers glued to the front.
These look impressive but still take under ten minutes once you get the hang of them.
For extension challenges, dare them to add hand-lettered calligraphy or create a secret message using invisible ink (lemon juice works great).
They could also design matching envelopes or make a whole set with a theme.
Watch their faces light up when friends ask, “Wait, you MADE this?” That proud moment? Totally worth the extra effort.
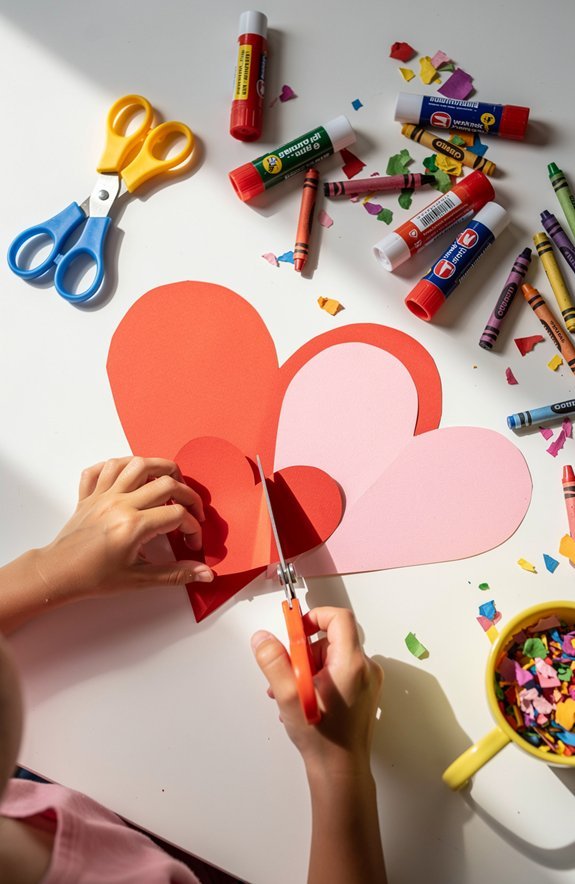
Why Cutting Hearts and Shapes Builds Motor Skills
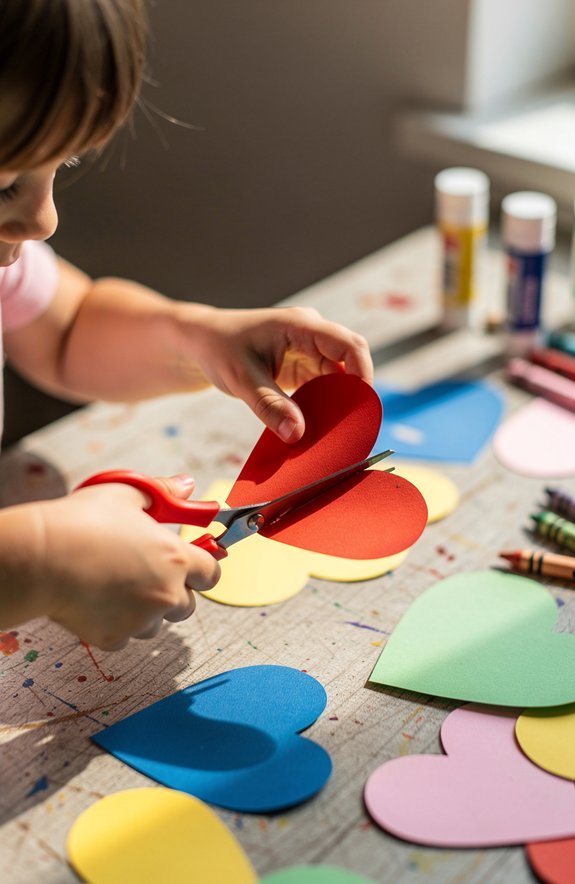
Have you ever wondered what’s actually happening in your kid’s brain when they’re hunched over construction paper, tongue sticking out,
trying to cut a heart that doesn’t look like a lumpy potato?
Turns out, a LOT. Cutting shapes is basically a workout for tiny hands. Every snip builds fine motor skills and hand-eye coordination. Plus, feeling the paper and scissors? That’s sensory development in action.
Here’s what those wobbly hearts are secretly teaching:
- Bilateral coordination – using both hands together without total chaos
- Grip strength – building muscles for future pencil holding
- Visual tracking – eyes following the line while hands do the work
- Patience – because that curve isn’t cutting itself
Why Folding and Gluing Cards Helps Kids Learn

Cutting’s great, but now let’s talk about folding and gluing—the dynamic duo of card-making chaos.
When your kid folds paper in half, they’re secretly building fine motor skills.
Their little fingers have to line up edges, crease firmly, and not crumple everything into a sad ball.
It’s harder than it looks!
And gluing? Pure critical thinking gold.
Kids have to figure out how much glue is enough (spoiler: they’ll use way too much at first).
They learn where to place decorations so nothing falls off when Grandma opens her card.
Should the glitter go before or after the sticker?
These tiny decisions add up.
Writing Valentine Messages Builds Early Literacy
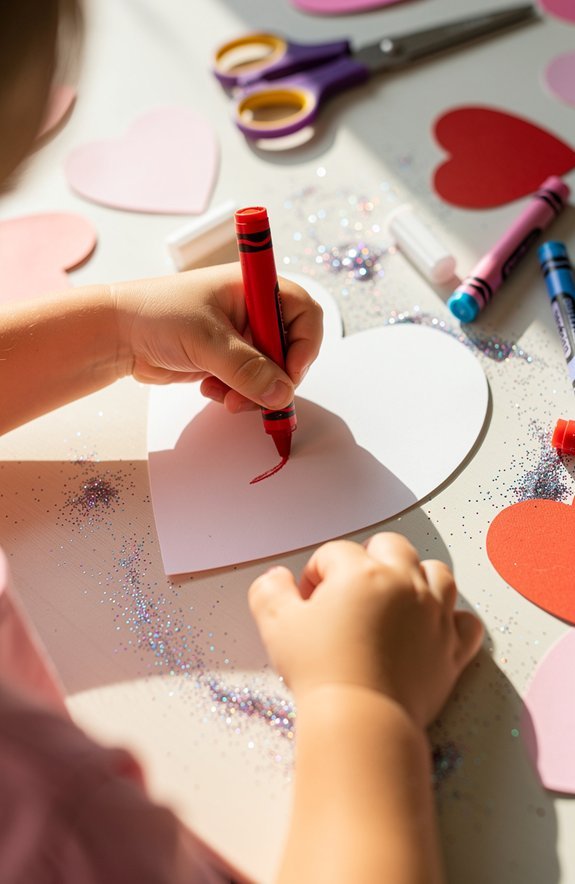
Why do kids suddenly want to write when there’s a heart-shaped card involved? It’s like magic!
Valentine messaging turns reluctant writers into tiny poets.
Your kid might groan at homework, but hand them a glittery card and suddenly they’re crafting love notes like Shakespeare.
Here’s why this matters for early literacy:
- Sounding out “Be Mine” builds phonemic awareness naturally
- Kids practice letter formation without it feeling like work
- They learn that writing communicates real feelings to real people
- Spelling attempts (even wild ones) show growing confidence
The best part? Nobody’s grading these cards. Your child can write “U R GR8” and grandma will still cry happy tears.
That’s the sweet spot where learning meets genuine motivation. Messy spelling included!
Kid-Safe Scissors and Non-Toxic Supplies to Use
Before your kid goes full Edward Scissorhands on your craft supplies, let’s talk safety! Scissor safety isn’t boring—it’s how we keep all ten fingers intact.
Scissor safety keeps craft time fun and finger-friendly—because nobody wants their art project to end in the emergency room.
Look for blunt-tipped scissors with rounded edges. They cut paper just fine but won’t turn craft time into an ER visit.
Now, about those safe supplies. Kids put everything in their mouths. It’s basically their superpower.
So grab non-toxic glue sticks, washable markers, and crayons that won’t cause a panic if they get taste-tested. Check labels for “AP Certified Non-Toxic” seals.
Skip the glitter glue with tiny beads—choking hazard alert! Stick to chunky craft supplies instead.
Foam stickers, construction paper, and pompoms are your best friends here. They’re colorful, fun, and totally drama-free.
Minimal Tool Requirements for Shared Classroom Supplies
Most classroom Valentine projects need just a handful of basic tools—and that’s actually perfect.
You don’t need fancy gadgets when crayons, glue sticks, and safety scissors do the job.
Tool sharing becomes way easier when everyone’s working with the same simple stuff.
Here’s why minimal supplies rock:
- Less chaos means more actual crafting time (and fewer meltdowns)
- Inventory rotation keeps supplies fresh and prevents the dreaded dried-out glue stick tragedy
- Kids learn teamwork when they share scissors without drama
- Teachers stay sane because cleanup takes two minutes, not twenty
Seriously, you don’t need a craft store explosion.
A few basics spread across tables work like magic.
Kids grab what they need, make something cute, and boom—Valentine’s done!
Candy-Free Valentine Ideas That Follow School Policies
Navigating school allergy policies doesn’t mean your kid’s Valentines have to be boring—it actually opens up way more creative options! Think tiny erasers shaped like puppies, glow sticks, or those squishy fidget toys kids go absolutely bonkers over.
Noncandy options are honestly a lifesaver. No melting chocolate disasters in backpacks, no nut allergy panic attacks from teachers. Everyone wins!
Your creative alternatives can be hilarious too.
Attach a small bouncy ball with a tag that says “You’re a blast!” or pair a pencil with “You’re write for me!” Cheesy? Absolutely. Will second graders love it? One hundred percent.
Stickers, temporary tattoos, and mini notepads work great too. They’re cheap, easy to find, and won’t get confiscated at the classroom door.
Time-Boxed Projects That Fit Into Party Rotations
When you’ve got exactly twelve minutes before the next group rotates in, you don’t have time for elaborate origami swans or anything requiring a glue gun.
Session pacing is everything when twenty kids are breathing down your neck.
Smart rotation planning means picking projects that start fast and end clean.
Here’s what actually works in the chaos:
- Pre-cut everything — Scissors during a time crunch? Absolute nightmare fuel.
- Use stickers instead of glue — No dry time, no sticky fingers on doorknobs.
- Pick one-step assembly — Fold, stamp, done. That’s the dream.
- Have a “finished” station — Kids work at wildly different speeds, so give fast finishers somewhere to go.
You’ll look like a party-planning genius.
The secret? You just planned smarter.
Mistakes That Double Your Valentine Card-Making Time
Rushing through your supply prep will absolutely wreck your timeline.
Trust me, hunting for scissors while glue dries on your kid’s fingers is pure chaos. Lay everything out first—paper, stickers, markers, the works.
Here’s another classic mistake: skipping the practice run.
Your kiddo attempts a heart shape, makes crooked cuts, gets frustrated, and suddenly you’re starting over. Again. And again.
Don’t even get me started on glue blobs.
One overzealous squeeze and now you’re waiting twenty minutes for that soggy mess to dry. Use glue sticks instead, or show them the “tiny dots” technique first.
The biggest time-killer? Perfectionism.
These cards don’t need to be Pinterest-worthy. They need to be done. Let the wobbly letters stay wobbly. That’s the charm!
How to Rescue Torn Paper, Glue Blobs, and Crooked Cuts
Disasters happen fast when little hands are crafting.
One second everything’s fine, the next you’ve got a ripped heart and tears flowing.
Don’t panic!
Paper repair is easier than you think—just flip that torn piece over and use it as a template for a fresh cut.
For glue cleanup, grab a barely damp cloth and dab (never rub!) before it dries into a crusty mess.
Here’s your quick-fix cheat sheet:
- Torn edges: Turn them into “rustic charm” by tearing the whole border on purpose
- Glue blobs: Let them dry, then peel off like satisfying slime
- Crooked cuts: Add stickers or glitter to distract from wonky lines
- Smudged markers: Draw a bigger heart right over the evidence
Crisis averted!
In case you were wondering
Can Toddlers Under Age 3 Safely Participate in Making Valentine’s Day Cards?
Yes, toddlers under 3 can participate with proper supervision. You’ll want to prioritize toddler safety by choosing materials suitability—use non-toxic crayons, large stickers, and avoid small choking hazards like buttons or glitter.
How Do I Store Unfinished Valentine Cards Overnight Without Ruining Them?
You’ll want to place cards flat between wax paper sheets for overnight protection. Storage tips include using a cookie sheet in a cool, dry area. Don’t stack wet glue projects—they’ll stick together and tear.
What Alternatives Exist for Kids With Allergies to Common Craft Supplies?
You’ll discover a world of allergy-friendly options! Switch to hypoallergenic glue and fragrance free markers for sensitive crafters. Try beeswax crayons, natural paper, cotton balls, and wooden craft sticks as safe alternatives.
How Can Left-Handed Children Cut Heart Shapes More Easily?
You’ll want to get left-handed scissors that feature a proper scissor grip designed for southpaws. Teach your child a blade technique where they cut clockwise around the heart shape for better visibility and control.
Should Kids Sign Their Names or Use Printed Name Labels?
Handwritten charm meets polished convenience when choosing signature options for your child’s cards. You’ll find label strategies work best for younger kids, while older children can proudly sign their own names for a personal touch.
Conclusion
Here’s the truth: your kid’s crooked heart covered in glitter glue means way more than any Pinterest-perfect card ever could. Messy hands, proud smiles—that’s the good stuff. So grab your supplies, set that timer, and let the chaos unfold. Ten minutes of creative fun beats two hours of stressed-out perfection every single time. Now go make some valentines!