Valentine’s Day Science Experiments Kids Will Love (STEM Made Fun)
You can turn Valentine’s Day into a science party with stuff already in your kitchen. Try dissolving candy hearts in different liquids and time how long each takes, or make a baking soda and vinegar volcano inside a cupcake—messy and totally worth it. Skittles in warm water create gorgeous color gradients, and elephant toothpaste explodes into pink foam that feels warm to the touch. Below, you’ll find even more experiments sorted by age.
What you will leave with
- Fizzing baking soda and vinegar volcano cupcakes create exciting acid-base reactions that captivate kids ages 3-12.
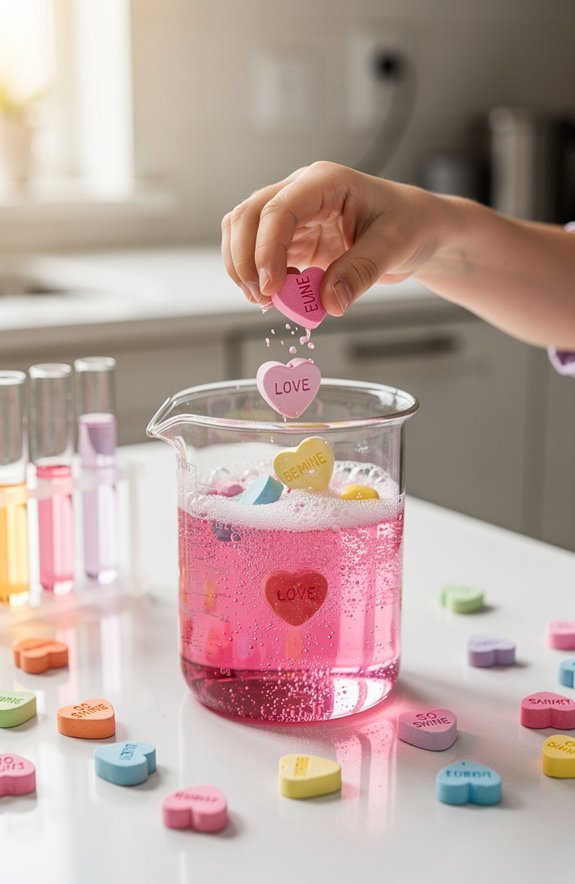
- Dissolving candy hearts in different liquids teaches timing and observation skills while using familiar Valentine treats.
- Elephant toothpaste produces dramatic pink foam blooms using hydrogen peroxide, dish soap, and yeast as a catalyst.
- Heart-shaped gelatin molds demonstrate polymer networks as protein strands create jiggly transformations kids find magical.
- DIY stethoscopes and pulse-counting activities connect Valentine themes to real human biology and heart science exploration.
Supplies You Already Have for Valentine Science Experiments
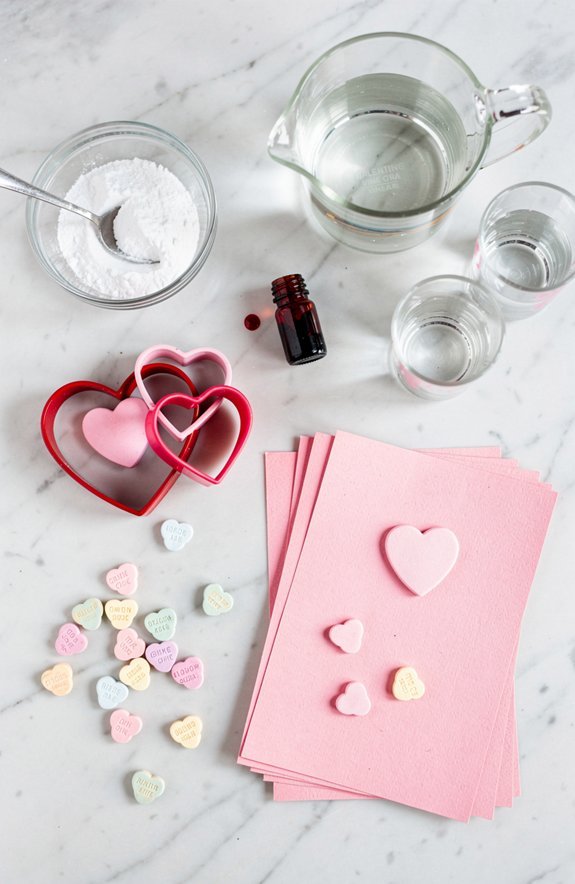
You’d be shocked at how much science stuff is hiding in your kitchen right now.
Your kitchen is a secret science lab waiting to be discovered—no fancy supplies required.
Seriously, your pantry is basically a secret lab.
Baking soda? Science gold. Food coloring? Chef’s kiss for dramatic experiments. Vinegar? The OG of kitchen chemistry.
Most Valentine science projects use common materials you’ve already got.
We’re talking paper towels, cooking oil, dish soap, and maybe some corn syrup if you’re fancy.
Raid your junk drawer for plastic cups, spoons, and those random droppers from old medicine bottles.
Household items like milk, candy hearts, and even that box of cornstarch work perfectly.
You don’t need to order weird supplies online or spend your whole paycheck at a specialty store.
Plus, hands-on experiments engage multiple senses, which helps kids remember what they learned way better than just reading about it.
Your home’s already stocked for science fun!
Best Ages for Each Valentine Science Activity
How do you know which experiments work for your kid’s age?
It’s all about matching activities to development milestones.
A toddler won’t care about chemical reactions, but they’ll go absolutely bonkers for colorful fizzing.
Meanwhile, older kids want the “why” behind the magic.
Here’s your quick guide to age ranges:
- Ages 3-5: Stick with sensory stuff—fizzing hearts, color mixing, and anything squishy. Keep it messy and hands-on.
- Ages 6-8: They’re ready for simple experiments with steps. Dissolving candy hearts and basic reactions work great.
- Ages 9-12: Bring on the real science! They can handle hypothesis testing and actually understand what’s happening.
Don’t stress about getting it perfect.
Kids usually surprise you with what grabs their attention!
Remember that introduction to STEM activities can begin as early as age 3-4, when children naturally develop critical thinking skills through sorting and building.
Safety Tips for Valentine Chemistry With Young Kids
Now that you’ve picked the perfect experiment for your kiddo’s age, let’s talk about keeping everyone safe while things fizz and pop.
First rule of chemical handling: no tasting! Baking soda looks like sugar, but trust me, your kid’s face will tell you it’s not. Keep all ingredients away from mouths and eyes.
Little scientists love to taste-test everything—make sure mouths stay closed and hands stay out of eyes during experiments.
Speaking of eyes—goggles required for anything that bubbles or sprays. Yes, even vinegar volcanoes. Nobody wants a fizzy Valentine surprise to the eyeball.
Cover your workspace with old towels or newspapers. Spills happen. They always happen.
Keep wet wipes nearby for sticky fingers before they touch furniture, pets, or siblings.
And here’s the big one: stay close. Little scientists get excited and pour way too fast. Your job? Be the calm backup. Just like with grills and fire pits, creating a kid-free zone around heat sources during any experiments involving warming ingredients keeps curious hands safe.
Valentine Kitchen Chemistry Experiments With Candy and Food
Why raid the candy stash when you can turn it into science?
Your kitchen becomes a sweet lab with these Valentine experiments.
Kids go absolutely wild watching candy transform right before their eyes.
1. Dissolving candy hearts – Drop conversation hearts into different liquids and time how fast they disappear.
Vinegar wins every time, and it’s weirdly satisfying to watch.
2. Candy crystallization magic – Grow your own rock candy on a stick using sugar water.
It takes patience, but the sparkly results are worth the wait.
3. Taste chemistry challenge – Blindfold your kids and have them guess flavors.
Their tongues will trick them when colors don’t match expectations.
For even more kitchen chemistry fun, try the baking soda and vinegar volcano cupcakes that create exciting acid-base reactions right in your treats.
These experiments prove dessert can be educational.
Your little scientists will beg for more kitchen chemistry adventures!
Skittles Heart Diffusion Shows Color Gradients in Warm Water
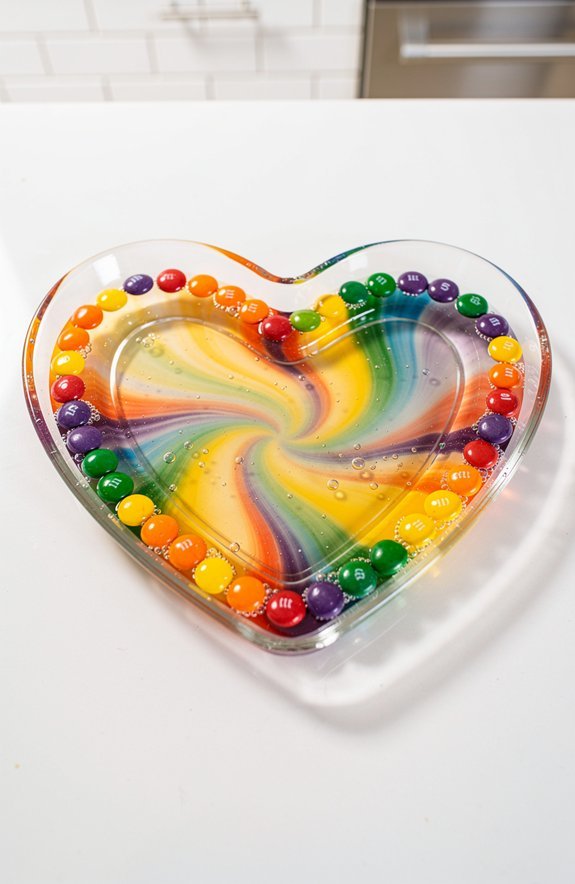
Watching Skittles bleed rainbow colors into warm water might be the most hypnotic thing you’ll see all week.
Arrange red and pink Skittles in a heart shape on a white plate, then carefully pour warm water around them.
The magic starts immediately.
Those candy coatings dissolve and create stunning diffusion patterns that spread toward the center.
You’ll get gorgeous gradient visualization as colors meet and swirl without mixing right away.
It’s like a tiny fireworks show in slow motion.
Here’s the cool part—the sugar coating is denser than plain water, so colors actually stay in their lanes for a while.
Kids go absolutely bonkers watching this unfold.
Pro tip: try cold water next and compare speeds.
Use visual aids can enhance understanding by having younger children draw what they observe as the colors spread.
Science plus candy equals pure Valentine’s Day gold.
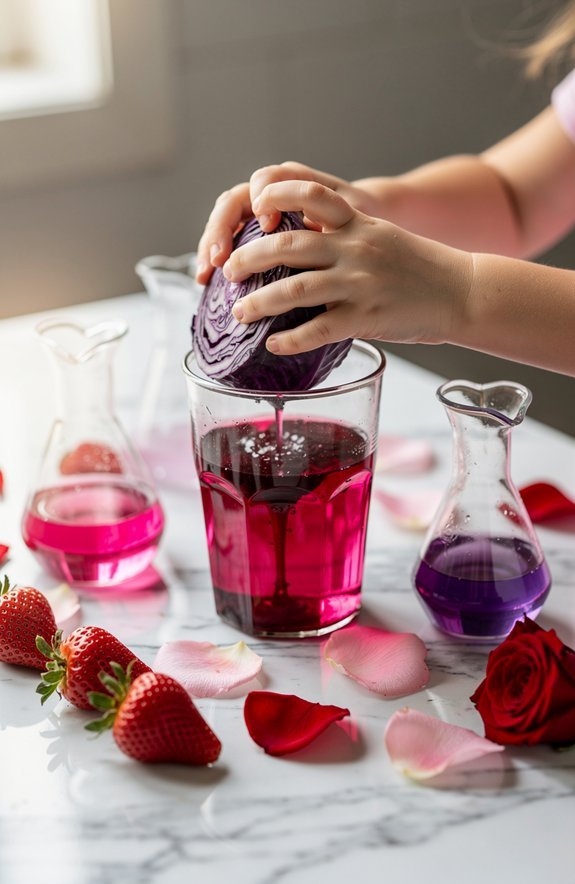
Red Cabbage Love Potion Reveals Acid-Base Chemistry
Red cabbage juice might look like something a witch brewed up, but it’s actually one of the coolest science tools hiding in your fridge.
This purple liquid is a natural pH indicator, which means it changes color when it meets acids or bases.
Your kids will flip out when they see it happen!
Here’s how cabbage chemistry gets magical:
- Blend red cabbage with water, then strain out the chunks
- Pour the purple juice into clear cups
- Add lemon juice, baking soda, or vinegar and watch the color explosion
Acids turn the potion pink or red. Bases make it green or even yellow! It’s like having a mood ring for liquids. Science has never looked this wild—or this Valentine’s-ready.
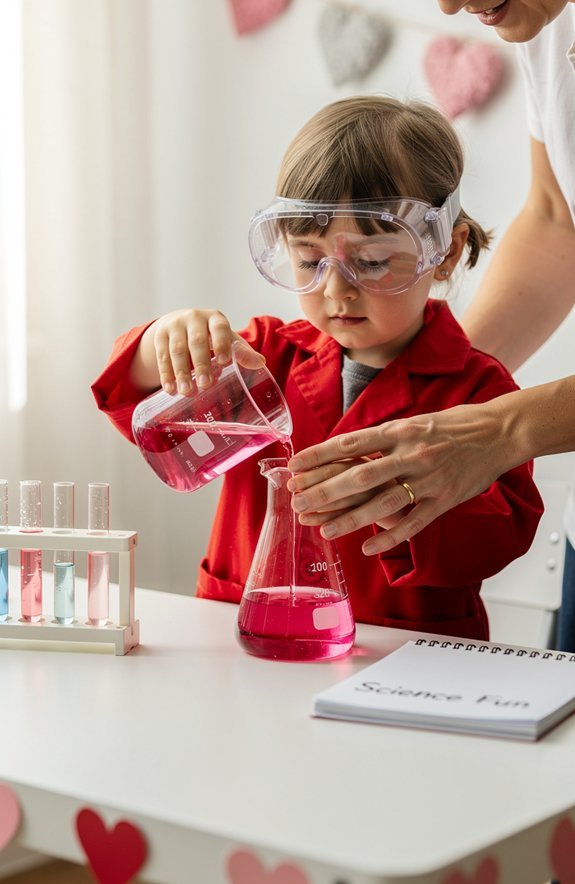
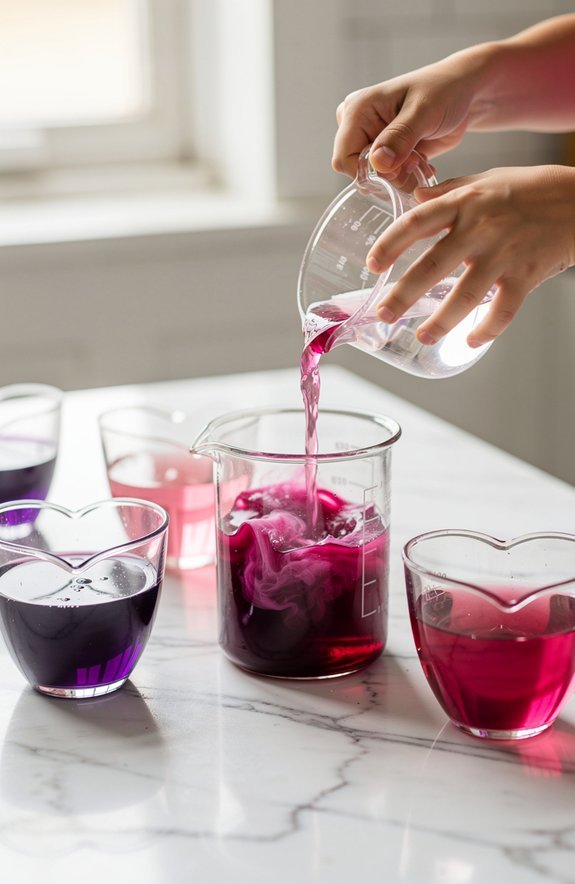
Color-Changing Valentine Drinks Demonstrate Safe pH Reactions
Transform your Valentine’s party into a science show with color-changing drinks that are totally safe to sip!
Here’s the magic trick: butterfly pea flower tea turns from blue to pink when you add lemon juice.
It’s like a love potion that actually works!
The secret? Natural pH indicators in the tea react to acids.
Squeeze in some citrus, and boom—instant color change right before your eyes.
Your friends will flip out.
Make it fancy by layering pink lemonade under the blue tea.
As kids stir, the colors swirl together like a sunset.
It tastes great and looks absolutely wild.
Pro tip: let guests add their own lemon drops and watch the purple magic happen.
Science never tasted this good!
Heart-Shaped Pizza Dough Shows How Yeast Produces Gas
Ever wonder why pizza dough gets so puffy and soft?
It’s all about yeast respiration—tiny fungi eating sugar and burping out gas.
Seriously, yeast basically throws a microscopic party in your dough!
Here’s how to make it Valentine-themed:
- Mix warm water, sugar, and yeast in a bowl—watch it foam like a science fiction movie
- Add flour and knead into a ball, then shape it into a heart
- Wait 30 minutes and watch your heart literally grow bigger
The dough aeration happens because yeast releases carbon dioxide bubbles.
Those bubbles get trapped, making everything fluffy and delicious.
Your kids will freak out watching their heart expand.
Plus, you get pizza for dinner.
Science AND snacks? That’s a total win.
Valentine Fudge Teaches Crystallization and Temperature Control
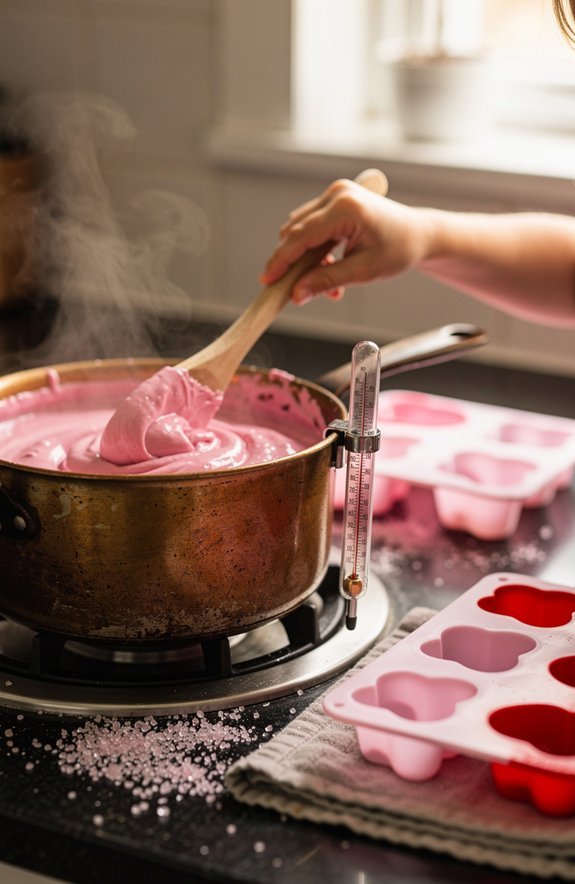
Making fudge is basically playing with sugar crystals—and it’s way more dramatic than it sounds.
You’re heating sugar until it dissolves completely, then cooling it down to create the smoothest, creamiest texture ever.
The secret? Controlling crystal growth like a boss.
Here’s where it gets wild.
Heat transfer matters SO much.
If you stir too early while it’s hot, you’ll get grainy, chunky fudge.
Nobody wants that.
But if you wait until it cools to exactly the right temperature and THEN stir?
Tiny, perfect crystals form, and your fudge turns out silky.
Kids can use a candy thermometer to watch the magic happen.
They’ll see firsthand how temperature controls everything.
Plus, you get to eat your science experiment.
That’s basically the best lab ever.
Homemade Gummy Hearts Explore Gelatin Polymer Networks
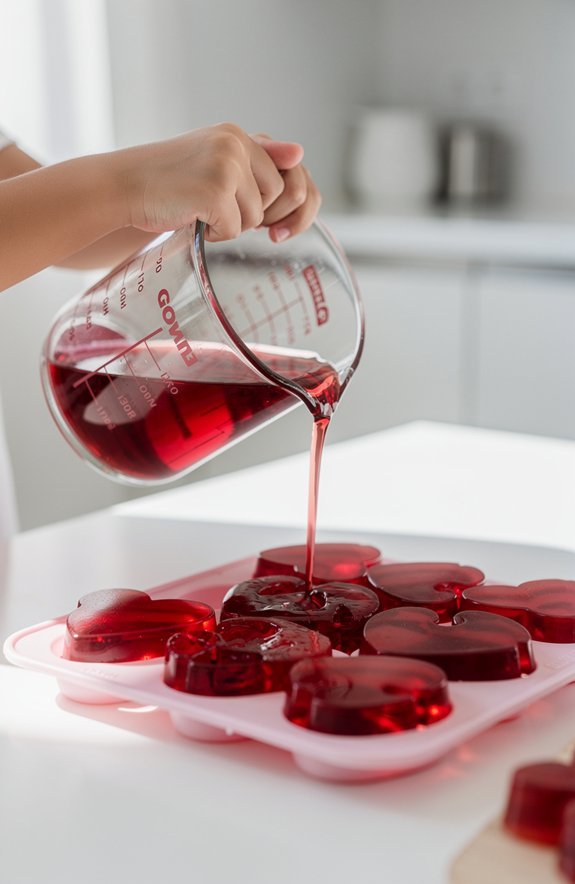
Stretching a gummy bear until it snaps back is basically a science lesson disguised as a snack.
When you heat gelatin in juice, you’re watching gelatin gelation happen in real time.
Those tiny protein strands tangle together like headphone cords in your pocket, creating polymer networks that trap liquid inside.
Here’s why your kids will flip for this experiment:
- They get to pour hot liquid into heart-shaped molds like tiny candy scientists
- Watching the jiggly transformation feels like magic
- They eat their experiment at the end—ultimate win
The best part? You control the squish factor.
More gelatin means firmer hearts.
Less gives you wobbly, bouncy ones.
Either way, you’ve turned dessert into a hands-on chemistry lab.
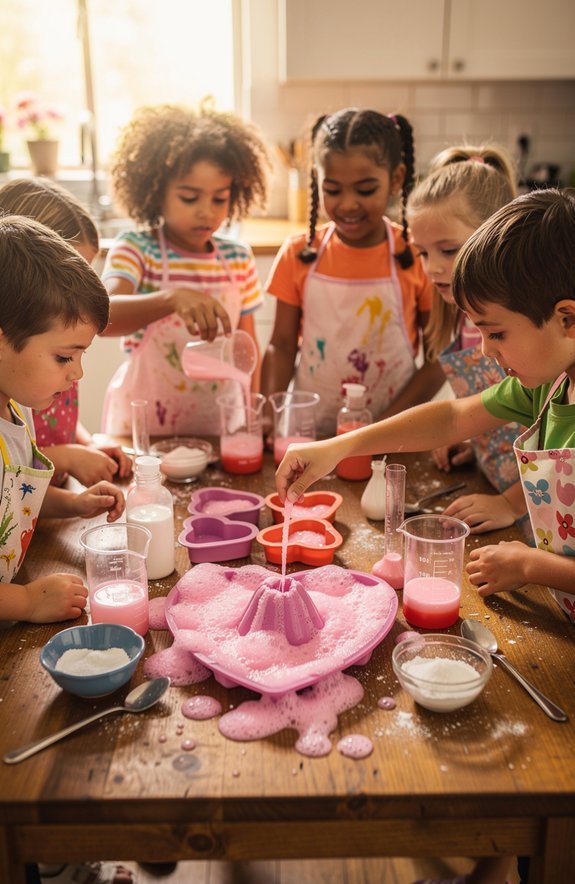
Elephant Toothpaste Blooming Rose Erupts With Oxygen Gas
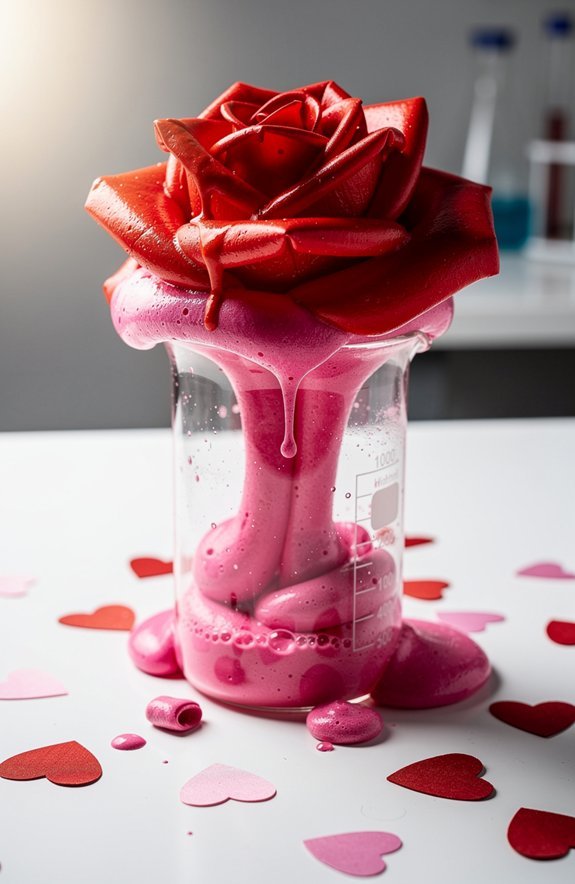
Picture a foam volcano exploding out of a rose-shaped bottle—that’s elephant toothpaste with a Valentine’s twist.
Love meets science when pink foam erupts like a Valentine’s volcano from your rose-shaped bottle.
You’ll mix hydrogen peroxide, dish soap, and yeast in a rose-colored container.
The yeast acts as your catalyst effects superstar, speeding up the reaction like a kid running to candy.
When everything combines, oxygen rushes out so fast it creates massive gas foam that looks like a blooming flower!
It’s basically your science experiment showing off.
The foam feels warm because this reaction releases heat.
Pretty cool, right?
Your kids will squeal watching pink foam overflow everywhere.
Pro tip: do this outside or in a bathtub unless you want your kitchen looking like a unicorn sneezed.
It’s messy, dramatic, and totally worth the cleanup.
Valentine Marshmallow Science Tests Sugar Structure and Air
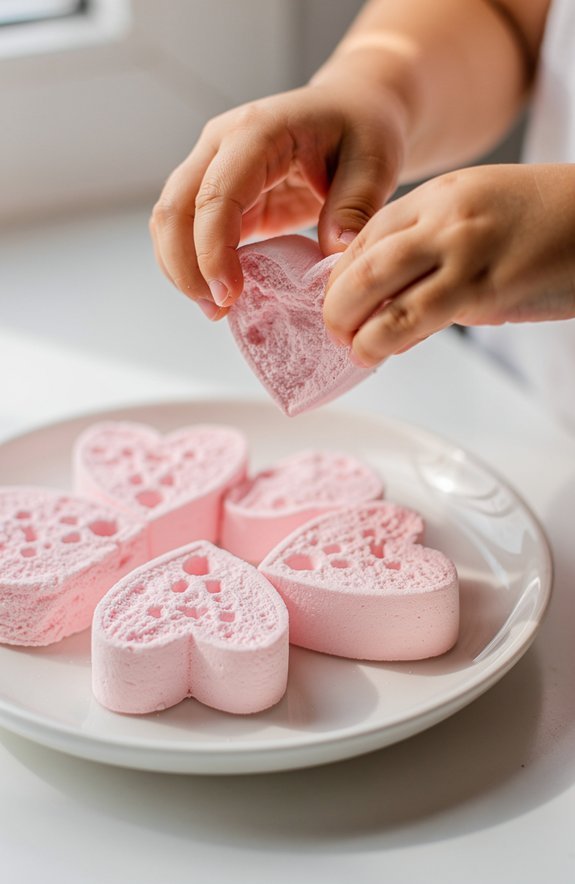
Have you ever wondered why marshmallows are so squishy and weird?
This experiment reveals the secrets hiding inside those puffy treats!
You’ll explore sugar structure and watch air diffusion in action—all while playing with candy.
Grab some Valentine heart marshmallows and let’s get scientific!
- Squeeze test: Press a marshmallow flat and watch it bounce back. That’s the sugar structure trapping tiny air bubbles inside!
- Microwave magic: Nuke one for 15 seconds and watch it puff up HUGE as trapped air expands. So wild!
- Water dissolve: Drop one in warm water and observe air diffusion as bubbles escape and the sugar melts away.
Your kids will go absolutely bonkers watching marshmallows transform.
Science tastes pretty sweet, honestly!
Valentine Biology Experiments That Explore the Human Body
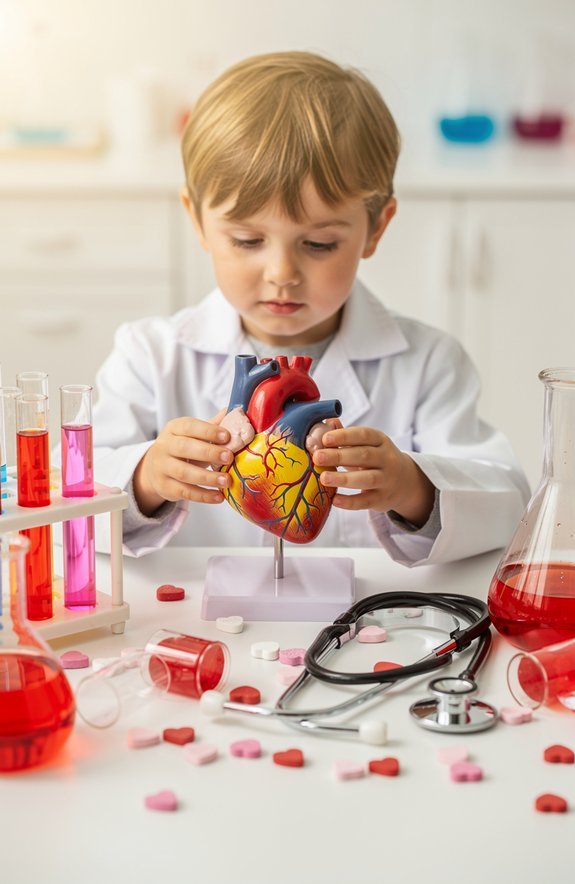
Why stop at candy when your own body is the coolest science lab around?
Valentine’s Day is perfect for exploring what makes you tick—literally.
Start with heart anatomy by building a model from red playdough.
Shape the four chambers, add straws for arteries, and squeeze it to mimic pumping action.
Kids go wild watching how it actually works!
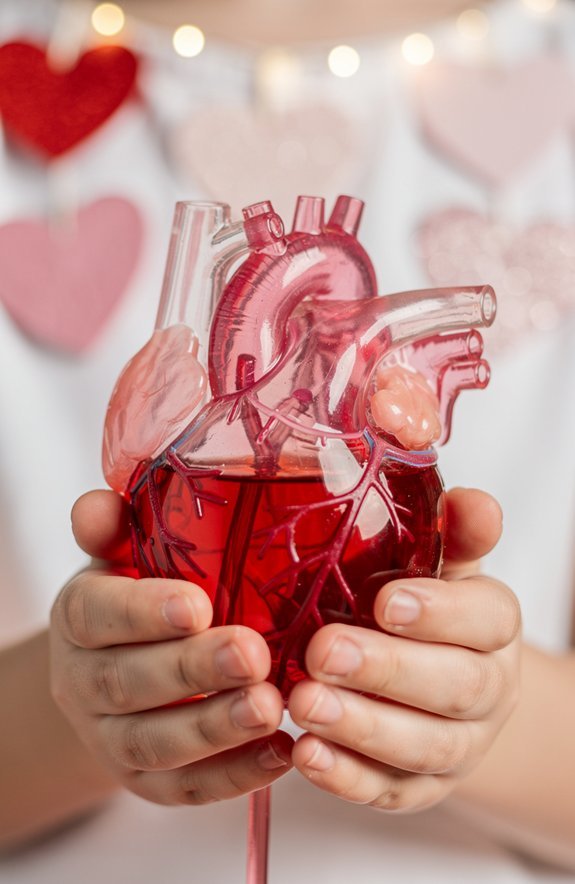
Next up: blood cells!
Grab a clear jar, corn syrup, red candies, white marshmallows, and sprinkles.
Layer them to show plasma, red cells, white cells, and platelets.
It’s like a Valentine’s smoothie you definitely shouldn’t drink.
Want drama?
Have kids find their pulse, then do jumping jacks.
Counting those heartbeats before and after?
Total mind-blower.
Their bodies are basically performing magic tricks 24/7.
Measure Your Heart Rate Before and After Valentine Exercise

Before you grab fancy equipment, here’s the truth: your fingers are the only heart rate monitor you need. Press two fingers on your wrist or neck, count the beats for 15 seconds, then multiply by four. Boom—pulse monitoring mastered!
Skip the gadgets—your fingertips and 15 seconds of counting are all you need to unlock your heart’s secrets.
Now let’s see exercise impact in action:
- Count your resting heart rate while sitting calmly (try not to think about candy)
- Do 20 jumping jacks or dance wildly to your favorite love song
- Immediately count your pulse again and watch those numbers skyrocket
Your heart just went from “lazy Sunday” to “running from a swarm of cupids.” That’s your body pumping extra blood to your muscles!
Kids go absolutely bonkers when they see their own heart respond to movement in real time.
Build a DIY Stethoscope to Hear Real Heart Sounds
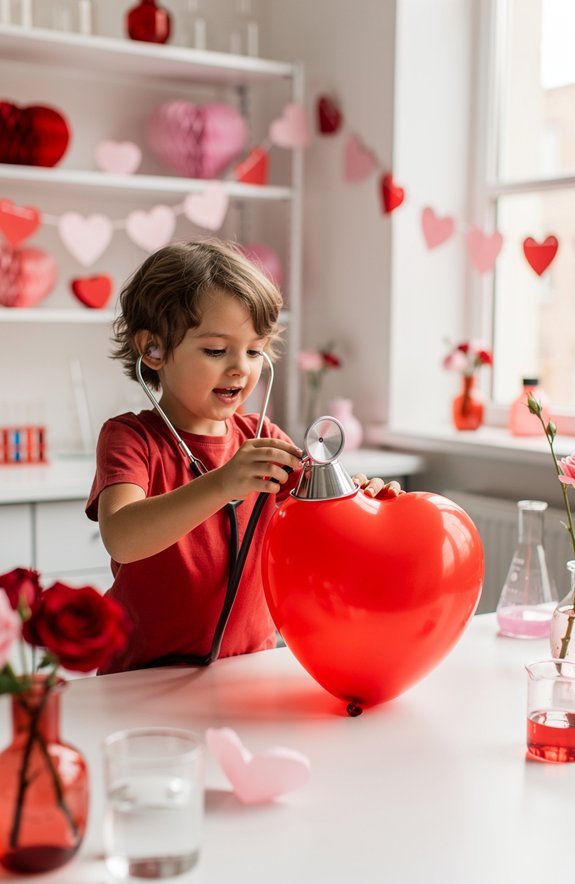
Ever wonder what your heart actually sounds like from the inside?
You’re about to find out with this super easy DIY stethoscope!
Grab a funnel, some plastic tubing, and a balloon.
Stretch the balloon over the funnel’s wide end—that’s your basic stethoscope anatomy right there.
The funnel catches sound waves while the tubing channels them straight to your ear.
Press it against your chest and listen.
That “lub-dub” you hear?
Those are your heart valves slamming shut!
Heart acoustics are wild when you actually tune in.
Try listening after jumping jacks.
The sounds get louder and faster—your heart’s basically throwing a dance party in there.
This experiment turns you into a doctor for a day.
Pretty cool for something made from stuff in your junk drawer!
Pumping Heart Model Shows How Valves Control Blood Flow
After hearing your heart’s rhythm with that DIY stethoscope, it’s time to see how the whole pumping action actually works! This pumping heart model lets you squeeze a balloon “heart” and watch valve function in real-time. Spoiler alert: it’s way cooler than any textbook diagram!
Ready to watch your DIY heart pump in action? Squeeze, watch, and discover why valves are the real MVPs!
You’ll build a simple contraption using straws and balloons that mimics blood flow through your actual heart. When you squeeze, water shoots one direction only—just like the real deal.
What You’ll Discover:
- Valves act like tiny one-way doors that slam shut behind blood
- Each squeeze pushes blood flow forward, never backward
- Your heart does this about 100,000 times daily (no breaks!)
Seriously, your heart deserves a trophy for that kind of hustle!
Valentine Body Map Helps Kids Locate Their Heart

Most kids think the heart sits on the left side of the chest, but that’s not quite right! It’s actually tucked almost in the center, just slightly left. Wild, huh?
Here’s a fun way to explore heart anatomy with your little Valentine.
Have your kid lie down on a big piece of paper.
Trace their body outline, then let them decorate it with hearts and arrows.
Now comes the cool part—help them find their actual heartbeat and mark the real spot!
You can even add pulse tracing by drawing lines from the heart to the wrist and neck.
Let them feel those spots and connect the dots.
Suddenly, they’re not just making art—they’re mapping their own amazing body!
Dyed Flowers Show How Plants Transport Water Like Veins
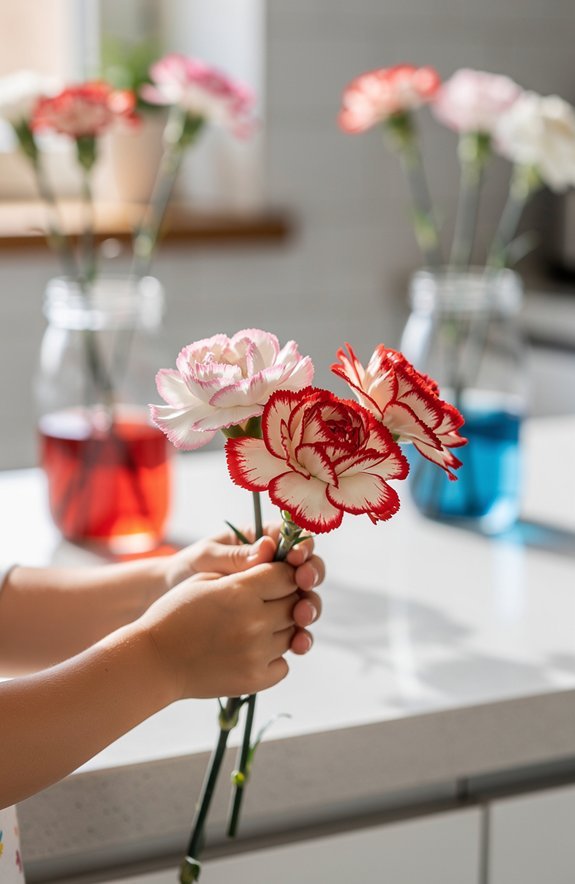
Why do plants need water anyway, and how does it travel all the way up a stem?
Here’s the cool part—plants have their own “veins” called xylem pathways.
These tiny tubes pull water from roots to petals using capillary action.
Capillary action is nature’s elevator system—tiny xylem tubes working together to defy gravity one water molecule at a time.
It’s like a built-in straw system!
You can actually watch this happen with white carnations and food coloring.
Mind. Blown.
- Fill glasses with water and add different food dye colors to each one
- Trim your white flower stems at an angle and pop them in
- Wait 24 hours and watch the petals transform into rainbow magic
The colored water climbs right up those xylem pathways.
You’ll see streaks of color appearing like tiny highways through the petals.
Science is basically sorcery sometimes!
Valentine Physics Experiments That Launch and Race
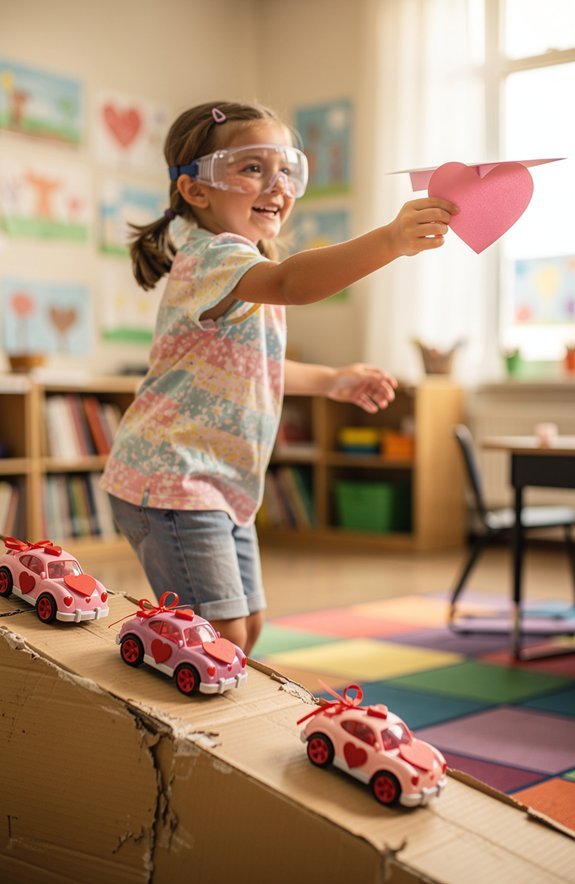
Ready to get things moving—literally? Physics gets way more fun when stuff flies through the air.
Build a simple catapult using popsicle sticks, rubber bands, and a plastic spoon.
Load up conversation hearts and launch them across the room.
Your kids will learn catapult basics without even realizing they’re doing science.
Want more action? Set up trajectory experiments by changing the launch angle.
Does 45 degrees really send candy the farthest?
Test it!
Make predictions, then watch those hearts soar.
For racing fun, tape straws to paper hearts and thread them onto string.
Blow through the straws and race your valentines across the room.
It’s chaotic, loud, and absolutely hilarious.
These experiments turn your living room into a physics playground.
Who said science can’t be wild?
Balloon Heart Inflation With Vinegar and Baking Soda
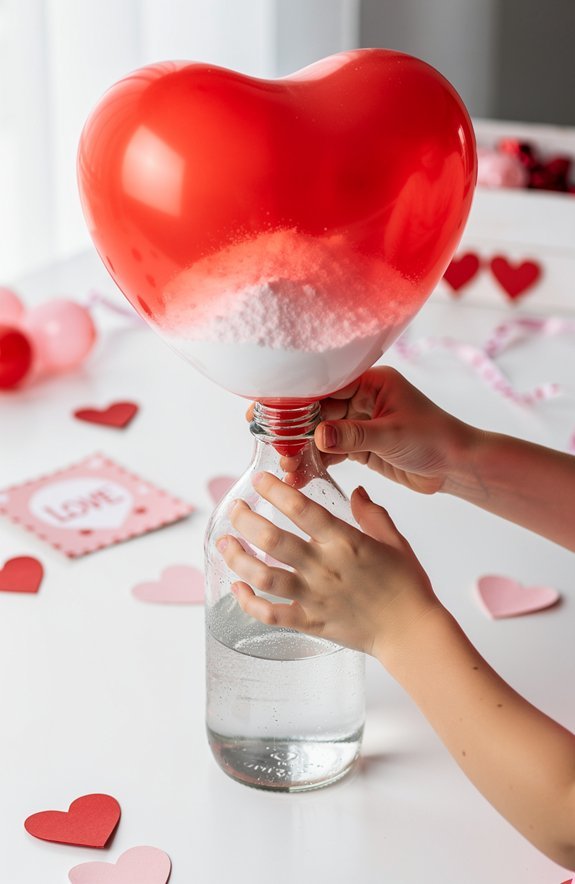
This classic baking soda-vinegar combo never gets old, and slapping a heart-shaped balloon on top makes it perfect for Valentine’s Day.
When the two ingredients mix, reaction kinetics kicks in fast—bubbles explode everywhere and carbon dioxide rushes out.
That gas pressure inflates your balloon like magic!
Here’s how to pull it off:
- Pour vinegar into a bottle – about an inch works great.
- Fill your heart balloon with baking soda – use a funnel so you don’t make a mess.
- Stretch the balloon over the bottle top and dump the powder in – watch it puff up!
The balloon swells because all that gas needs somewhere to go. It’s loud, it’s bubbly, and kids absolutely lose their minds over it.
Cupid’s Arrow Balloon Races Demonstrate Newton’s Third Law
When you’re ready to turn your living room into a racetrack, Cupid’s Arrow Balloon Races are where it’s at.
String a line across the room, tape a balloon to a straw threaded on it, and watch the magic happen.
Here’s the deal with balloon propulsion: air rushes out the back, and your balloon zooms forward.
That’s action reaction in its purest form—Newton’s Third Law showing off.
Every push gets an equal push back.
Decorate your balloons like little Cupids or add paper hearts for extra flair.
Then let them rip! Kids go absolutely bonkers watching these things fly.
Who knew science could feel like a competition? Time each race, crown a winner, and prepare for demands of “again, again!” Trust me, this one’s a crowd favorite.
Candy Heart Catapults Teach Potential and Kinetic Energy

Catapults and candy? Yes, please! Your kids are gonna flip when they build their own launching machines and send conversation hearts flying across the room.
The catapult design is super simple—just popsicle sticks, rubber bands, and a plastic spoon. But here’s where it gets cool: energy transfer happens right before their eyes!
What kids will discover:
- Pulling back the spoon stores potential energy (like a coiled spring ready to pop)
- Releasing it converts to kinetic energy—WHOOSH, there goes the candy!
- Different pull-back distances mean different flight paths
Watch their faces light up when they realize *they* control how far that heart soars. It’s basically physics class disguised as pure chaos. And honestly? The best kind of mess you’ll ever clean up.
DIY Bow and Arrow Explores Elastic Energy and Trajectories

Ready to level up from catapults? Grab a popsicle stick, a rubber band, and some cotton swabs. You’re about to build a mini bow and arrow that actually works!
Here’s the cool part: when you pull back that rubber band, you’re storing elastic energy.
It’s like a coiled spring just waiting to explode.
Release it, and whoosh—your cotton swab flies across the room!
Now try some trajectory analysis.
Aim high, aim low, aim sideways.
What happens?
You’ll notice arrows shot at an angle go farther than ones fired straight out.
Physics is sneaky like that.
Pro tip: add paper heart targets on the wall.
Nothing says “Happy Valentine’s Day” like launching Cupid’s arrows at your siblings.
Science has never been this romantically chaotic!
Balancing Hearts Toy Teaches Center of Mass Basics
Ever wonder why tightrope walkers carry those long poles? It’s all about mass balance! This adorable balancing heart toy shows kids the same principle in action.
Cut a heart shape from cardstock. Attach two paper clips to the bottom curves. Now balance it on your fingertip. Magic? Nope—science!
Why it works:
- The paper clips shift the center of mass below your finger
- This creates stable equilibrium concepts in action
- The heart literally can’t fall over without fighting gravity
Your kid will gasp when that heart refuses to topple.
It looks impossible!
Try adding coins or moving the clips around.
Watch how the balance point changes.
It’s like having a tiny circus performer right on your fingertip—no net required.
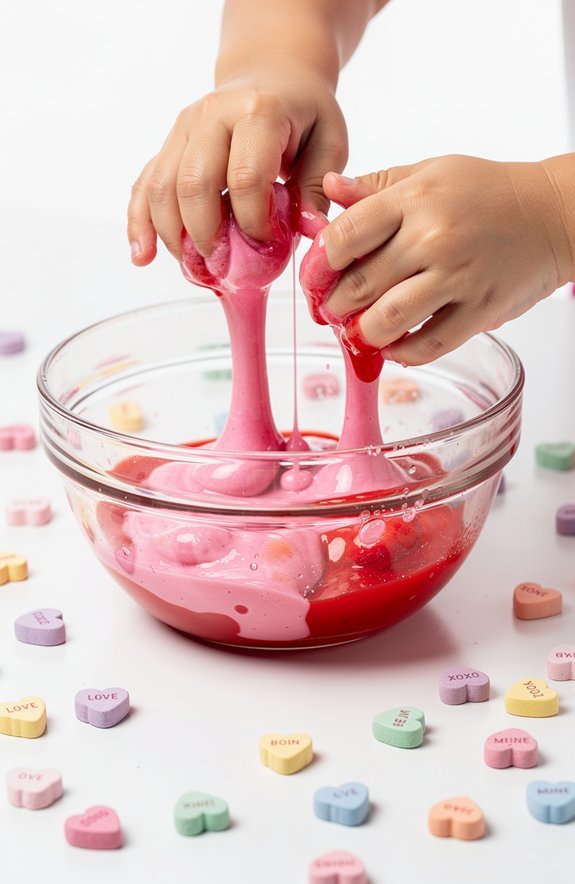
Valentine Sensory Science With Slime and Strange Materials
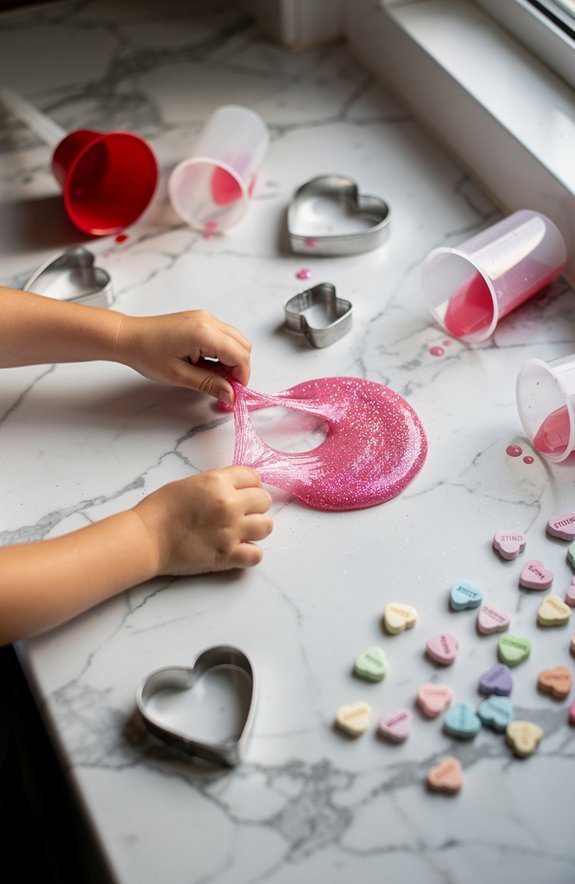
Making slime is basically a rite of passage for kids, and Valentine’s Day gives you the perfect excuse to get gloriously gooey. Add red and pink food coloring to your basic slime recipe, toss in some heart-shaped confetti, and boom—instant Valentine magic.
Here’s where it gets sciency. Slime is perfect for viscosity experiments because it’s neither liquid nor solid.
It’s weird. Kids can stretch it slow (smooth!) or yank it fast (snap!). That’s viscosity in action.
Don’t stop at slime, though. Texture exploration opens up wild possibilities. Make oobleck with cornstarch and water. Add valentine sprinkles to kinetic sand. Let kids squish, poke, and describe what they feel. Their brains are making connections while their hands make a mess. Win-win.
Valentine Oobleck Acts as Both Solid and Liquid
When you punch oobleck, it fights back like a solid—but leave your hand still, and it swallows your fingers like quicksand.
Oobleck breaks all the rules—solid when you strike, liquid when you surrender.
This weird goo messes with your brain in the best way!
The secret? Shear viscosity.
When you apply force fast, the cornstarch particles lock together.
Slow down, and they slide apart.
Why Kids Go Crazy for This Stuff:
- You can roll it into a ball, then watch it melt through your fingers
- It remembers how you touched it (that’s thixotropic memory being awesome)
- You can literally walk on a pool of it if you move quick enough
Add pink food coloring and heart sprinkles for Valentine vibes. Your kids won’t believe science can be this squishy and strange!
Enchanted Rose Slime Shows Polymer Cross-Linking
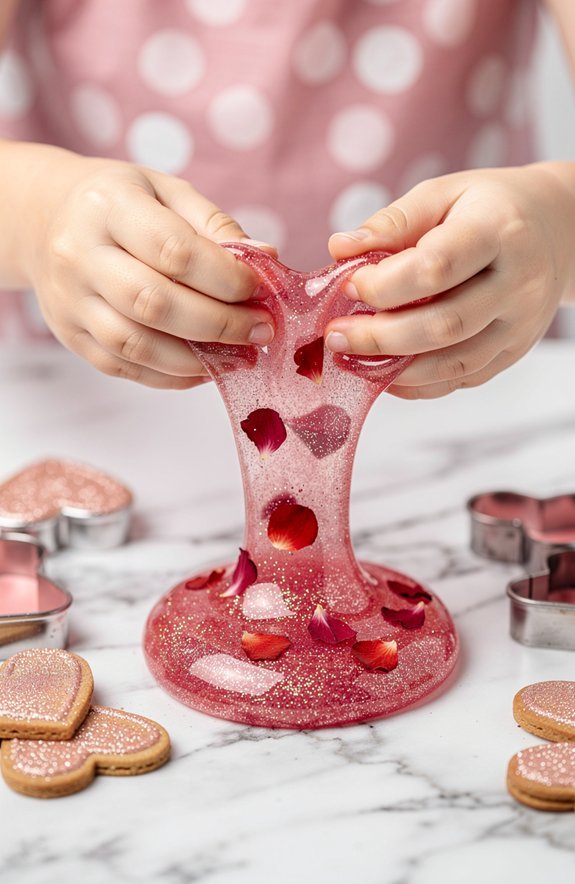
Oobleck’s weird solid-liquid magic is cool, but slime takes things to a whole new level of stretchy, gooey fun.
When you mix glue with activator, you’re actually doing polymer crosslinking—fancy science talk for connecting long molecule chains together.
It’s like linking paper clips into a stretchy net!
Add some rose-scented oil and pink glitter for that enchanted vibe.
Your kids will go absolutely bonkers watching the mixture transform from runny goop to perfect, pullable slime.
This is one of the best viscosity experiments because you can actually feel the thickness change in your hands.
The more activator you add, the firmer it gets.
Too much? You’ve got a bouncy ball.
Just right? Pure squishy perfection.
Science has never smelled this good!
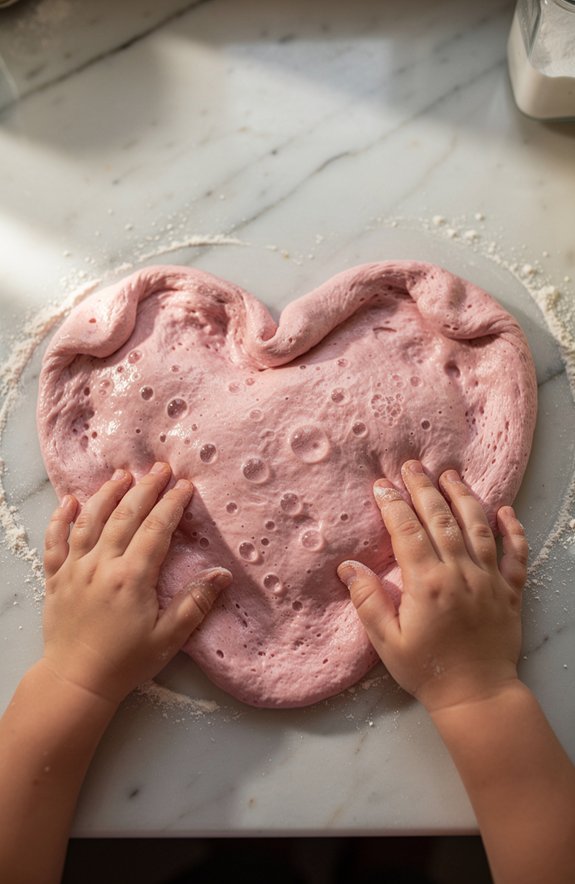
Homemade Valentine Playdough Tests Ingredient Ratios
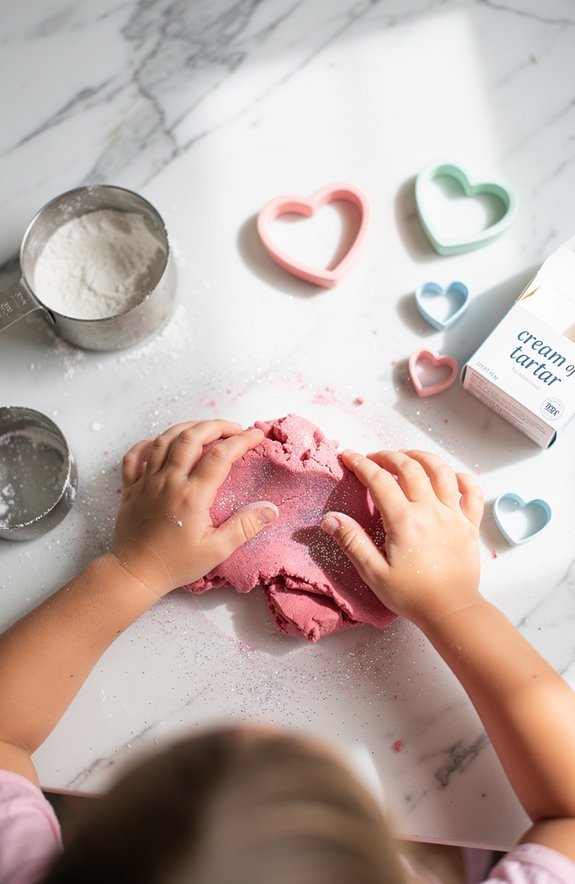
Because playdough is basically edible science clay, it’s the perfect way to teach your kids about ingredient ratios without any boring math worksheets.
Too much flour? Crumbly disaster.
Too much water? Sticky nightmare on your hands.
Your kids will quickly learn ratio sensitivity matters when their playdough won’t cooperate!
Try These Texture Experiments:
- Double the salt and watch the dough get grainy and weird
- Skip the cream of tartar and see how fast it falls apart
- Add extra oil for super smooth, stretchy results
Toss in some red food coloring and heart-shaped cookie cutters for Valentine vibes.
The best part? When they mess up the recipe, they’ll actually understand *why* it flopped.
That’s real science learning disguised as messy fun!
Melt and Mold Heart Crayons to Observe Phase Changes
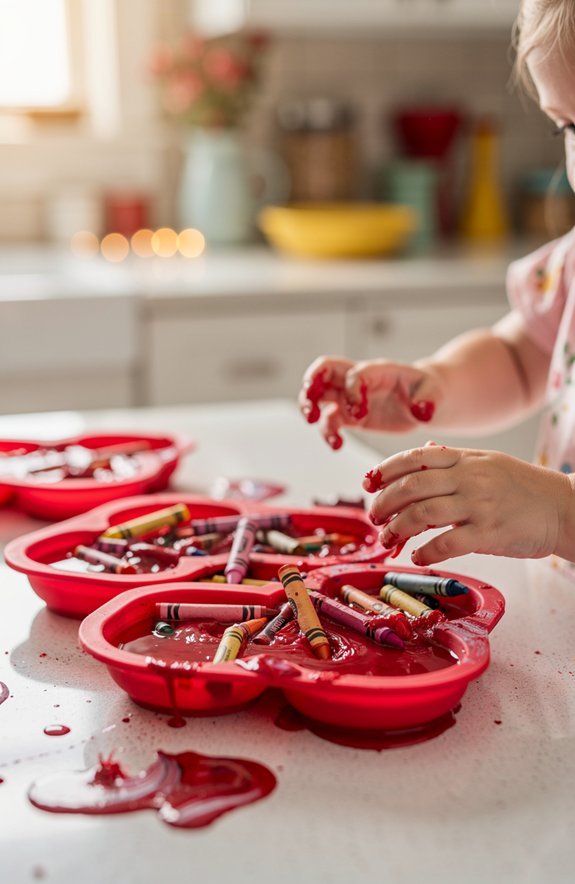
Grab those broken crayon stubs hiding in your junk drawer—they’re about to become Valentine’s science!
Peel off the paper wrappers, break crayons into small chunks, and toss them into silicone heart molds.
Pop those bad boys in the oven at 250°F for about 15 minutes.
Here’s where the magic happens.
Your melting observations will blow your mind!
Watch solid wax transform into a colorful liquid pool.
It’s like a tiny rainbow lava pit.
Once cooled, you’ve got brand-new heart crayons.
The crayon molding process teaches kids about phase changes—solid to liquid and back again.
Heat adds energy, molecules move faster, and boom: liquid wax.
Remove heat, everything slows down, and you’re back to solid.
Science *and* a cute Valentine gift? Win-win!
Magnetic Hearts Attract and Repel Based on Polarity

Bar magnets and foam hearts are about to become your new favorite science combo! Cut heart shapes from craft foam, then glue small magnets to the back. Now watch the magic happen when two hearts meet!
Love meets science when foam hearts and magnets create instant attraction—or dramatic rejection—right before your eyes!
What you’ll discover:
- Hearts with opposite poles zoom together like best friends reuniting
- Same poles push apart dramatically—talk about relationship drama!
- You can make hearts “chase” each other across a table
The polarity dynamics here are surprisingly simple.
Every magnet has a north and south end.
Opposites create magnetic attraction, while matching ends basically say “nope, not today!”
Your kids will giggle watching hearts reject each other.
It’s like a tiny soap opera on your kitchen table.
Science has never been this entertaining!
Valentine Circuit Projects That Light Up and Glow
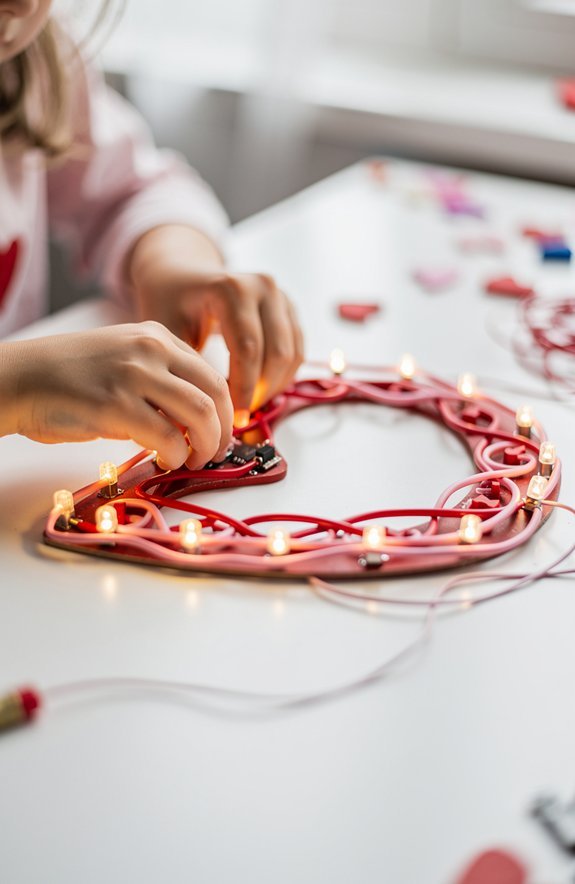
Ready to swap magnets for electricity?
Let’s make Valentine’s cards that actually light up!
Grab some copper tape, a coin battery, and an LED.
Stick the tape in a heart shape, add your battery, and boom—glow circuits that’ll make everyone jealous.
Here’s the cool part: you can use conductive glue to connect everything without soldering.
Just squeeze, stick, and watch the magic happen.
Draw a heart, trace it with glue, let it dry, and attach your LED.
It’s basically arts and crafts with superpowers.
The best part? When someone opens your card and it lights up, their face will be priceless.
Way better than those boring store-bought valentines, right?
Science just made you the coolest kid in class.
Simple LED Heart Circuit Lights up With Conductive Glue
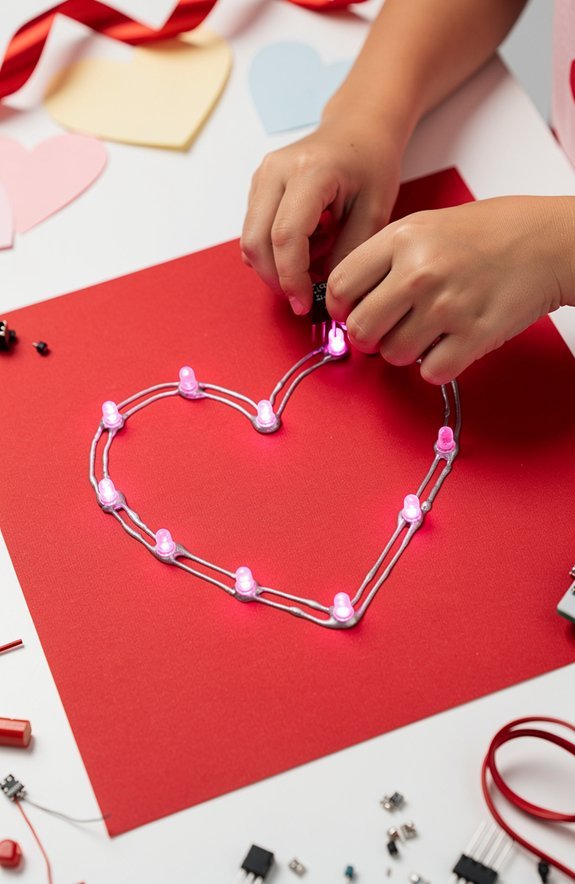
The secret weapon for this project is conductive glue, and it’s basically liquid electricity paths in a tiny bottle.
You’ll draw a heart shape, add an LED, connect it to a coin battery, and boom—instant glow-up!
The glue conductivity makes this way easier than messing with wires.
Just squeeze and draw your circuit lines.
Kids go absolutely nuts when their hearts actually light up.
What makes this project awesome:
- No soldering required—the glue does all the heavy lifting
- Circuit durability means your heart keeps glowing for days
- You can decorate around the LED without breaking anything
The best part? Mistakes wipe off before the glue dries. So if your circuit looks more like a blob than a heart, just try again!
Light-Up Valentine Cards Use Paper Circuit Engineering
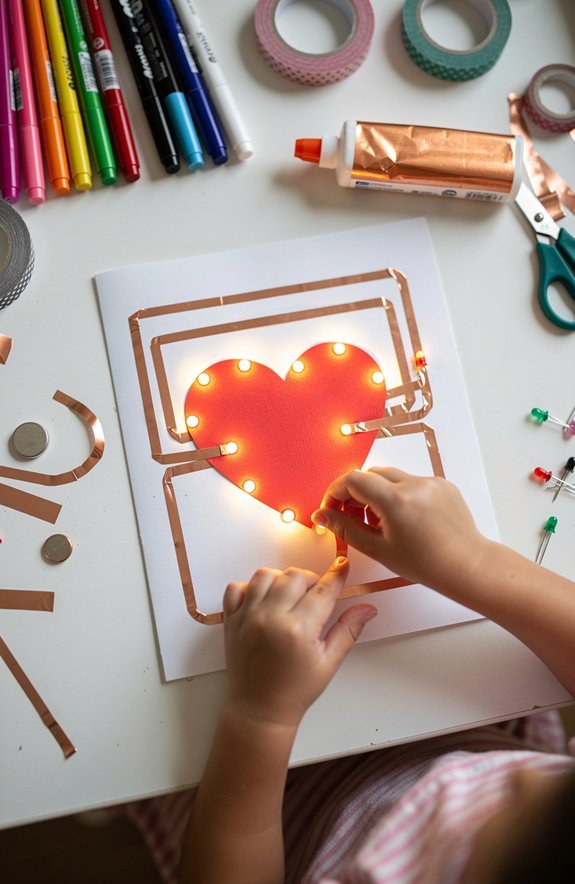
Taking that conductive glue magic one step further, you can build entire light-up Valentine cards using paper circuit engineering!
This is where things get seriously cool.
Paper circuits turn ordinary cardstock into working electronics.
Paper circuits transform simple cardstock into functional electronics—proving real engineering can happen with craft supplies.
Mind-blowing, right?
You’ll use copper tape as your “wires,” a coin battery for power, and tiny LEDs to make hearts actually glow.
Understanding LED basics helps here—these little lights only work one way.
The longer leg is positive, shorter is negative.
Mix them up and nothing happens.
It’s like putting batteries in backward.
Kids go absolutely bonkers when their homemade card lights up.
They drew it, they built it, and boom—it glows!
That’s real engineering happening on your kitchen table.
The best part?
Recipients keep these cards forever.
Way better than store-bought!
Valentine Code-Breaker Puzzles Introduce Cryptography
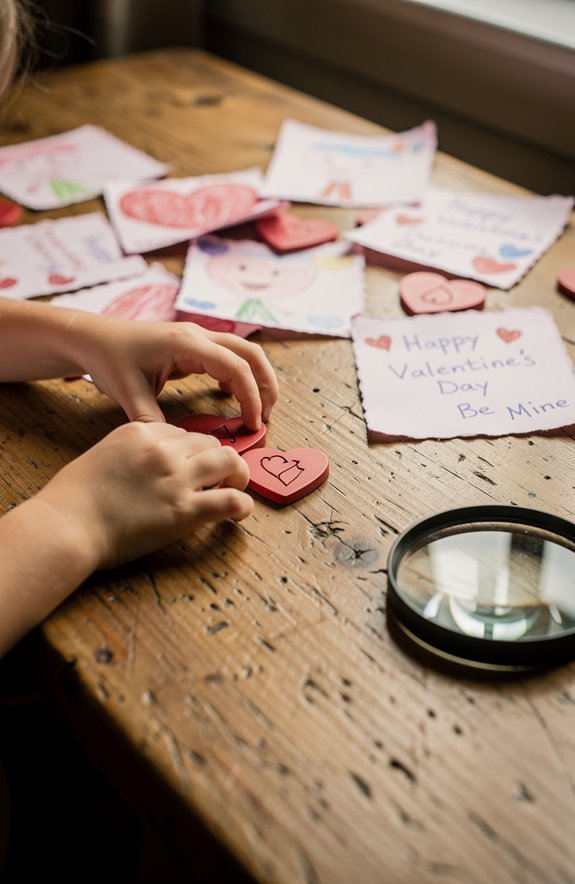
Why not turn Valentine’s Day into a secret spy mission?
Your kids can learn cipher basics while cracking codes about love and friendship.
It’s like being a detective, but with hearts instead of magnifying glasses!
Cryptogram puzzles turn ordinary messages into brain-bending mysteries.
Each letter gets swapped for another, and your little code-breakers must figure out the pattern.
- Symbol Swap: Replace letters with Valentine symbols—hearts for A, arrows for B, roses for C
- Number Codes: Assign each letter a number (A=1, B=2) and write secret messages
- Backward Writing: Start simple by writing words in reverse
The best part? Kids don’t even realize they’re learning logic and pattern recognition.
They just think they’re cracking top-secret Valentine intel!
Invisible Ink Love Notes Reveal Hidden Chemical Reactions
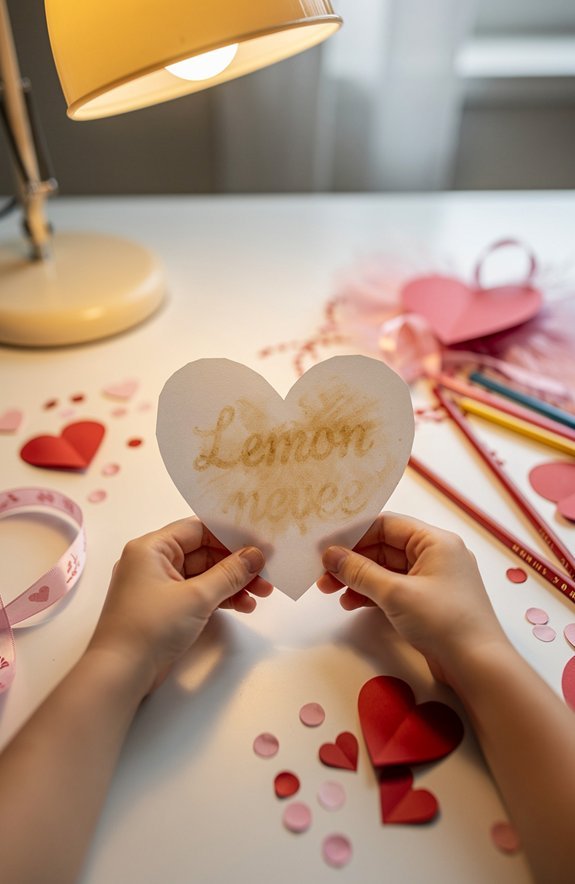
When you combine lemon juice and heat, something magical happens—invisible messages suddenly appear out of nowhere! Your kids will flip out when they write secret Valentine’s notes that only reveal themselves over a warm light bulb or candle.
Here’s the deal: lemon juice contains carbon compounds that are colorless when wet. But heat triggers reaction mechanisms that break down those compounds and turn them brown. It’s basically controlled burning without the flames!
The science is simple: heat causes colorless carbon compounds in lemon juice to break down and turn brown.
Dip a cotton swab in lemon juice, write your message, and let it dry completely.
Then hold the paper near a heat source and watch the words magically appear.
Pro tip: this teaches kids about privacy implications too—some secrets aren’t as hidden as we think!
Baking soda and grape juice work great as alternatives.
Valentine Optical Illusions With Spinning and Folding
The coolest thing about optical illusions is how they trick your brain into seeing stuff that isn’t really there—and Valentine’s Day versions are ridiculously fun to make!
Spinning illusions work like magic when you twist a paper disc and watch two separate images blend into one.
Your eyes literally can’t keep up! Folding optics create wild effects too—fold a heart card just right, and boom, it looks like it’s beating.
Try These Mind-Bending Valentine Illusions:
- Thaumatrope Hearts – Spin a disc with a heart on one side and an arrow on the other to merge them together
- Folding Fortune Tellers – Create peek-a-boo love messages that appear and disappear
- Spinning Color Wheels – Watch red and pink swirl into totally new shades
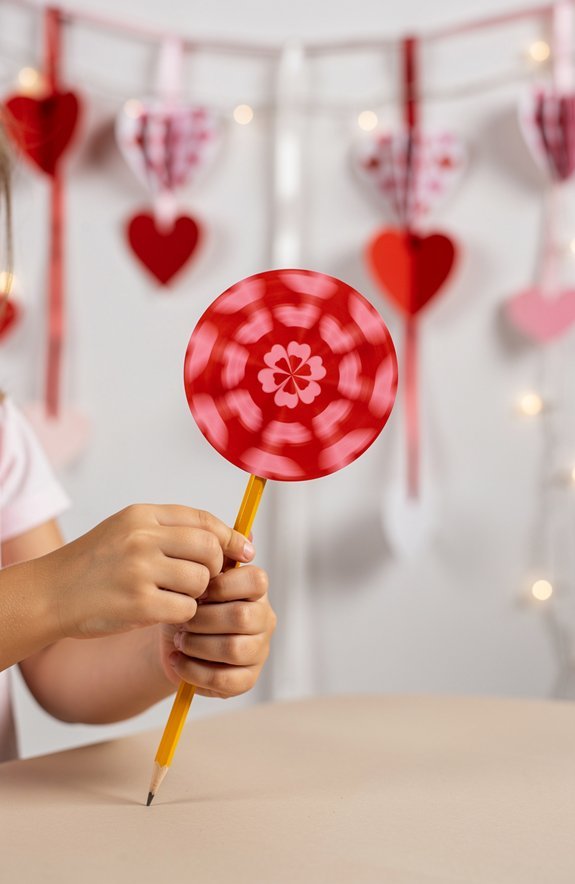
Thaumatrope Valentine Demonstrates Persistence of Vision
Thaumatropes take that spinning disc trick to a whole new level—and there’s actual science behind why they work!
Here’s the deal: you draw a heart on one side of a card and an arrow on the other.
Attach strings to both edges, then twist them between your fingers.
The spinning mechanism makes both images blur together, so it looks like the arrow is going straight through the heart.
Magic? Nope—visual persistence!
Your brain holds onto images for a split second after they disappear.
When the disc spins fast enough, your eyes can’t tell the pictures are separate anymore.
They just smoosh together into one image.
Kids go absolutely bonkers for these things.
They’re basically the original animation technology, and they cost like five cents to make!
Agamograph Hearts Create Illusions With Viewing Angles
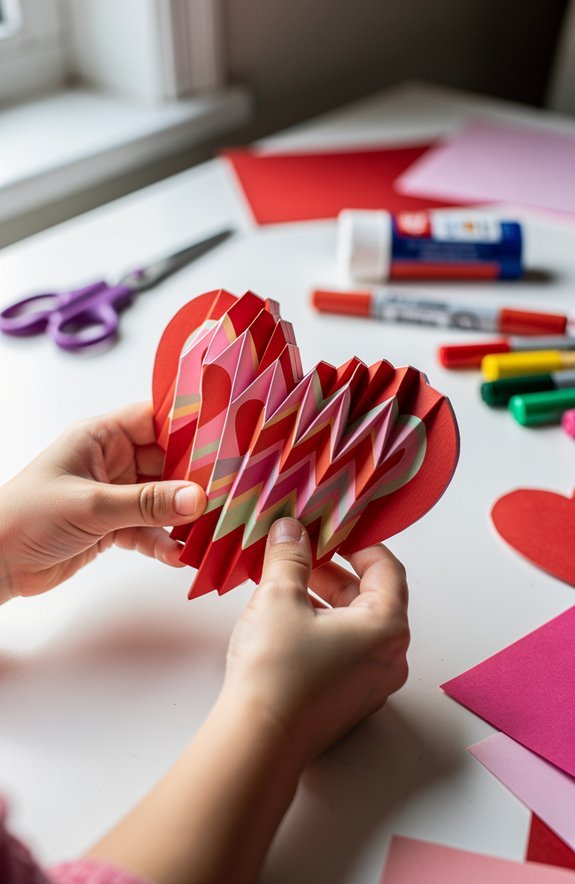
Folded paper might seem boring, but agamographs turn a simple accordion fold into a mind-bending optical illusion!
You’ll draw two different heart designs, slice them into strips, then fold them into zigzags. Here’s where the magic happens—tilt left, see one image. Tilt right, boom, totally different picture! This illusion technique makes your brain do a double-take every single time.
Why kids go crazy for this:
- It feels like actual wizardry in their hands
- They can create secret messages that “disappear”
- The parallax study concepts click instantly when they see it work
The science? Your eyes only catch certain strips depending on your viewing angle. It’s basically a tiny billboard that changes without batteries. Pretty sneaky, paper. Pretty sneaky!
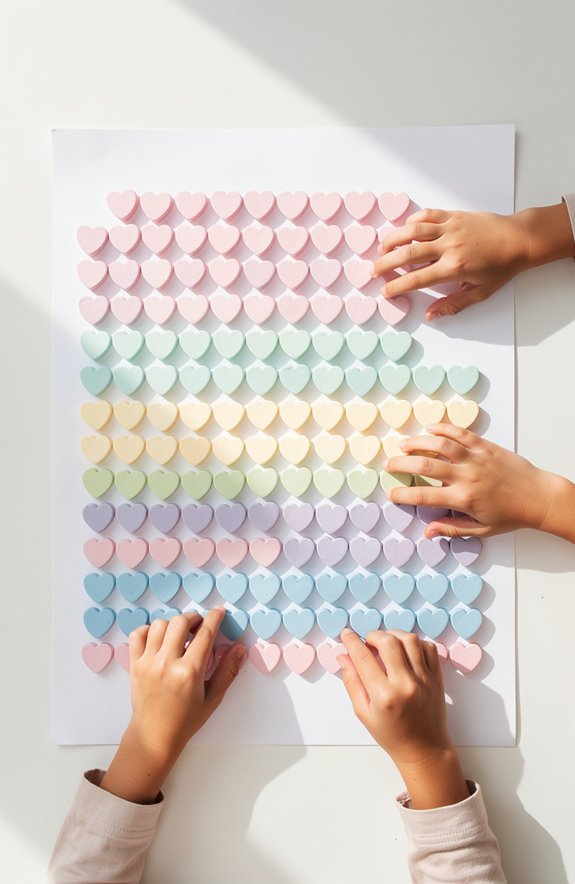
Valentine Math Activities Using Hearts and Candy
Candy hearts aren’t just for eating—they’re secretly tiny math manipulatives in disguise! Grab a bag and let your kids sort them by color, then create candy graphs to compare which shade wins. It’s basically a popularity contest for sweets.
Want to level up? Cut paper hearts into halves, thirds, and quarters to explore heart fractions. Ask your kiddo which piece they’d rather eat—suddenly fractions make total sense!
You can also use candy for addition, subtraction, and pattern-making. Line up pink, purple, pink, purple… then ask what comes next. Easy peasy.
The best part? Math mistakes are delicious. Wrong answer? Eat the evidence and try again. Your kids won’t even realize they’re learning because they’re too busy eyeing their “supplies.”
Heart Sticker Math Games Build Early Number Sense
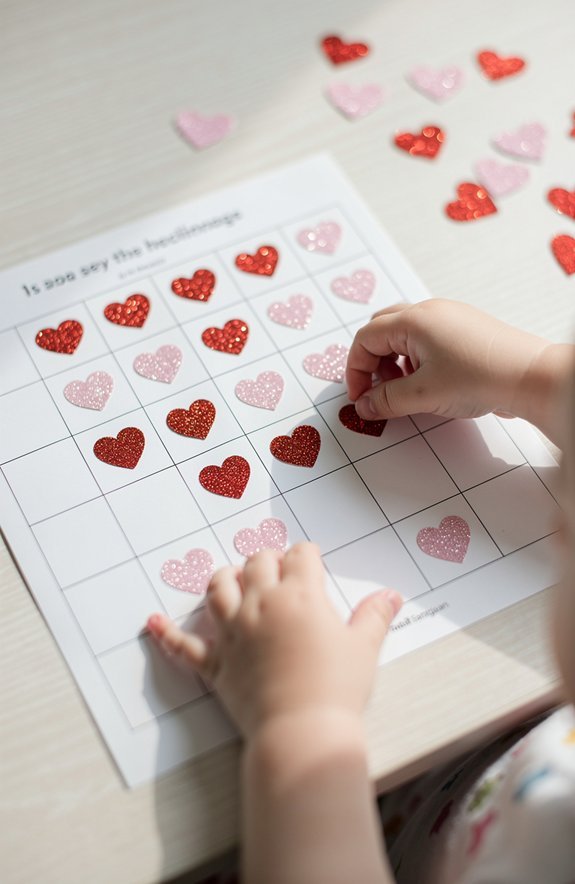
If you’ve run out of candy (or eaten it all—no judgment here), heart stickers are your new best friend.
Heart stickers are the secret weapon when the candy stash mysteriously disappears.
These little sticky wonders turn counting hearts into a full-blown math adventure.
Kids peel, stick, and suddenly they’re number wizards.
Here’s how to make stickers work overtime:
- Roll and stick – Roll a die, then stick that many hearts on paper
- Pattern party – Create sequences like red-pink-red-pink for pattern recognition practice
- Number match – Write numbers 1-10 and have kids add the matching sticker count
The best part? Stickers don’t melt in tiny hands or cause sugar crashes.
Your couch stays clean, and your kid gets smarter.
That’s what we call a parenting win.
Möbius Heart Strips Show Surfaces With Only One Side
The Möbius strip is basically a magic trick you can make with paper and tape.
Cut a paper strip, give it one twist, then tape the ends together.
Now run your finger along the surface.
You’ll keep going and going without ever lifting your finger—because there’s only one side!
This one sidedness paradox will blow your kid’s mind.
Here’s where it gets wild.
Draw a line down the middle and cut along it.
Instead of two separate rings, you get one giant connected loop!
The twist topology creates shapes that seem impossible.
To make it Valentine’s themed, use red or pink paper.
Cut your final creation into a heart shape.
Your kids just learned real math concepts while making decorations.
Science sneaks in everywhere!
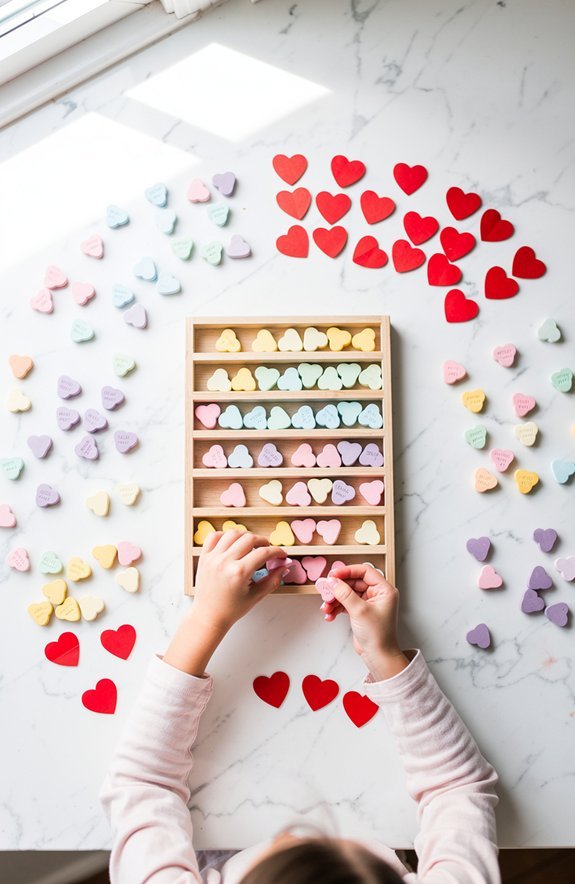
Candy Heart Graphing Sorts Colors Into Bar Charts
From paper loops with one side to candy you can actually eat—now we’re talking!
Grab a bag of conversation hearts and dump them out.
Your job? Sort those little sweethearts by color coding each pile.
Pink here, purple there, white in the corner.
Once sorted, stack them up or draw bars on paper to match your counts.
Boom—you’ve got data visualization that looks like a rainbow!
Why kids flip for this activity:
- You get to count candy (and maybe sneak one or two)
- Bar charts suddenly make total sense when they’re edible
- Comparing “most” versus “least” becomes obvious instantly
The best part? When the math lesson ends, the snacking begins.
Science has never tasted this good!
Gummy Heart Engineering Tests Structural Stability

Because gummy hearts are basically squishy little building blocks, they’re perfect for testing what shapes can hold the most weight.
Give your kid a pile of gummy hearts and some toothpicks, then challenge them to build structures.
Triangles? Squares? Weird wobbly towers? Let them go wild.
Here’s where it gets exciting—load testing time!
Stack pennies or small toys on top until everything collapses.
(The dramatic crash is half the fun.)
Kids quickly learn that triangles are ridiculously strong while squares just flop over like tired puppies.
One tricky part? Material consistency matters.
Some gummy hearts are firmer than others, which totally affects your results.
That’s real engineering talk right there!
Your kiddo just became a tiny structural engineer.
Pretty impressive for a Tuesday afternoon, honestly.
In case you were wondering
Can These Valentine Science Experiments Be Adapted for Classroom Group Activities?
You can easily adapt these experiments for classroom groups by assigning group roles like materials manager, recorder, and presenter. You’ll want to establish clear assessment criteria beforehand so students understand expectations and learning goals.
How Long Does Each Valentine STEM Experiment Typically Take to Complete?
Just as hearts sync in rhythm, your procedure timing aligns perfectly with class periods. You’ll find duration estimates range from 10-30 minutes per experiment, so you can easily fit multiple activities into one session.
Which Valentine Science Experiments Work Best for Science Fair Projects?
You’ll find candy heart dissolution and flower color absorption experiments work best because they meet typical project criteria requiring measurable variables. They’re easy to document, and you can create compelling data presentation through charts and photographs.
Are There Printable Worksheets Available for These Valentine STEM Activities?
Yes, you’ll find printable worksheets for these Valentine STEM activities online. Availability options include free downloads from educational blogs, Teachers Pay Teachers, and Pinterest. You can also create custom worksheets matching your specific experiments.
What Valentine Science Experiments Can Kids Do Independently Without Adult Help?
You might worry about messes, but many Valentine experiments need no supervision when you follow safety guidelines. Kids can independently create heart chromatography, mix baking soda volcanoes, or observe candy hearts dissolving in different liquids.
Conclusion
You’ve got the candy. You’ve got the supplies. You’ve got experiments that’ll make your kids think you’re basically a wizard.
So grab those conversation hearts, fill up some bowls with warm water, and let the magic happen. Your kitchen becomes a lab. Your candy becomes a lesson. Your Valentine’s Day becomes legendary.
Now go make some messy, colorful, sciency memories!