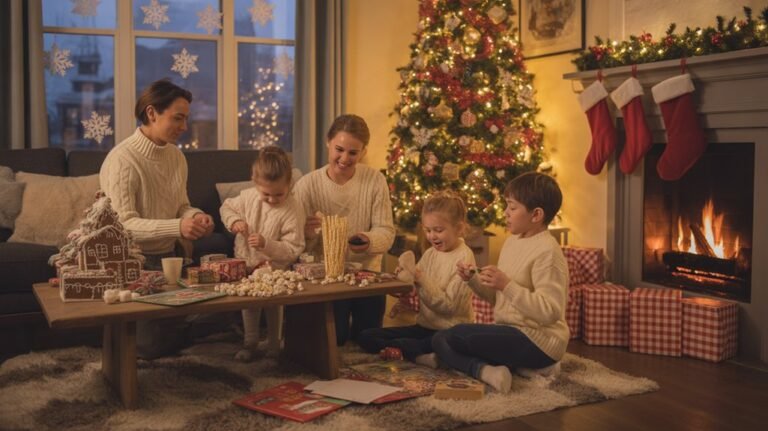
What Crafty Holiday Activities for Tweens?
Try tween-loved crafts that feel big-kid and fun: 1) DIY ornament station with paint pens and sequins. 2) Personalized stockings with felt letters and pockets. 3) Hot cocoa bar plus mug painting. 4) Gift-tag and wrapping lab. 5) Gingerbread team build-off with roles. 6) Snow globe jars or mini winter terrariums. 7) Upcycled sweater mittens. 8) Simple scented soy candles. 9) Photo-booth props and a fast scrapbook page. You’ll get steps, tips, and easy wins next.
DIY Ornament Workshop Night
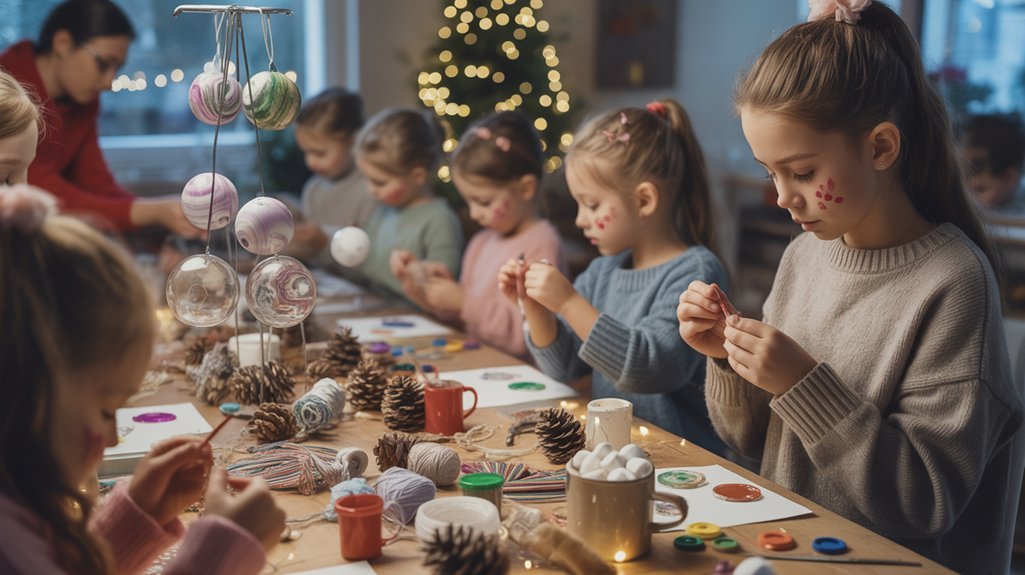
Even if your week is busy, you can still host a cozy DIY Ornament Workshop Night that feels easy and fun. You want to serve your tweens and their friends well. This plan helps you do that with calm and care.
1) Gather supplies
- Clear or wood ornaments
- Paint pens, glue, ribbon
- Felt, sequins, twine
2) Set the tone
- Play soft music
- Offer cocoa and fruit
- Lay out stations by ornament design
3) Guide the craft
- Demo simple steps
- Model safe tool use
- Encourage festive colors
4) Keep hearts first
- Praise effort
- Invite kind teamwork
- Share stories as you create
5) Finish strong
- Dry on labeled trays
- Snap a group photo
- Pack take-home kits
You’ll lead with love. They’ll beam with pride. Warm hands, bright hearts.
Personalized Stocking Decorating
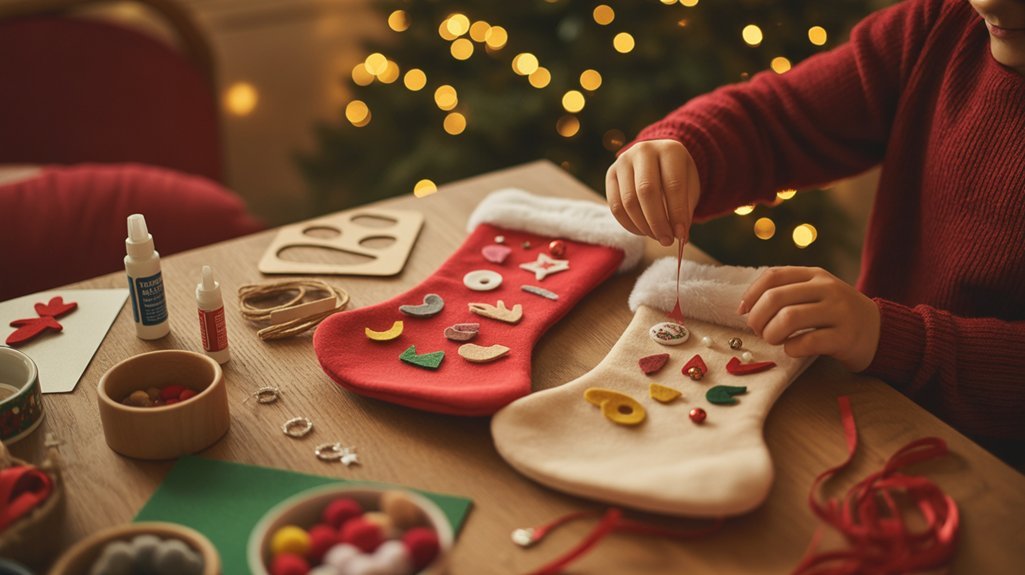
Ornaments drying on the table? Perfect time to switch to stockings and share some love. You’ll guide tweens to make gifts that lift others. Keep it simple, kind, and fun.
Ornaments drying? Switch to stockings and craft simple, kind gifts that lift others.
1) Prep
- Lay out plain stockings, scrap felt, stencils, and brushes.
- Share a short plan and a smile. You’ve got this.
2) Personalize
- Sketch names in chalk.
- Try fabric paint techniques: dot borders, gentle ombré, thin-line outlines.
- Add felt hearts, stars, and tiny pockets for notes.
3) Serve
- Invite kids to design for someone else: a neighbor, coach, sibling.
- Talk stocking stuffer ideas: tea bags, lip balm, pens, granola bars.
4) Finish
- Glue on trims: ribbon, pompoms, buttons.
- Slide in a handwritten blessing.
- Dry flat. Clean up together.
- Deliver with warmth—and a proud grin.
Hot Cocoa Bar and Mug Painting
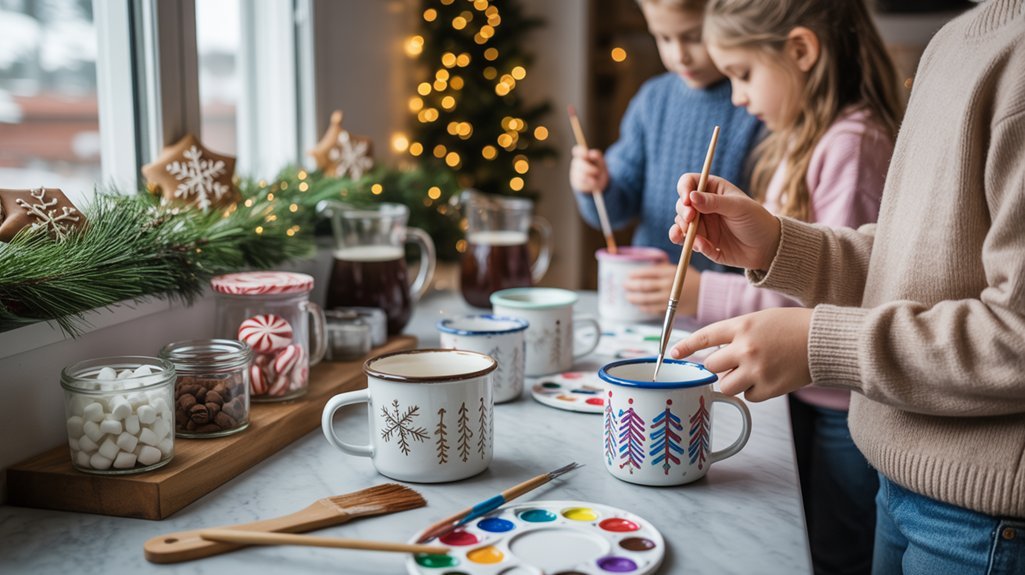
While mugs and cocoa feel simple, they create big cozy magic for tweens. You can host a moment that warms hands and hearts. It’s service with a smile. You guide, they create, everyone feels cared for.
1) Set the scene
- Lay out cocoa mixes, toppings, and spoons.
- Share two easy hot cocoa recipes: classic, and peppermint.
- Add milk, non-dairy options, and water for choice.
2) Paint the mug
- Offer simple mug design ideas: initials, snowflakes, tiny hearts.
- Use porcelain pens. Bake per pen directions.
3) Build the bar
- Bowls for marshmallows, peppermint bits, cinnamon.
- Clear labels and small scoops.
- Napkins, wipes, and a spill cloth.
4) Serve with heart
- Invite taste tests.
- Encourage kind notes on mugs.
- Snap a group photo. Celebrate small wins.
Handmade Gift Tag and Wrapping Station

Mugs are cooling on the rack, and the cozy mood keeps going at a Handmade Gift Tag and Wrapping Station. You’ll guide tweens to bless others with simple gift tag designs and smart wrapping techniques. Keep it calm. Keep it fun. Keep it giving.
1) Set up stations
- Paper, tags, ribbon
- Tape, scissors, twine
- Stamps, markers, stickers
2) Teach easy wins
- Loop, tie, tuck
- Layer colors
- Add a message
3) Cheer progress
- Praise effort
- Share ideas
- Snap a photo
| Idea | Supplies | Time |
|---|---|---|
| Stamped tag | Ink, stamp | 3 min |
| Ribbon belly band | Ribbon, tape | 2 min |
| Kraft paper wrap | Paper, twine | 4 min |
| Washi frame tag | Washi, tag | 3 min |
| Leaf sprig tie | Twig, string | 2 min |
Invite them to make two: one to give, one to keep.
Gingerbread House Build-Off
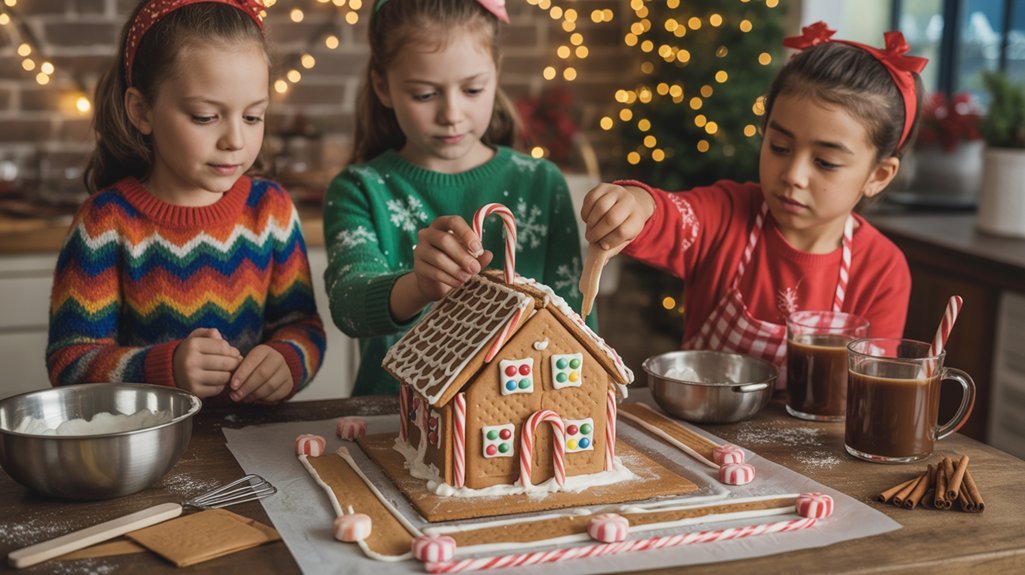
You’ll kick off your Gingerbread House Build-Off by setting team roles—planner, builder, decorator—and a quick game plan.
Pick a fun theme with a twist, like snowy ski lodge, candy castle, or space station with pretzel “solar panels.”
Use smart edible engineering: trim warm walls for clean edges, anchor with thick royal icing, brace with graham crackers, and let roof pieces set before you add candy.
Team Roles and Strategy
Before the frosting flies, set clear team roles so everyone knows what to do and when. You’ll build faster and serve each other better with team collaboration and smart task delegation. Keep it kind. Keep it simple. Everyone contributes.
1) Choose roles
- Lead Builder: handles walls and roof.
- Frosting Captain: mixes, fills bags, checks consistency.
- Detail Artist: places candy, adds neat touches.
- Runner/Helper: gathers supplies, wipes spills, cheers.
2) Set a plan
- Pick a build order: walls, roof, trim.
- Time-box steps: 10, 10, 10.
- Use a signal word: “Pause” for fixes.
3) Work the strategy
- Stage tools before starting.
- Rotate jobs halfway for fairness.
- Keep hands clean and stations tidy.
4) Communicate with care
- Ask, don’t boss.
- Share wins.
- Swap if someone feels stuck.
Creative Themes and Twists
Even a simple cottage can shine when you give it a fun twist. You want kids to serve joy, not just stack candy. So guide them to choose themes that bless others—neighbors, teachers, or a community cause. Keep it playful. Keep it kind. You’re building memories and a little hope.
1) Pick a purpose
- Thank-you cottages for helpers
- Cozy library nook scene
- Winter animal rescue village
2) Set a theme
- Color stories: silver-blue calm, red-gold cheer
- Story prompts: “Snowy train stop,” “Tiny bakery lane”
- Music vibe: carols, lo-fi, quiet focus
| Theme Idea | How It Serves |
|---|---|
| Gratitude Street | Deliver with notes to staff |
| Kindness Cafe | Share with cocoa stand |
| Memory Lane | Honor elders’ stories |
3) Add holiday art touches and simple festive crafts. Keep it joyful. Keep it generous.
Edible Engineering Tips
Two strong rules lead to sturdy, stress-free builds: start with smart parts and use the right “glue.”
Work on a flat board or tray. Use royal icing for strength. Let walls dry before adding a roof. Choose flat, firm cookies as panels. Keep kindness in the plan—build to share.
1) Cut, check, and chill. Measure pieces so edges meet. Chill baked parts for structural stability.
2) Pipe, press, and pause. Pipe thick icing, press panels, then pause 10 minutes. Patience serves everyone.
3) Brace, roof, and seal. Use cans as braces. Add roof last. Seal seams inside and out.
- Use edible materials like graham crackers, pretzels, and fondant shingles.
- Add cereal “tiles,” gumdrop “trees,” and licorice trims.
- Make mini houses to gift to neighbors.
Snow Globe Jars and Winter Terrariums

One sparkly jar can turn a snowy afternoon into calm, hands-on fun. You’ll guide tweens to make gifts that comfort others. Small, sweet, and easy to share.
1) Gather supplies
- Clean jars with tight lids
- Figurines, tiny trees, ribbon
- Glycerin, glitter, water
- Pebbles, moss, bottlebrush trees for terrariums
- Hot glue, spoon, towel
2) Build snow globe designs
- Glue figurine to lid. Let dry.
- Fill jar with water, a few drops glycerin, a pinch of glitter.
- Twist lid tight. Add ribbon. Test shake. Adjust glitter if needed.
3) Create winter terrarium themes
- Layer pebbles, then moss.
- Tuck in a tree, a pine cone, a tiny note of hope.
4) Serve with heart
- Deliver to neighbors.
- Add tags: “You matter.” “Warm wishes.”
Upcycled Sweater Mittens and Hats
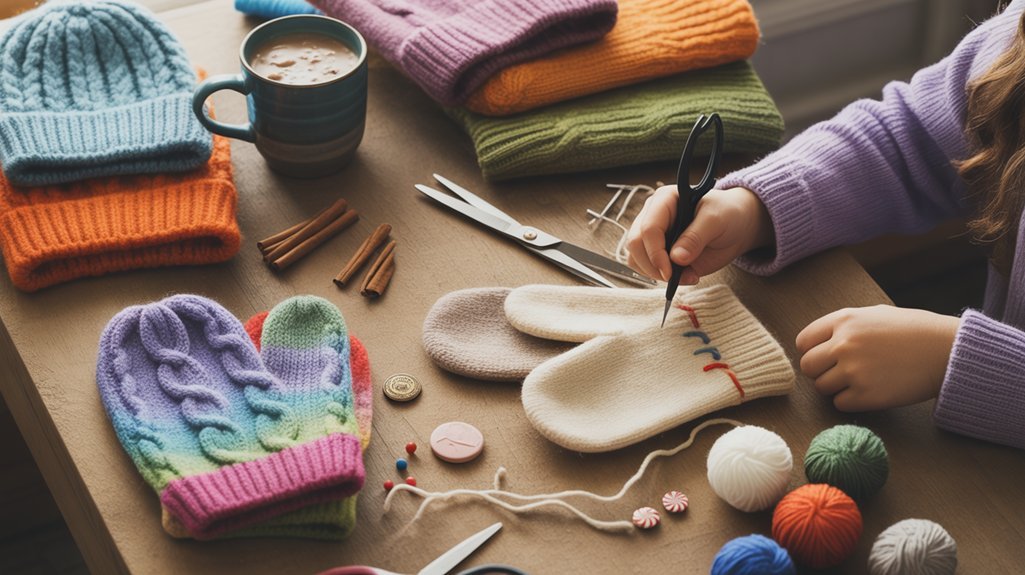
Start by choosing thrifted sweaters that feel soft, not scratchy—think wool blends, chunky knits, bright stripes.
Use a simple mitten pattern you trace from your hand, then cut, pin, and stitch; make a matching hat from the ribbed hem.
Add charm with patches—felt stars, tiny hearts, or iron-ons—and you’ve got cozy gear with personality.
Choosing Thrifted Sweaters
When you’re hunting for sweaters to upcycle, think cozy first and sturdy second.
You want soft knits that feel kind on skin and hold shape. For sweater upcycling, choose wool, wool blends, or thick cotton. Skip itchy acrylic that pills fast.
Check ribbing at cuffs and hems. Tug seams. Look for holes, then imagine smart patches.
1) Start
- Scan size racks for bigger fits. More fabric means more options.
- Roll sleeves to spot hidden wear.
- Read tags: 70%+ wool is gold.
2) Test
- Lightly stretch elbows and cuffs. If they bounce back, you’re good.
- Hold to light to find thin spots.
3) Select
- Choose coordinating colors for sets.
- Grab textures tweens love: cable, rib, fuzzy.
- Celebrate thrift shop finds that serve others and the planet.
Simple Mitten Pattern
Those cozy, sturdy sweaters you found are ready for a second life—let’s turn them into simple mittens tweens can actually wear and love.
1) Make a pattern: Trace a hand on paper with thumb out. Add a 1/2-inch border. Label cuff.
2) Cut fabric: Place sweater double-layered. Align cuff at ribbing. Pin. Cut two mirror pieces per mitten.
3) Use easy sewing techniques: With right sides together, stitch around the curve. Leave the cuff open. Reinforce the thumb curve.
4) Turn and test: Flip right side out. Slide on a hand. Check fit. Trim bulk at curves if needed.
5) Finish cuffs: Fold once. Zigzag or blanket stitch.
Tips:
- Try varied mittens designs: long cuffs, color-block palms, cozy fleece lining.
- Choose sturdy seams: small zigzag, ballpoint needle, slow speed.
Warm hands. Warm hearts.
Embellish With Patches
Even a small patch can turn plain mittens and hats into story pieces—little badges of style and care. You’re making warmth and joy, not just gear.
Start simple. Choose a patch design that shares kindness, school spirit, or a fun hobby. Keep edges smooth. Pick sturdy thread. Smile when it’s a little crooked. Handmade shows love.
1) Plan
- Sketch your patch design on paper.
- Test placement with pins.
- Decide hand-sewn or iron-on.
2) Prep
- Do careful fabric selection: felted wool, fleece, or denim scraps.
- Cut with sharp scissors.
- Back thin fabric with fusible web.
3) Stitch
- Use blanket stitch around edges.
- Knot well inside.
- Add a tiny heart or star.
- Bright contrast pops.
- Neutral-on-neutral feels calm.
- Mix small and medium patches.
Holiday Candle Making With Scents
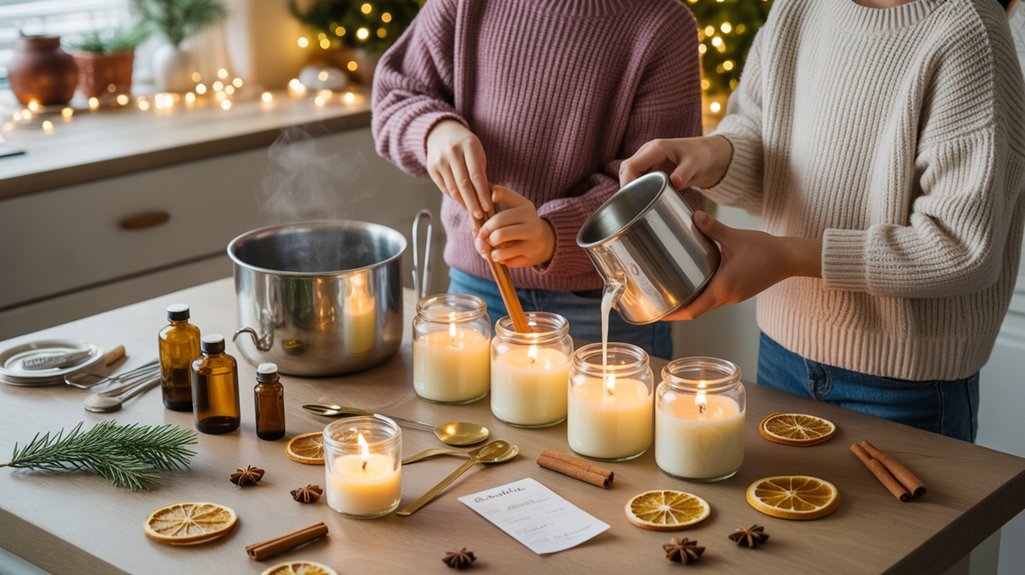
Although it looks fancy, holiday candle making is simple, safe, and super fun for tweens with a bit of guidance.
Holiday candle making looks fancy but is simple, safe, and super fun with a little guidance.
You’ll make gifts that warm rooms and hearts. Let’s keep it easy and kind.
1) Gather supplies
- Soy wax flakes
- Cotton wicks and jars
- Stir stick, thermometer
- Essential oils for scent selection
- Labels and ribbon
2) Prep jars
- Stick the wick to the jar’s center.
- Set jars on a tray for steady work.
3) Melt and mix
- Melt wax low and slow.
- Cool a bit. Add oils. Stir gently.
4) Candle pouring
- Pour near the wick. Leave space on top.
- Hold steady. Breathe. You’ve got this.
5) Finish with care
- Let set. Top off small sinkholes.
- Add a kind label and a short note.
Give your candles to neighbors, teachers, or friends.
Small light. Big smile.
Family Photo Booth Props and Scrapbook Session
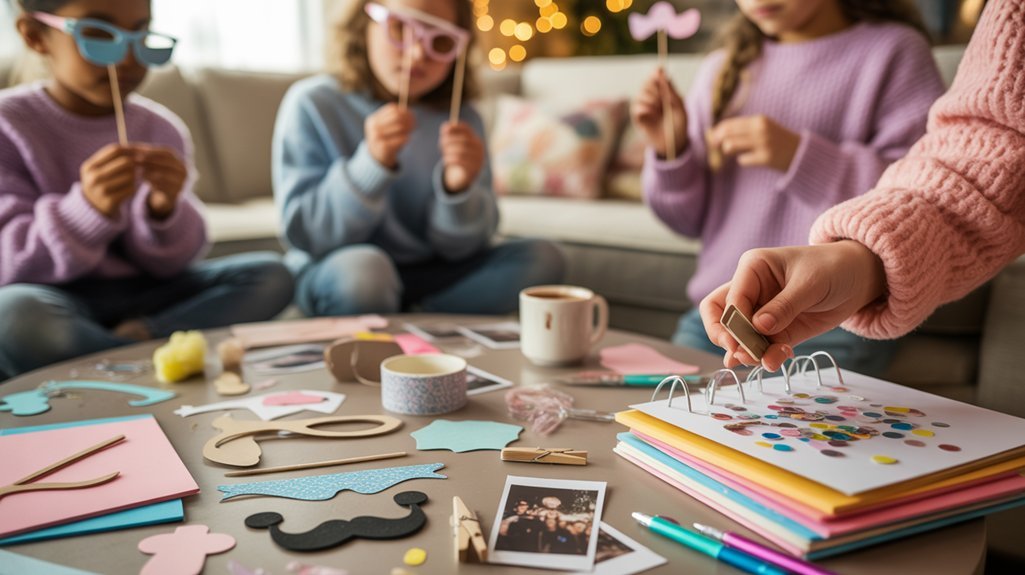
Joy starts here: set up a cozy “studio,” gather simple props, and get ready to laugh together.
Hang a sheet, add a lamp, and clear floor space. Invite tweens to serve as directors. You’ll guide, they’ll shine. Keep it simple. Keep it kind.
1) Plan
- Pick a theme: winter hats, funny glasses, kind notes.
- Set roles: photographer, prop wrangler, smile coach.
- Decide where photos go: cards, gifts, or a scrapbook session.
2) Capture
- Use burst mode for real laughs.
- Try group shots, pairs, solos.
- Hold signs with short thank-yous.
3) Craft
- Print small. Trim with washi tape.
- Add dates, names, and one sweet memory.
- Bind pages for a family gift.
Your photo booth builds joy. Your scrapbook session preserves it.
In case you were wondering
How Do I Keep Tweens Engaged for a Full Afternoon?
Keep tweens engaged by rotating stations: creative storytelling prompts, hands-on crafts, and group challenges that solve community needs. Offer leadership roles, short timers, and snack breaks. Encourage collaboration, celebrate service-minded wins, and end with a showcase they present.
What Budget-Friendly Supplies Cover Multiple Activities?
Choose recyclable materials and multi use items: cereal boxes, jars, paper rolls, scrap fabric, buttons, twine, glue, markers, felt, cardstock, paint, cookie cutters. You’ll create décor, cards, ornaments, gift wrap, and service projects affordably.
How Can Activities Be Inclusive for Different Abilities?
Start by offering choices and flexible roles; 26% of kids have disabilities. You incorporate adaptive techniques, visual steps, and sensory materials. You provide quiet zones, peer buddies, seated/standing options, and one-handed tools so everyone contributes and feels valued.
What Mess-Free Options Work in Small Spaces?
Choose mess free crafts like sticker cards, washi-tape bookmarks, origami, and no-glue felt kits. For small space activities, use lap desks, zipper pouches, and digital art apps. Encourage kids to create gifts, notes, and decorations that uplift others.
How Do I Adapt Crafts for Mixed-Age Siblings?
Start simple: set shared steps, then offer craft variations by age. You facilitate sibling collaboration—pair partners, provide parallel projects, and celebrate service-minded making. You supply safe tools, staggered challenges, and supportive roles so everyone contributes, learns, and loves creating together.
Conclusion
You’ve got this. Pick one idea, gather simple supplies, and start. Teens who create feel better too—one study found crafting can cut stress by about 75%. That’s huge. Try quick wins: a cocoa bar, fast gift tags, or a photo booth. Keep steps short. Offer choices. Praise effort, not results. Snap a few pics. Share a laugh. Repeat next week.
Quick start:
1) Set a 45-minute timer
2) Play cozy music
3) End with show-and-tell and cocoa