Creative Ways to Display Family Art Projects Together
You can showcase your family’s creativity by setting up a rotating gallery wall with easy-open frames, transforming a hallway with a wire display system, or mounting clipboards at kid-friendly heights for quick artwork swaps. Mix vintage frames for an eclectic look, or turn favorite pieces into functional items like pillows and blankets. Each approach lets everyone’s art shine while keeping your display fresh and meaningful—and there are even more creative options to explore below.
Key Takeaways
- Create a rotating gallery wall with easy-open frames hung at kid-friendly heights for simple artwork swaps.
- Install clipboard or wire systems giving each family member their own dedicated display spot for personal expression.
- Transform favorite artwork into functional items like pillows or blankets using digital printing on washable fabrics.
- Mix vintage frames in varying sizes and shapes for an eclectic, visually interesting family art display.
- Use colorful strings to hang art at varying heights, creating a dynamic mobile-style display kids love watching.
Create a Rotating Gallery Wall With Interchangeable Frames
When you’ve got kids creating masterpieces left and right, a rotating gallery wall becomes your best friend. This simple setup lets you celebrate new artwork without running out of space.
Getting Started:
- Choose frames with easy-open backs or clip styles
- Pick frame colors that match your room’s vibe
- Hang them at kid-friendly heights so everyone can admire the work
The magic is in interchangeable designs. Swap out pieces weekly or monthly. Your children feel proud seeing their art displayed, and you avoid the guilt of tossing older projects.
A rotating gallery wall lets kids shine while keeping your space fresh and clutter-free.
Quick tip: Store rotated artwork in a dated portfolio box. You’ll treasure looking back at their creative journey. This wall grows with your family’s ever-changing talents.
Transform a Hallway Into a Dedicated Art Corridor

Because hallways often go overlooked, they’re actually perfect for showcasing your family’s creativity. This simple hallway transformation turns wasted wall space into a source of artistic inspiration for everyone who walks through.
Getting Started:
- Install a picture rail or wire system along the length
- Use clipboards for easy artwork swaps
- Add small LED lights above pieces for a gallery feel
You can group art by family member or mix everyone’s work together. Either approach works beautifully.
Quick Tips:
- Hang pieces at varying heights for visual interest
- Include 3D projects on narrow floating shelves
- Leave some breathing room between pieces
Your hallway becomes a daily celebration of what your family creates together.
Use Clipboards and Hanging Wire Systems for Easy Updates
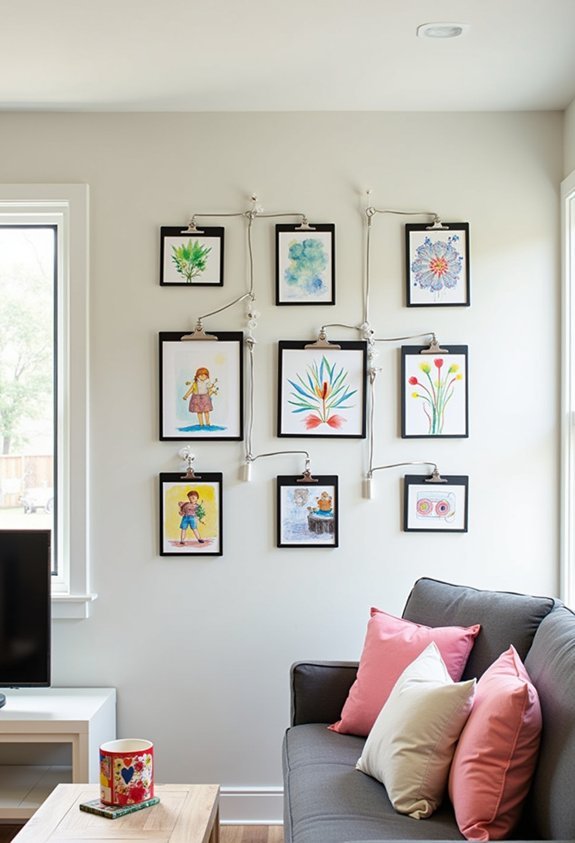
Everyone wants their family’s artwork to shine without the hassle of constant reframing. Clipboard organization makes swapping pieces simple and fun. Just unclip the old, clip in the new. Your kids will love seeing fresh work on display.
Getting Started with Wire Display
- Mount a wire display system along one wall
- Space clipboards evenly across the wire
- Assign each family member their own spot
This setup grows with your family. Toddler scribbles today become detailed drawings tomorrow. You won’t need new frames or extra nail holes.
Quick Tips
- Choose wooden clipboards for a warm look
- Paint them to match your room
- Hang at kid-friendly heights so little ones feel proud
You’ve got this. Your gallery awaits.
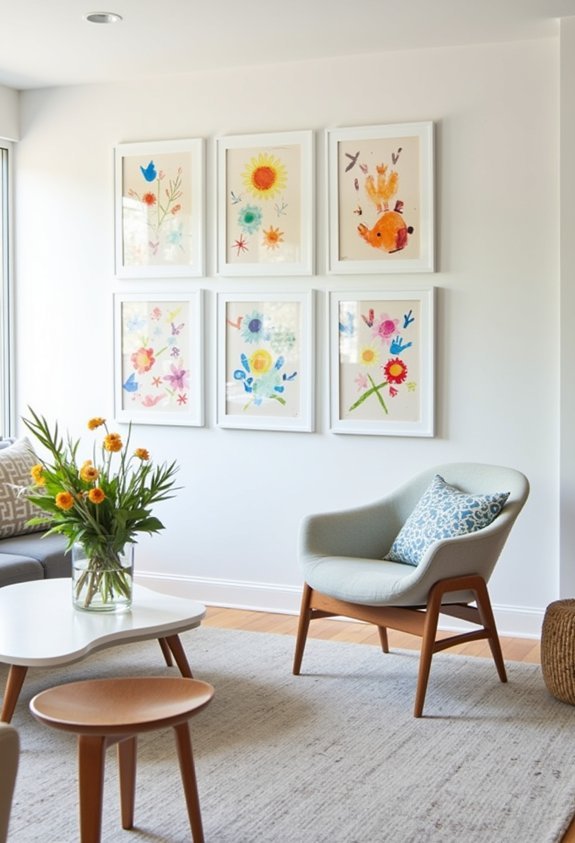
Repurpose Vintage Frames for an Eclectic Display

Although matching frames look polished, mixing vintage finds creates something far more interesting. Thrift stores, flea markets, and grandma’s attic hold treasures waiting for new purpose.
How to create your eclectic display:
- Hunt for frames with character—ornate gold, weathered wood, or painted metal
- Remove old glass if it’s cracked or cloudy
- Leave frames empty or add corkboard backing for rotating art
Your frame arrangement works best when you vary sizes and shapes. Lay everything on the floor first. Play until it feels right.
Don’t stress about perfection. The vintage colors—faded golds, creamy whites, soft greens—naturally blend together. That worn patina tells a story.
Imperfection is the point—those faded golds and worn edges carry stories that shiny new frames simply can’t tell.
Kids love seeing their masterpieces in “fancy” frames. It shows their work matters. And honestly? Those imperfect vintage edges make every crayon drawing feel museum-worthy.
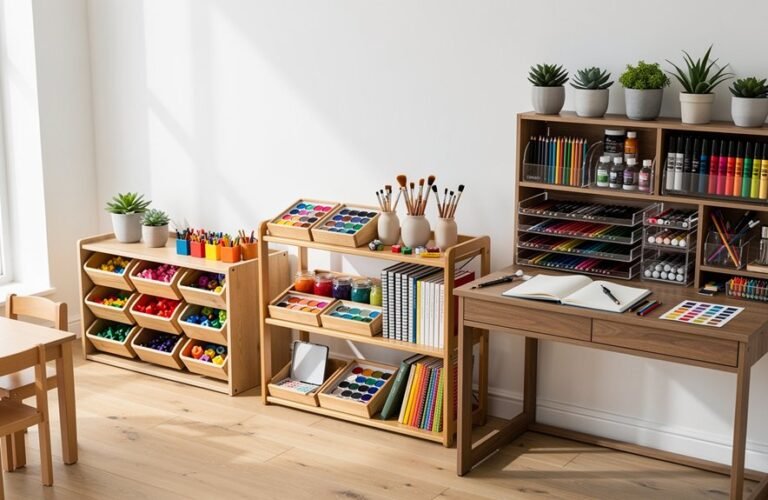
Design a Family Art Corner With Built-In Shelving
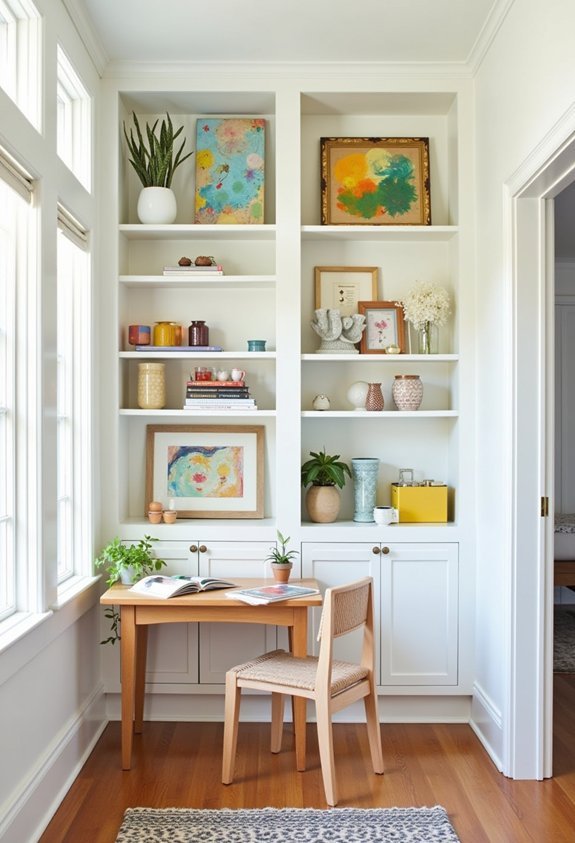
A dedicated art corner gives your family’s creativity a permanent home—and built-in shelving takes it to the next level.
Choose Your Shelving Styles****
Consider these options:
- Floating shelves for a clean, modern look
- Cubby-style units for easy art organization
- Adjustable shelves that grow with your kids
Make It Work for Everyone
Place lower shelves at kid-height so little ones can reach their masterpieces. Use the upper shelves for framed pieces or delicate projects.
Smart Art Organization Tips
- Rotate displays monthly to keep things fresh
- Add small bins for works-in-progress
- Include a mini easel for the “star piece”
You’re creating more than storage here. You’re building a space that says, “What you make matters.” That’s powerful.
Turn Artwork Into Functional Items Like Pillows and Blankets
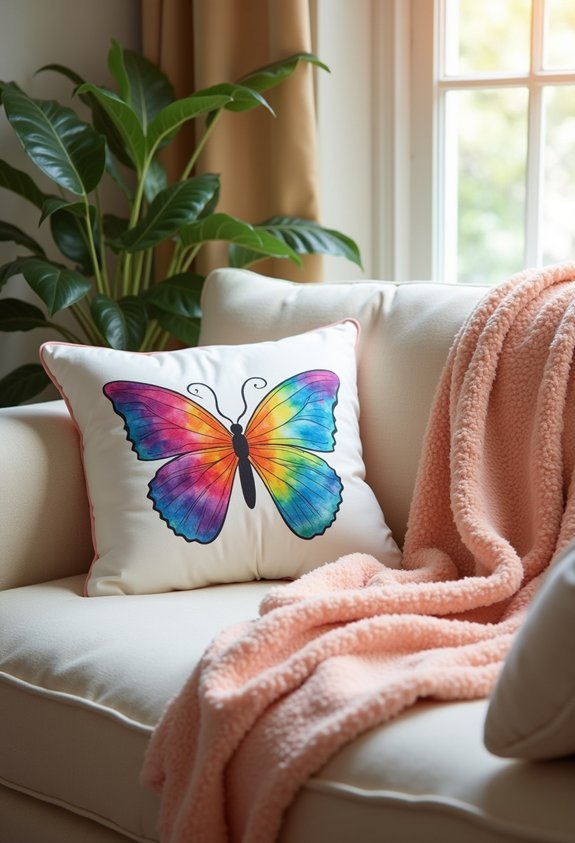
When your child’s artwork becomes something your family actually uses every day, magic happens. Those colorful drawings transform into cozy art pillows for the couch or snuggly blanket designs for movie night.
Getting Started:
- Scan or photograph your favorite pieces
- Upload images to custom printing services
- Choose your item size and fabric type
You’ll find many online companies that print artwork on soft goods. Simply pick a drawing with bold colors and clear lines for best results.
Quick Tips:
- Select washable fabrics for durability
- Group several small drawings into one design
- Add names and dates for keepsakes
Your child will beam when they see their art on something real. These functional pieces make treasured gifts for grandparents too.
Build a Seasonal Display That Celebrates Holiday Creations
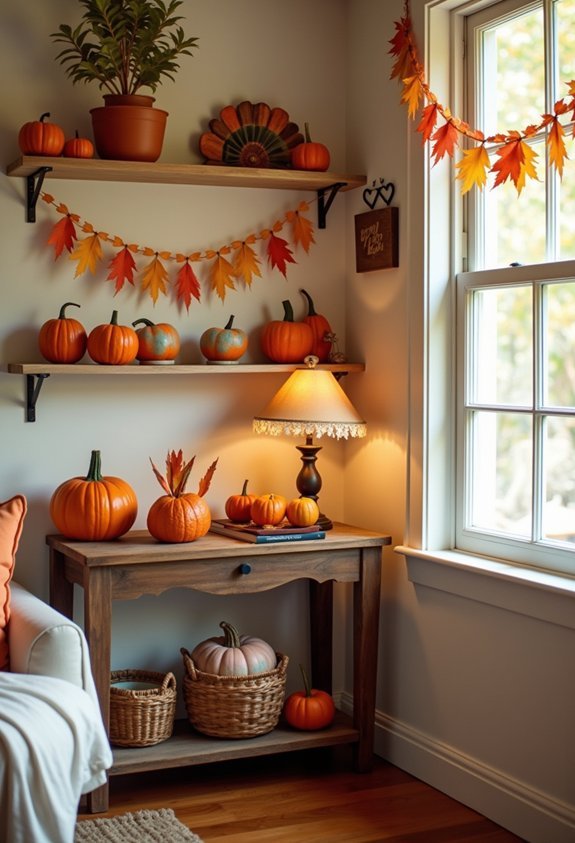
Because holidays bring such a rush of creative energy, you’ll want a dedicated spot where seasonal masterpieces can shine. A rotating display keeps your home fresh and gives every creation its moment.
A rotating seasonal display gives every holiday masterpiece its moment to shine without overwhelming your space.
Setting Up Your Seasonal Station
Pick one wall or shelf that becomes your holiday gallery. Then:
- Swap out artwork as each season arrives
- Group pieces by holiday themes like Halloween, Thanksgiving, or spring celebrations
- Add simple frames in seasonal colors—orange for fall, red and green for winter
Quick Tips
- Store off-season art in labeled folders
- Let kids help choose what goes up
- Take photos before rotating pieces out
This approach honors every holiday creation without overwhelming your space. Your family’s traditions grow more meaningful each year.
Create a Digital Frame Slideshow of Scanned Projects

Digital frames offer a wonderful way to enjoy your family’s artwork without covering every inch of wall space. You can rotate through dozens of pieces with one simple device.
Getting Started:
- Use digital scanning to capture each project clearly
- Save files in a dedicated folder for easy photo organization
- Load your favorites onto the frame’s memory card
Quick Tips:
- Scan artwork on a flat surface for best results
- Name files by child and date
- Set the slideshow to change every few minutes
Your kids will light up seeing their work on display. Plus, you’ll preserve these treasures for years to come. It’s a smart solution that keeps creativity front and center.
Install a Ceiling-Mounted Mobile for Three-Dimensional Pieces
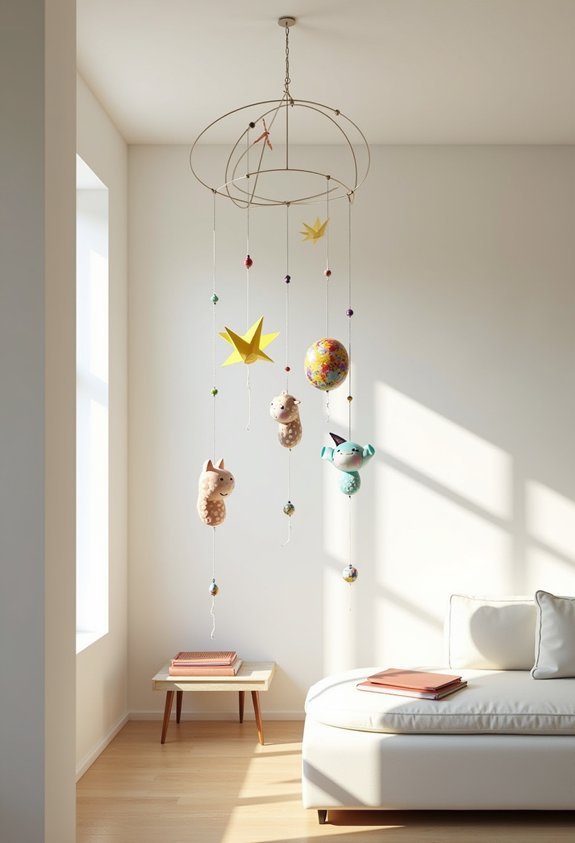
If you’ve got sculptures, paper mache creations, or other three-dimensional masterpieces piling up, a ceiling-mounted mobile gives them the spotlight they deserve. This three dimensional display lets art float and spin, catching light from every angle.
Getting Started with Mobile Art:
- Use a wooden dowel or embroidery hoop as your base
- Attach clear fishing line at varying lengths
- Hang lightweight pieces only—think paper, cardboard, or small clay items
- Balance heavier items closer to the center
You’ll want to install a ceiling hook rated for the total weight. Start small with three or four pieces. Add more as you find the right balance.
Kids love watching their creations dance in the breeze. It’s magic they made themselves.
In case you were wondering
How Do I Preserve Children’s Artwork to Prevent Fading Over Time?
You’ll protect your children’s artwork from fading by using archival storage materials like acid-free folders and sleeves. When displaying pieces, add UV protection through museum glass or protective sprays that block harmful light damage.
What Age Should Children Be Before Displaying Their Art Publicly?
You can display your child’s art publicly at any age when they’re comfortable with it. Age considerations matter less than your child’s enthusiasm for public display. Always ask permission and celebrate their creative confidence.
How Can I Involve Reluctant Family Members in Creating Art Together?
You can engage reluctant family members by introducing fun art games that feel low-pressure. Try creative prompts like “draw with your eyes closed” or collaborative pieces where everyone adds one element.
What Materials Are Safest for Young Children to Use for Projects?
Like tiny artists exploring a colorful wonderland, you’ll want to stock up on non toxic paints, chunky crayons, and eco friendly materials. Choose washable markers, large paper, and child-safe scissors with rounded edges.
How Do I Diplomatically Choose Which Artwork to Display and Which to Store?
You’ll simplify artwork selection by rotating pieces monthly, giving everyone equal display time. Ask each child to choose their favorite—this honors sentimental value while teaching decision-making. Store others in portfolios they can revisit anytime.
Conclusion
You’ve got a million options to showcase what your family makes together. Pick one idea and start small. Swap out a frame. String up a wire. Scan a favorite drawing. Every piece of art tells your story. Your kids will beam when they see their work displayed proudly. And years from now, you’ll treasure these creative memories. Go make something beautiful together.