17 Screen-Free Craft Activities for Bored Kids
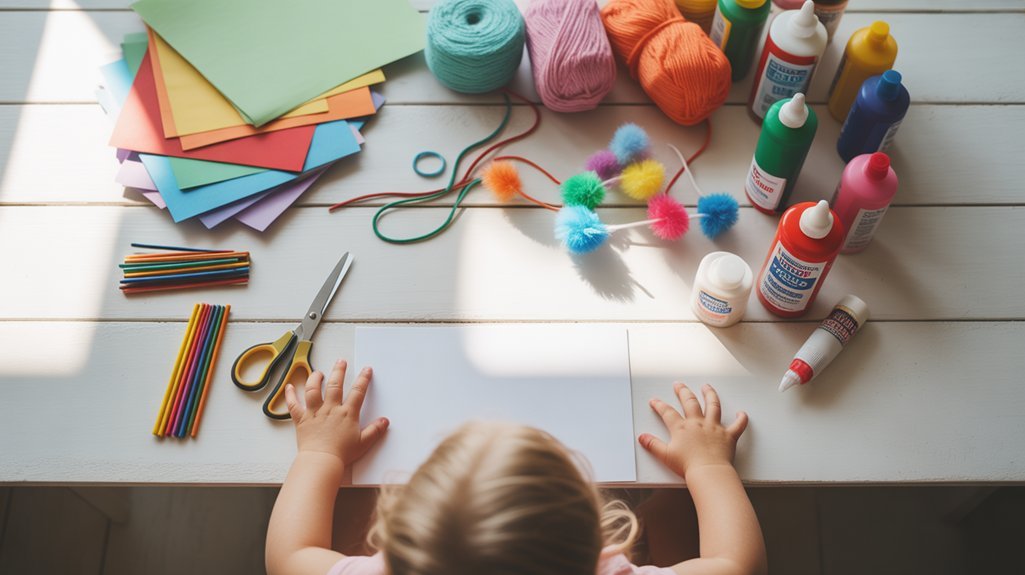
You’ll find endless entertainment for your kids with these 17 screen-free crafts using household items. Transform cardboard boxes into castles and race cars, create nature collages with pressed flowers and leaf rubbings, or whip up homemade playdough for sculpting fun. Try paper plate animals, sock puppet theaters, yarn-wrapped letters, and handprint canvas art. Mason jar terrariums, cereal box puzzles, salt dough ornaments, tin can wind chimes, coffee filter butterflies, and egg carton caterpillars round out your creative arsenal. Discover how each activity develops essential skills while keeping boredom at bay.
Key Takeaways
- Transform cardboard boxes into castles, robots, race cars, or dollhouses using scissors, markers, and foil for imaginative play.
- Create nature collages with pressed flowers, leaf rubbings, and stick frames using materials collected from outdoor explorations.
- Make homemade playdough with flour, salt, water, and food coloring for sculpting activities that strengthen fine motor skills.
- Build newspaper forts, yarn-wrapped letters, and cereal box puzzles by repurposing household recyclables into creative projects.
- Craft paper plate animal masks, sock puppets, salt dough ornaments, and coffee filter butterflies for hands-on entertainment.
DIY Cardboard Box Creations
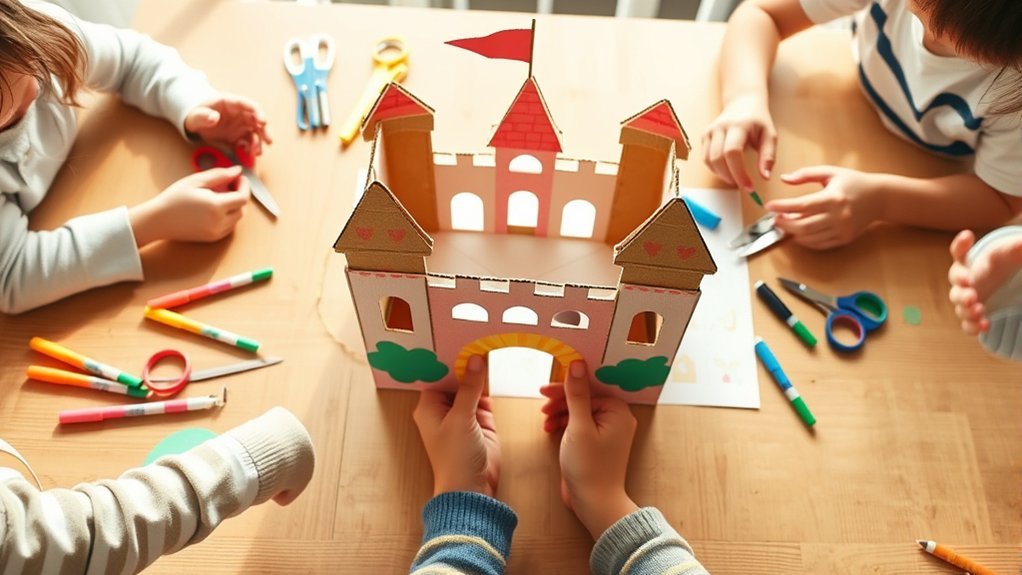
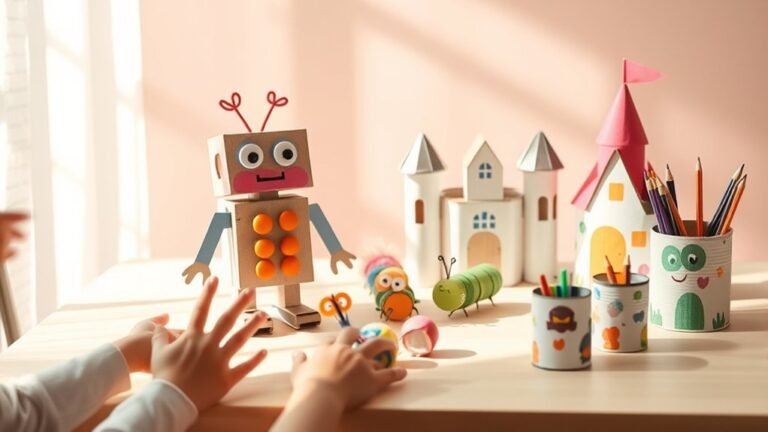
Before you toss that Amazon delivery box into the recycling bin, consider its potential as your child’s next creative masterpiece. Cardboard boxes transform into endless possibilities with just scissors, tape, and markers.
Your kids can construct cardboard castles complete with drawbridges and towers, fostering imaginative play for hours. They’ll design room layouts, add windows, and decorate walls with their own artwork.
Cardboard castles spark endless imagination as children architect their own kingdoms, complete with custom rooms, windows, and hand-decorated walls.
Robot costumes offer another exciting project. Cut arm holes, attach foil details, and create control panels with bottle caps and buttons. Your child becomes a walking, talking robot creation.
Large boxes become race cars, puppet theaters, or dollhouses. Small boxes turn into treasure chests or mailboxes. The beauty lies in cardboard’s versatility—it’s free, recyclable, and mistakes simply become creative opportunities.
Nature Collage Art

When your family ventures outdoors, you’re surrounded by free art supplies waiting to be collected. Nature collage art transforms leaves, twigs, flowers, and pebbles into stunning masterpieces while teaching kids about their environment.
Start by gathering materials during walks, then let creativity flow with these collage techniques:
- Pressed flower portraits – Flatten blooms between book pages, then arrange them into faces or patterns on cardstock.
- Leaf rubbings backdrop – Create textured backgrounds by placing leaves under paper and rubbing with crayons before adding dimensional elements.
- Stick frame borders – Glue twigs around artwork edges for a rustic nature theme.
- Seed and pebble mosaics – Fill outlined shapes with small natural objects to create detailed designs.
You’ll discover endless combinations while keeping screen time minimal.
Homemade Playdough Sculptures
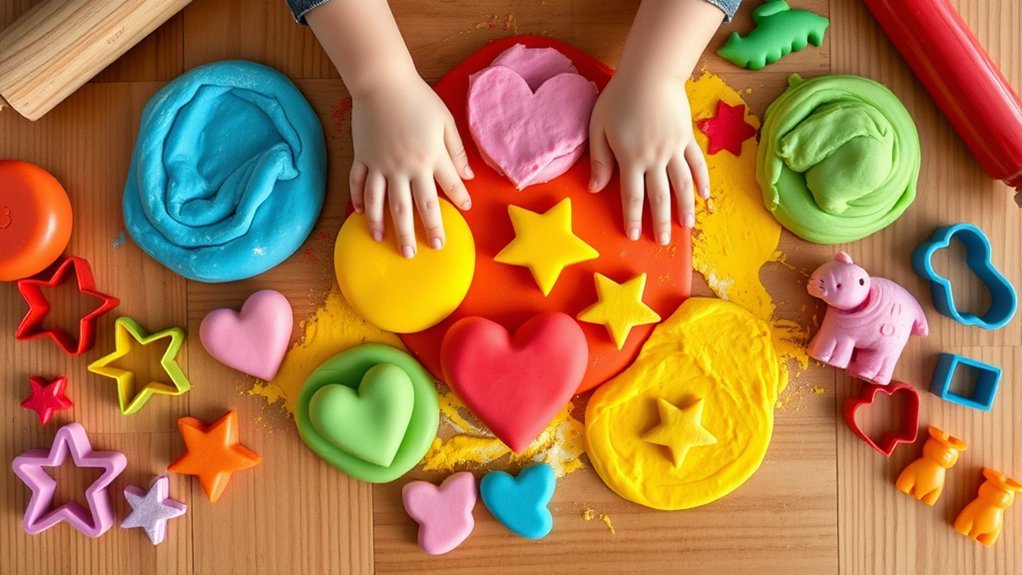
Creating playdough from scratch costs pennies and delivers hours of tactile fun that store-bought versions can’t match.
You’ll find countless playdough recipes online, but the basic formula combines flour, salt, water, oil, and food coloring. Mix ingredients in a pot over medium heat until the dough forms a ball.
Once cooled, your kids can explore various sculpting techniques. They’ll roll snakes, flatten pancakes, and create detailed figures using household tools like cookie cutters, rolling pins, and garlic presses.
Encourage them to build animals, food items, or imaginary creatures.
Store the playdough in airtight containers, and it’ll last weeks. This activity strengthens fine motor skills while keeping little hands busy.
Best of all, you’ll know exactly what’s in it.
Paper Plate Animals
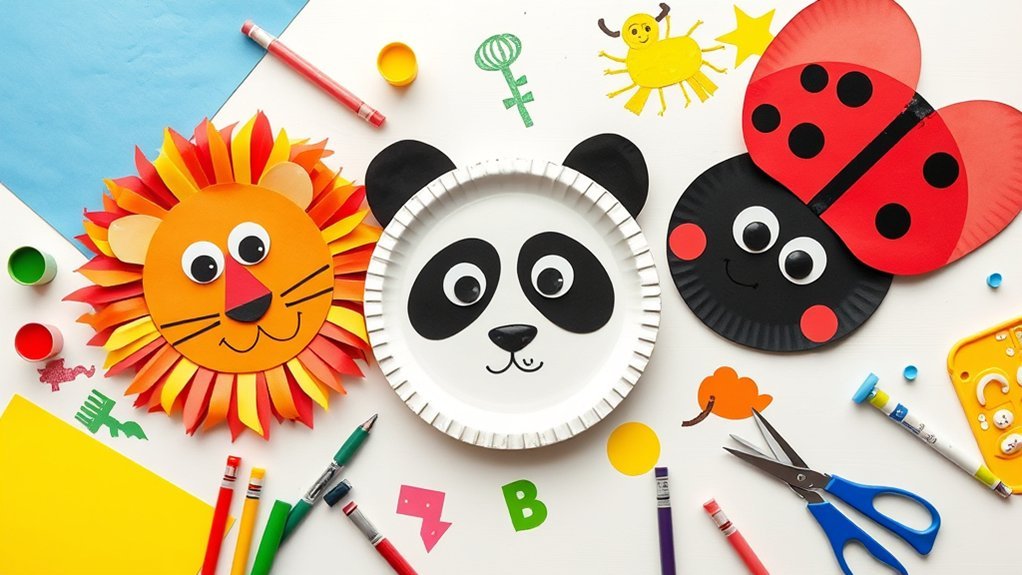
A stack of paper plates from your pantry transforms into a menagerie of creatures with just a few craft supplies. You’ll create lions, owls, fish, and butterflies using markers, construction paper, and glue. Kids can design paper plate masks they’ll actually wear, bringing their creations to life during imaginative play.
Essential supplies for colorful animal designs:
- Paper plates (standard white or colored varieties)
- Washable markers, crayons, or paint for vibrant details
- Construction paper scraps for ears, fins, wings, and beaks
- Googly eyes, yarn, and buttons for dimensional features
Cut eyeholes for functional masks, or mount finished animals on popsicle sticks for puppets.
You’re encouraging creativity while developing fine motor skills through cutting and gluing. This activity accommodates all ages—toddlers enjoy simple faces while older children craft elaborate three-dimensional designs.
Sock Puppets Theatre
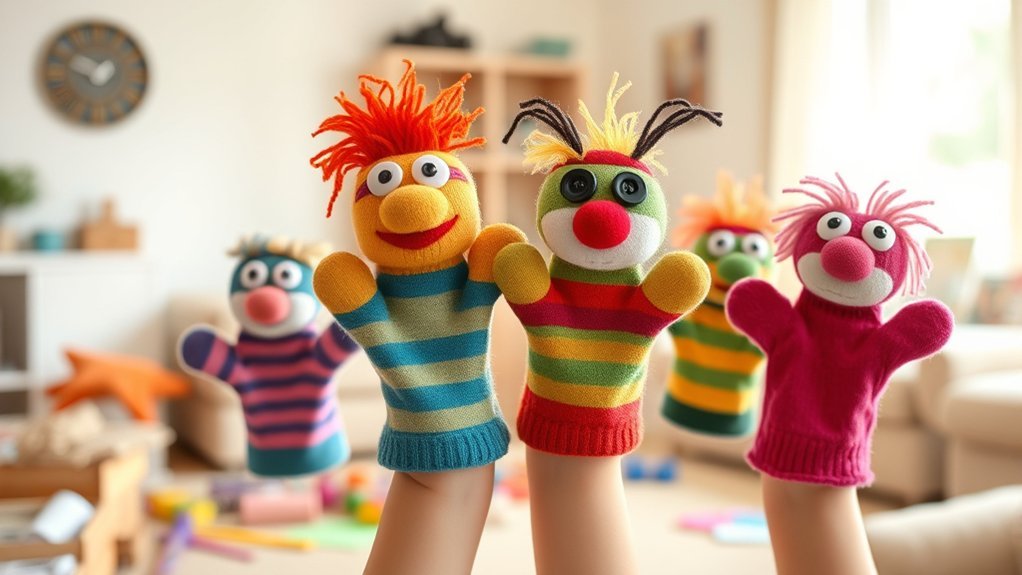
Mismatched socks from your laundry basket become theatrical stars with minimal supplies and maximum imagination.
You’ll transform basic puppet materials into characters through simple puppet design—add buttons, yarn, and felt for eyes and hair. Character creation sparks storytelling techniques as you develop personalities and voices using voice modulation.
Basic materials like buttons and yarn transform into puppet personalities, teaching children design skills while sparking creative storytelling and character development.
Set up your stage setup with a couch back or cardboard box, then explore script writing or improvisation skills for spontaneous puppet shows.
Theatre games like emotion switches enhance performance tips while building confidence. You’ll discover audience engagement through questions and interactive moments during collaborative performances.
This creativity boost extends beyond entertainment—puppet maintenance teaches responsibility as kids care for their creations. Each show strengthens communication abilities and imaginative thinking.
Painted Rock Garden Markers
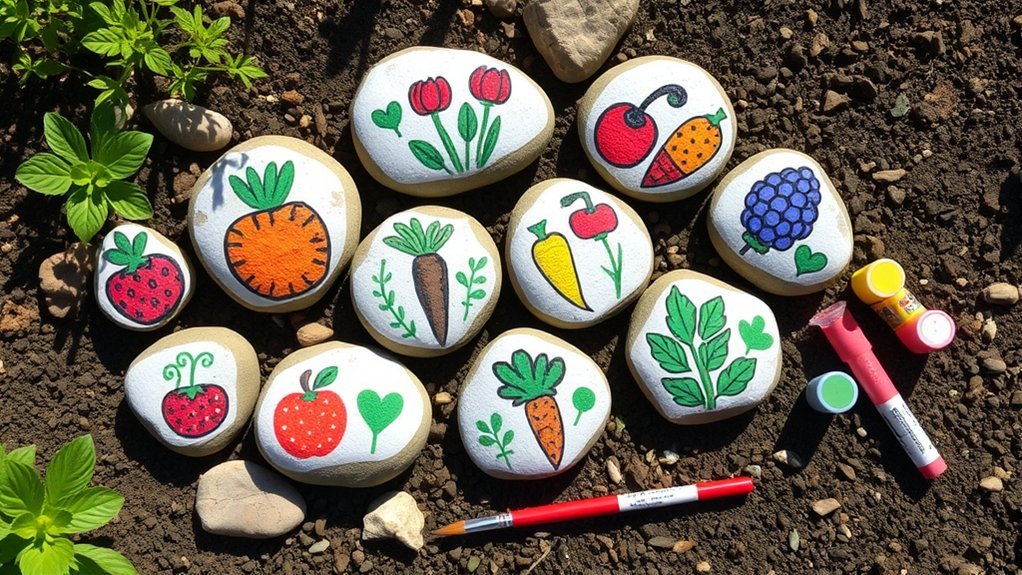
While puppet shows bring indoor creativity to life, your outdoor spaces offer equally exciting craft opportunities. Painted rock garden markers transform ordinary stones into colorful plant labels that’ll brighten your garden beds.
You’ll discover simple rock painting techniques that even young children can master, from basic brushstrokes to creative designs.
Here’s what you’ll need:
- Smooth, flat rocks collected from your yard or purchased from craft stores
- Acrylic paints in various colors for weather-resistant designs
- Fine-tipped brushes for writing plant names and adding details
- Clear sealant spray to protect your finished markers outdoors
These garden decoration ideas combine learning with creativity. Kids practice spelling while labeling tomatoes, basil, or carrots.
They’ll proudly check their markers daily, connecting them to growing plants.
Toilet Paper Roll Binoculars
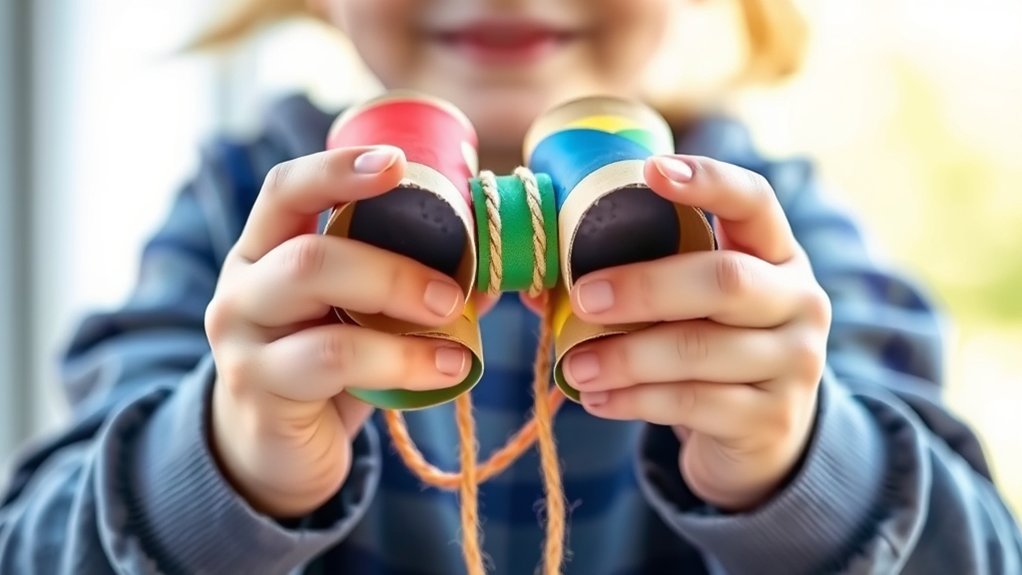
Young explorers can’t resist the allure of their own handmade binoculars. This classic craft transforms two empty toilet paper rolls into adventure-ready equipment that’ll fuel your child’s imagination for hours.
Start by taping or gluing the rolls together side-by-side. Punch holes on the outer edges and thread yarn through to create a neck strap.
Now comes the fun part: binoculars decorating. Let your kids paint, wrap with washi tape, or cover them with stickers and markers. They can add camouflage patterns for safari adventures or bright colors for backyard expeditions.
Unleash creativity with paint, washi tape, stickers, and markers—transform plain cardboard tubes into personalized adventure gear your young explorer will treasure.
Once decorated, these binoculars become essential gear for outdoor exploration. Your children will spot birds, search for insects, and discover nature’s hidden details.
This simple craft encourages active play while developing observation skills and curiosity about their surroundings.
Popsicle Stick Picture Frames
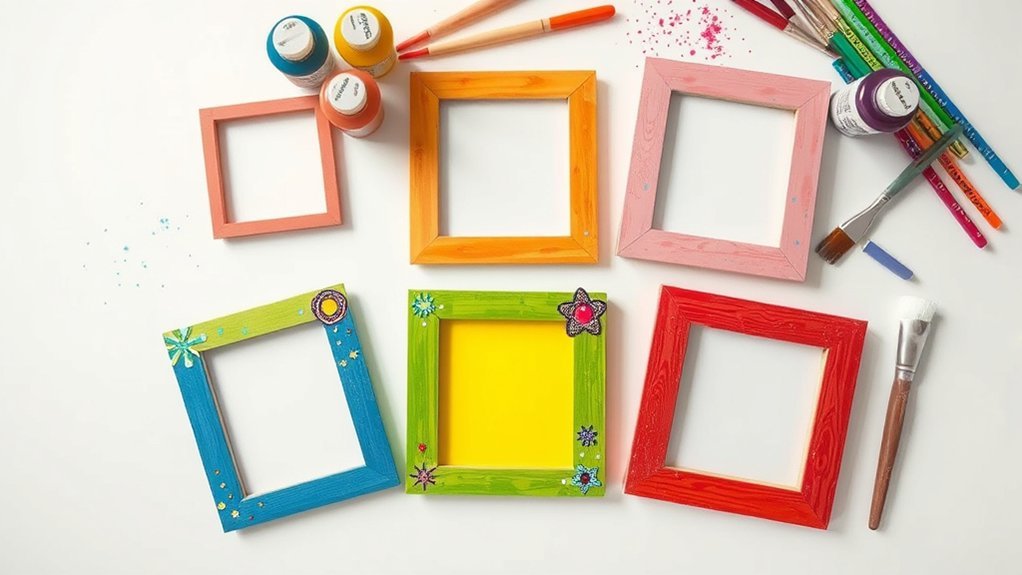
Popsicle sticks stack up to become charming homemade frames that showcase your child’s artwork, family photos, or nature finds.
These popsicle stick crafts require minimal supplies and deliver maximum creativity. Your kids can personalize their frames with paint, glitter, buttons, or markers to match any style.
Basic Assembly Steps:
- Create the base – Arrange four popsicle sticks in a square or rectangle shape, overlapping the corners.
- Secure with glue – Apply craft glue to corner joints and let dry completely.
- Add frame decoration – Paint, wrap with yarn, or attach embellishments like sequins and stickers.
- Attach backing – Glue cardboard behind the frame, leaving the top open to slide pictures in and out.
These frames make perfect gifts for grandparents or teachers.
Salt Dough Ornaments
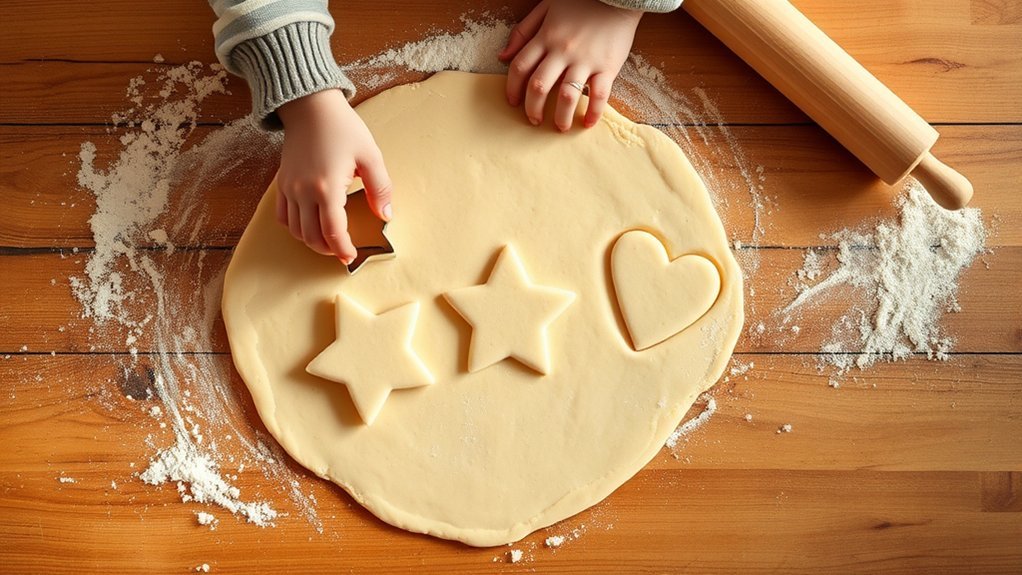
Transform simple kitchen ingredients into keepsake decorations with salt dough ornaments that’ll last for years. You’ll need just flour, salt, and water to create these festive decorations that kids can shape, bake, and personalize.
Mix two cups flour, one cup salt, and one cup water until you’ve got smooth dough. Let children roll it out and use cookie cutters to create shapes.
Don’t forget to poke holes for hanging before baking at 250°F for two hours.
Once cooled, kids can paint their creations with acrylics, add glitter, or use markers for details. Seal finished pieces with clear varnish for durability.
These salt dough recipes work perfectly for holidays, birthdays, or whenever you need handmade gifts that capture your child’s creativity and personality.
Tin Can Wind Chimes
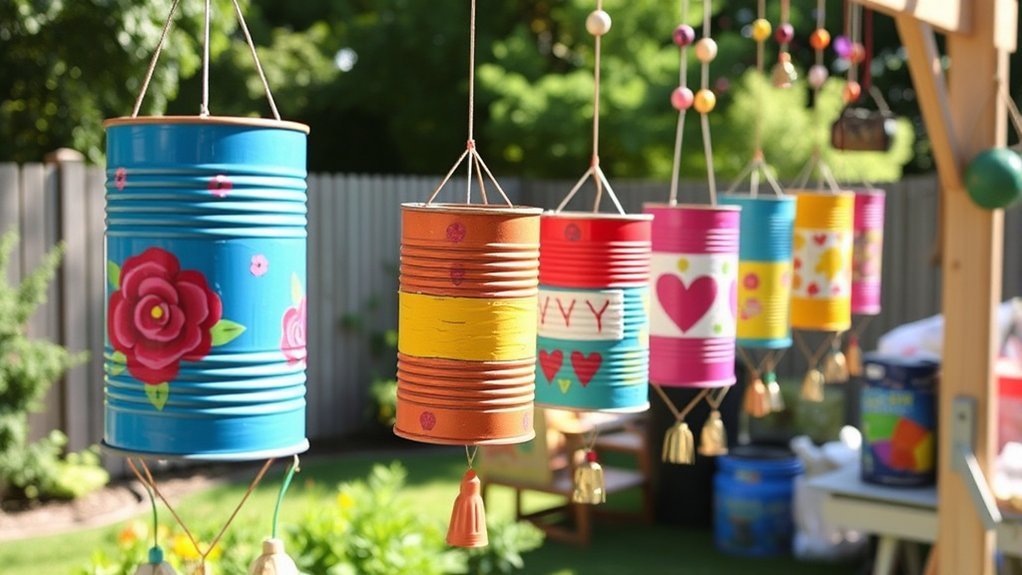
Repurpose empty tin cans into melodious outdoor decorations that’ll bring music to your garden or porch.
This eco-friendly project transforms everyday tin can materials into charming wind chime decoration that creates soothing sounds when the breeze blows.
What You’ll Need:
- Clean tin cans in various sizes (remove labels and smooth any sharp edges)
- Twine or sturdy string for hanging each can at different lengths
- Paint and brushes to customize your wind chime decoration with colors and patterns
- A wooden stick or metal rod as your top support beam
Punch holes in the bottom of each can, thread your string through, and attach them to your support beam.
Let your kids paint creative designs, then hang outside where wind will strike them together, producing gentle musical tones.
Coffee Filter Butterflies

While wind chimes add music to your outdoor space, you can bring color and whimsy indoors with these delicate coffee filter butterflies.
You’ll need white coffee filters, washable markers, a spray bottle with water, pipe cleaners, and clothespins.
Start by flattening a coffee filter and drawing colorful designs with markers. Spray it lightly with water and watch the colors bleed together, creating stunning color mixing effects.
The magic happens when water meets marker—colors dance and swirl together, transforming simple white filters into vibrant works of art.
Once dry, accordion-fold the filter and secure it with a clothespin for the body. Twist a pipe cleaner around the center for antennae.
This project sneaks in a science lesson about butterfly anatomy while kids create their masterpieces.
Display these vibrant butterflies on windows, walls, or hanging from the ceiling for an enchanting room transformation.
Egg Carton Caterpillars
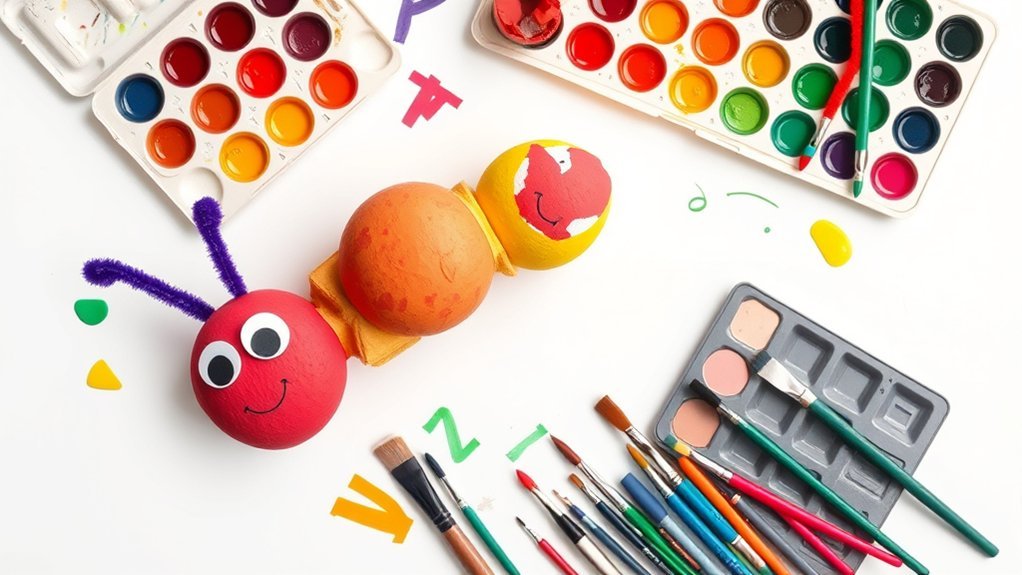
Those humble egg cartons collecting dust in your recycling bin can become adorable caterpillars with just a few snips and splashes of paint.
This egg carton recycling project transforms waste into whimsical creatures that’ll delight younger children.
Materials and Steps:
- Cut individual cups from the carton in strips of 4-6 connected sections to form your caterpillar’s body.
- Paint each section in bright, vibrant colors—think greens, blues, purples, and yellows for eye-catching colorful caterpillar crafts.
- Add googly eyes to the front section and draw a cheerful smile with markers.
- Attach pipe cleaners as antennae by poking small holes in the head section.
Your kids can create an entire caterpillar family, experimenting with different color combinations and patterns for each character.
Newspaper Fort Building
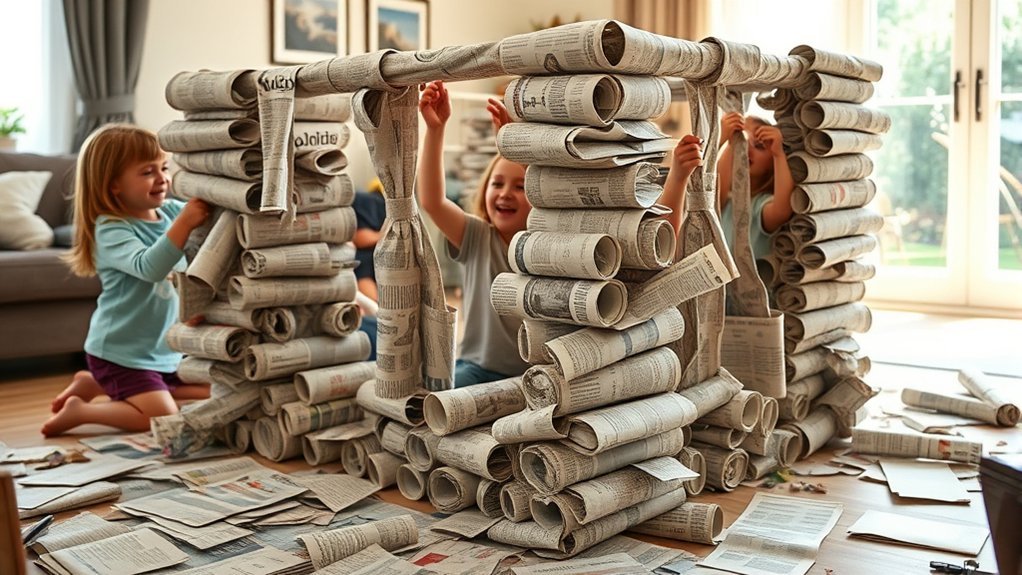
Transform stacks of old newspapers into an impressive architectural wonderland where your kids can read, play, and let their imaginations run wild.
Start by rolling newspapers tightly and securing them with tape to create sturdy building logs. Stack these rolls to form walls, leaving openings for windows and doorways. You’ll need about 50-75 rolls for a decent-sized structure.
Once the basic framework‘s complete, let your children experiment with newspaper sculptures like towers, chimneys, or even a mailbox.
They can design fort decorations by cutting newspaper into banners, flags, or chains. Encourage them to paint their creation with poster paints or wrap sections in colored tissue paper.
This activity teaches engineering basics while developing problem-solving skills and spatial awareness through hands-on construction.
Yarn-Wrapped Letters
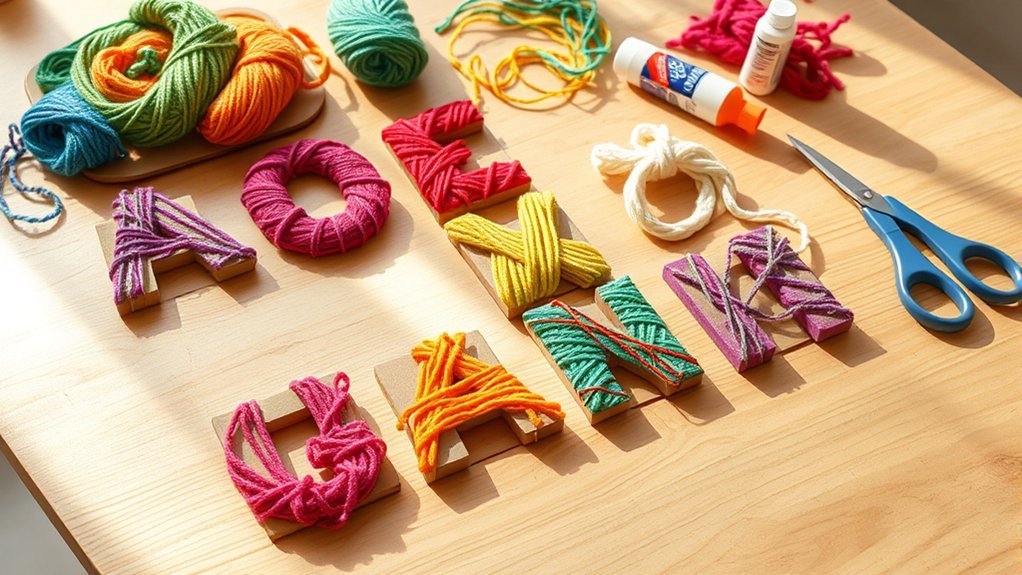
Because cardboard letters are inexpensive and easy to find at craft stores, they make perfect canvases for this colorful yarn-wrapping project. Your kids can create personalized decorations for their bedroom doors or walls while developing fine motor skills.
The repetitive wrapping motion is surprisingly calming, making it ideal for restless children.
This meditative craft channels excess energy into focused creativity, helping active kids find moments of peaceful concentration through simple, rhythmic hand movements.
Letter decoration techniques to try:
- Diagonal wrapping – Wind yarn at angles for dynamic patterns
- Color blocking – Switch yarn color combinations every few rows for bold sections
- Random wrapping – Let younger kids wrap freely without strict patterns
- Ombré effect – Gradually transition between similar shades
You’ll need cardboard letters, various yarn colors, glue, and scissors. Simply apply glue to start, then wrap tightly until covered.
Handprint Canvas Art
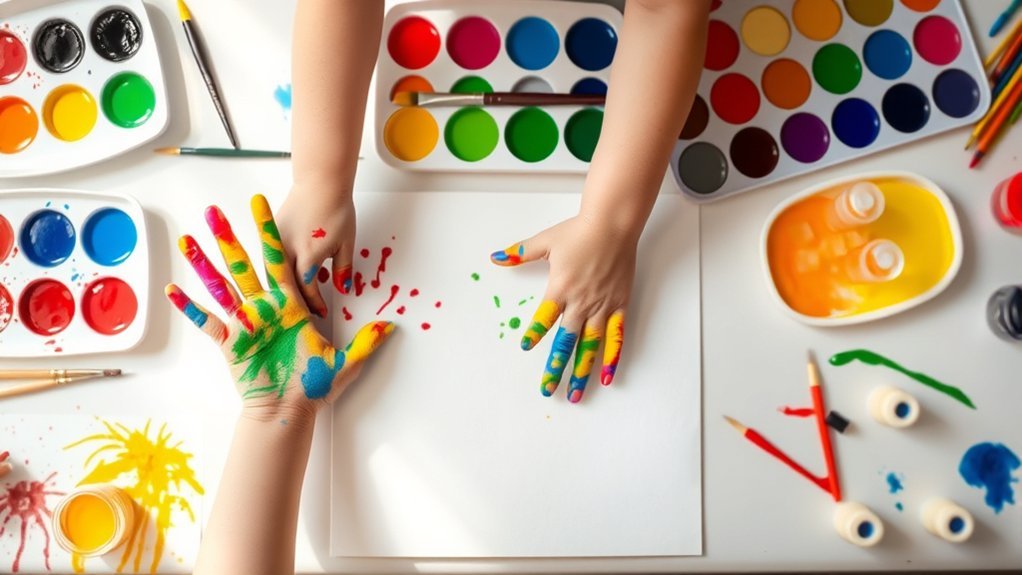
Handprint canvas art captures precious moments while giving children creative freedom to experiment with paint and patterns. You’ll need washable acrylic paints, brushes, and pre-stretched canvases from your local craft store.
Start by selecting canvas sizes appropriate for your project—small 8×10 canvases work well for single prints, while larger options accommodate multiple handprints or elaborate designs.
Let your kids choose handprint colors that reflect their personality or match their room’s décor.
Apply paint evenly to their palms and fingers, then press firmly onto the canvas. They can create animals, flowers, or abstract compositions by adding details with brushes once prints dry.
Older children can layer multiple handprints or incorporate fingerprint embellishments.
These finished pieces make thoughtful gifts for grandparents or meaningful bedroom decorations.
Mason Jar Terrariums
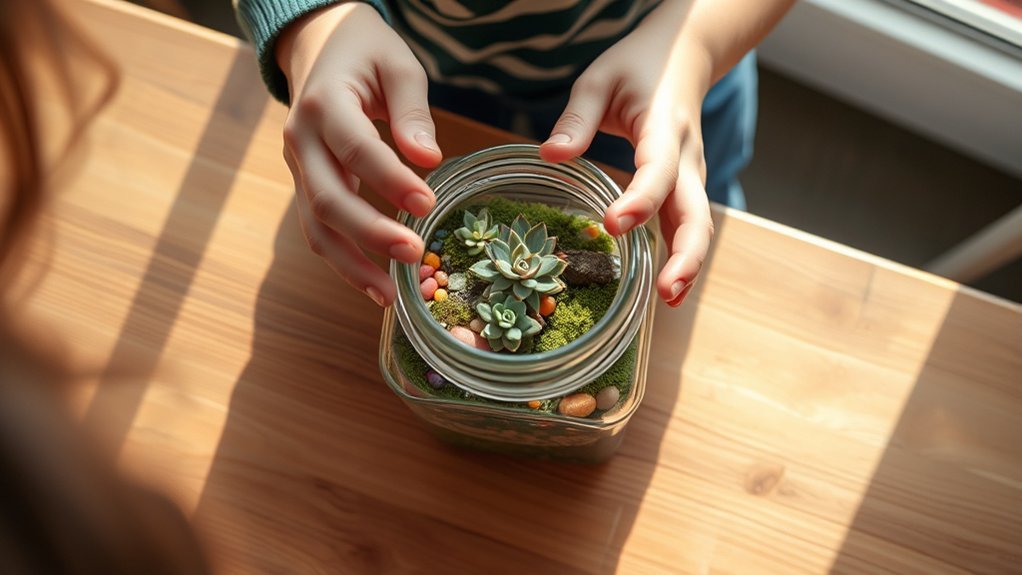
Mason jar terrariums combine science and creativity while teaching kids about plant ecosystems in a hands-on way.
You’ll create miniature ecosystems that thrive with minimal maintenance, making them perfect for young gardeners.
What You’ll Need:
- Clear mason jars – Any size works, but wider mouths make moss layering easier
- Small pebbles and activated charcoal – These create drainage and keep water fresh
- Potting soil and moss – Use sheet moss or collect it from your yard
- Miniature plants – Succulents, small ferns, or air plants work best
Guide your kids through moss layering by adding pebbles first, then charcoal, soil, and finally moss or plants.
They’ll love decorating with tiny figurines or stones.
This project teaches responsibility as kids water and maintain their miniature ecosystems weekly.
Cereal Box Puzzles
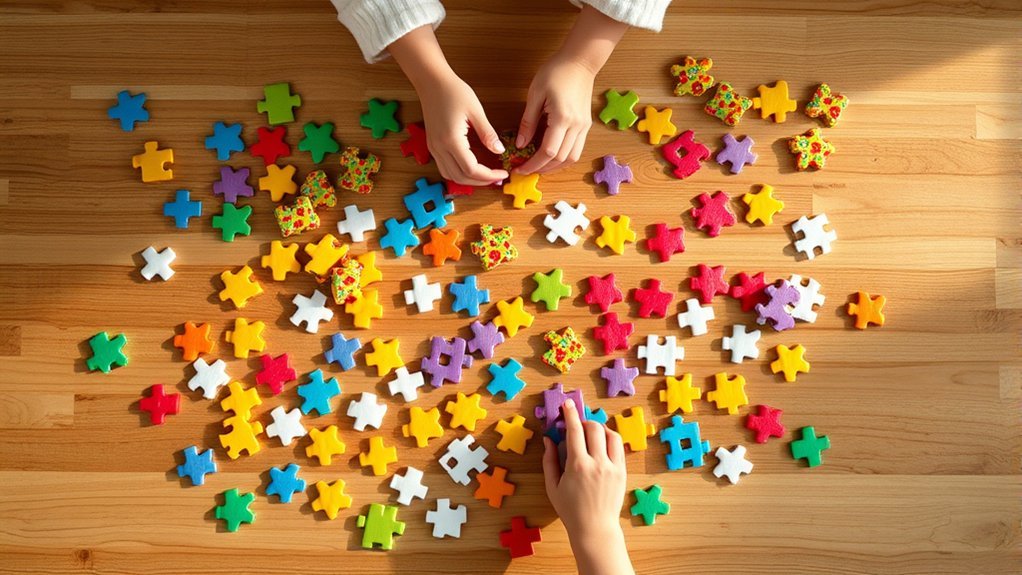
While terrariums offer a long-term project that grows over time, cereal box puzzles provide instant gratification using materials you’d normally toss in the recycling bin.
You’ll transform colorful cereal box designs into creative puzzles that challenge your kids while teaching problem-solving skills. Start by selecting boxes with vibrant graphics. Cut the front panel into puzzle pieces—larger chunks for younger children, smaller intricate shapes for older kids. You can create different difficulty levels by varying piece sizes and shapes.
Turn breakfast box graphics into custom puzzles by cutting panels into age-appropriate pieces that match your child’s skill level.
Store completed puzzles in resealable bags for repeated use. Your kids can also swap puzzles with friends, extending the activity’s value. This craft costs nothing, reduces waste, and keeps children engaged for hours.
They’ll develop spatial awareness and fine motor skills while piecing together familiar breakfast favorites.
In case you were wondering
What Age Group Are These Screen-Free Craft Activities Most Suitable For?
You’ll find these activities work best for kids aged 5-12 years old. The suitable projects adapt easily across this craft age range, letting you modify complexity based on your child’s skill level and interests.
How Can I Motivate My Child to Choose Crafts Over Screen Time?
You’ll motivate your child by highlighting craft benefits like creating something they’re proud of. Emphasize how creative expression lets them make unique projects. Set specific craft times, participate together, and limit screen availability during these periods.
Where Can I Find Affordable Craft Supplies for These Activities?
Studies show families save 70% buying secondhand craft materials. You’ll find affordable supplies at local thrift stores, dollar shops, and online marketplaces like Facebook Marketplace. Don’t overlook your recycling bin—it’s free and filled with creative possibilities!
How Long Do These Craft Projects Typically Take to Complete?
Craft duration varies based on project complexity. You’ll find simple activities take 15-30 minutes, while more elaborate projects need 1-3 hours. It depends on your child’s age, skill level, and attention span, so you’ll want to plan accordingly.
What Should I Do if My Child Loses Interest Halfway Through?
You can try encouraging perseverance, you can pause and return later, or you can pivot by offering alternatives. Sometimes kids need breaks, flexibility, or entirely new projects to reignite their creativity and engagement.
Conclusion
Just as a seed needs rich soil rather than concrete to flourish, your child’s imagination thrives when it’s rooted in hands-on creation, not passive screens. You’ve planted nine gardens of possibility here—from cardboard kingdoms to yarn masterpieces. Now watch as your little artists bloom, their fingers stained with paint and minds alive with wonder. You’re not just fighting boredom; you’re cultivating creators who’ll harvest creativity for life.