Weekend Family Craft Projects: Fun Bonding Activities Guide
Make weekends creative and calm with quick, age-appropriate projects. Try Saturday speed crafts: nature collages, washable painting, and two-minute cleanups. On Sunday, team up for family painting rotations or cozy knitting with defined roles. For toddlers, keep it contained—sticker sorting, sponge stamps, or paint-in-bags. Tweens and teens can design shirts, film stop-motion, or craft purposeful gifts. Stock a simple, labeled station with non-toxic supplies and a wipeable mat. You’ll pick up smart routines, skill builders, and stress-saving tips next.
Key Takeaways
- Plan quick Saturday crafts with washable paints or nature collages to build fine-motor skills, ending with a two-minute cleanup.
- Try cozy Sunday team projects like rotating family paintings or shared knitting roles to practice cooperation and reflection.
- Set up toddler-friendly, low-mess makes—sticker sorting, sponge stamps, or bagged finger painting—with 10–15 minute sessions and supervision.
- Offer tween and teen challenges—custom T-shirts, stop-motion films, stylish decor, or purposeful gifts—timed under 90 minutes using non-toxic materials.
- Organize a safe, inviting craft area with labeled bins, child-height tools, weekly material rotation, and simple cleanup rules to build responsibility.
Quick Crafts for Busy Saturday Mornings

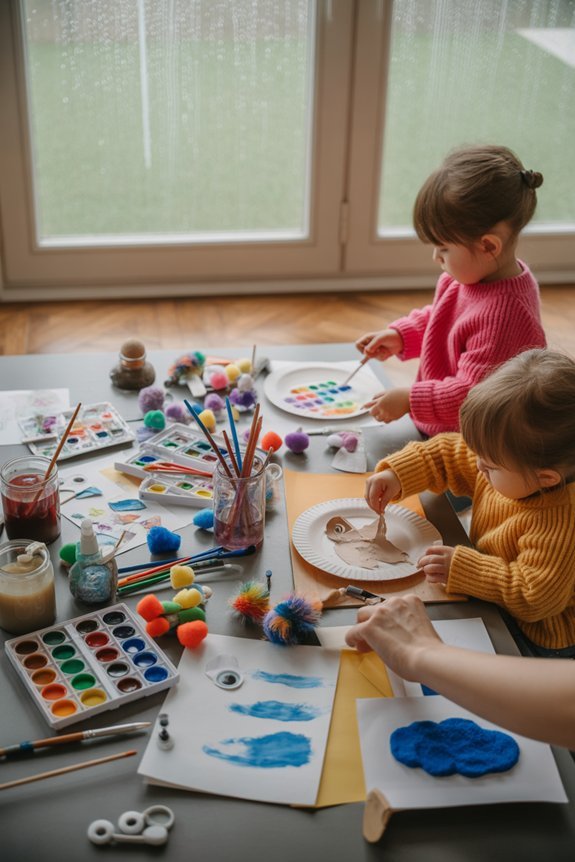
Even when weekends feel rushed, you can squeeze in simple, satisfying crafts that build skills and memories. Choose activities that fit short attention spans and support fine-motor practice. Set up a tray with washable paints, thick paper, and chunky brushes for quick painting; limit colors to reduce mess and cognitive load. Narrate color names and strokes to reinforce language.
For toddlers, use hand-over-hand guidance; for older kids, invite pattern or shape challenges.
Head outside for nature collages. Collect leaves, bark, and petals, then sort by size or texture to build early math skills. Glue onto cardstock with non-toxic adhesive; supervise closely to prevent mouthing and choking.
Offer child-safe scissors and clear rules: sit while cutting, pass tools handle-first. End with a two-minute cleanup routine.
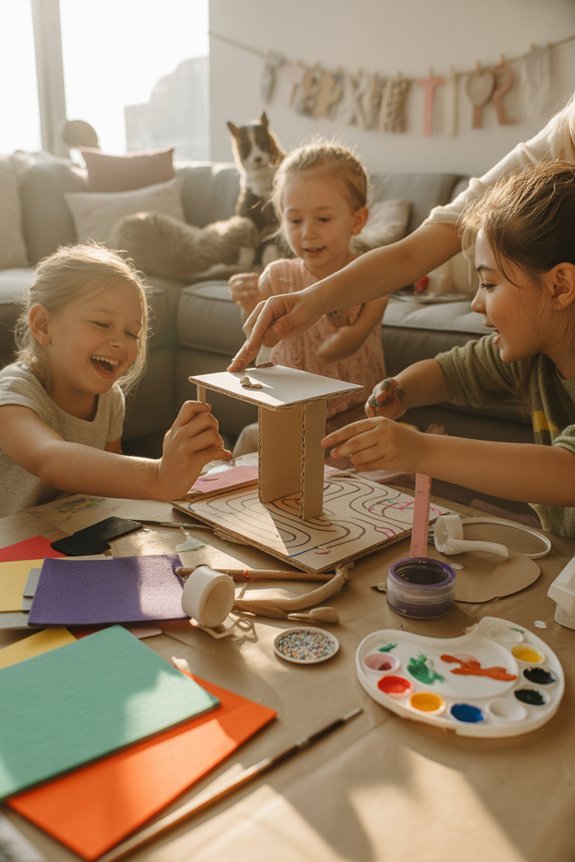
Cozy Sunday Projects to Do as a Team
While the pace finally slows on Sunday, lean into projects that foster cooperation, communication, and problem-solving. Choose activities that match attention spans and fine-motor skills, and set clear roles to reduce frustration.
Try cozy knitting: you cast on, an older child counts stitches, and a younger one measures length. Research links repetitive handwork to improved focus and self-regulation, so keep sessions short and celebrate progress, not perfection.
Cozy knitting: cast on together, count stitches, measure length—short, soothing sessions build focus and self-regulation.
Shift to family painting. Sketch a simple scene, assign sections, and rotate every five minutes to encourage perspective-taking. Use washable, non-toxic supplies, ventilate the room, and secure smocks and table coverings.
For tools, offer broad brushes for beginners and smaller ones for detail-ready hands. End with a brief reflection—what worked, what didn’t—to build problem-solving habits together.
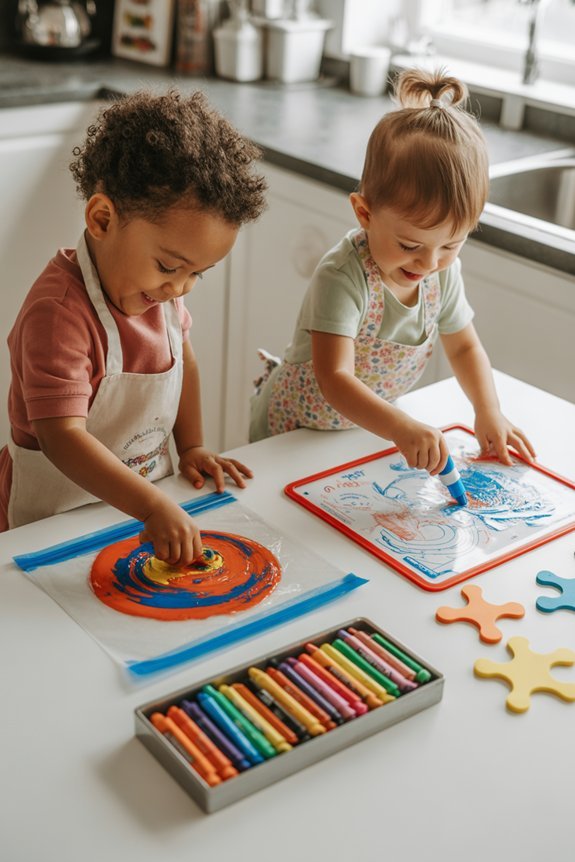
Toddler-Friendly Makes With Minimal Mess
Two simple rules keep toddler crafts low-stress: contain the materials and match the task to tiny hands. Set up a washable tray, tape paper down, and offer chunky, non-toxic tools.
Go for activities that build fine-motor skills and language: sticker sorting by color, large sponge stamps, and finger painting inside a zip-top bag to reduce mess while giving sensory input. Try nature collages by placing contact paper sticky-side up and letting your child press leaves or petals; you handle scissors, they press and point.
Keep sessions short (10–15 minutes), model one step at a time, and praise effort. Supervise constantly to prevent mouthing small parts. Use washable, taste-safe supplies, and wipe hands promptly.
End with a simple cleanup song so routines stick.
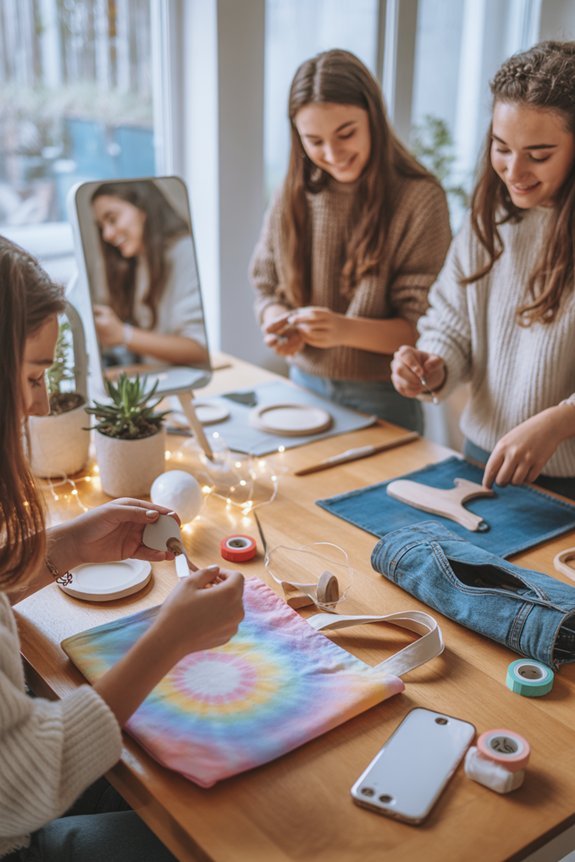
Tween Challenges That Spark Creativity
You can challenge tweens with design-your-own T-shirts using fabric markers or heat-transfer vinyl—provide cotton shirts, prewash them, and supervise any heat tools to prevent burns.
Encourage DIY stop-motion films by planning a short storyboard, using a stable phone tripod, and setting frame rates around 12 fps for smoother motion.
Keep sessions under an hour, use non-toxic materials, and build in short breaks to support focus and reduce frustration.
Design-Your-Own T-Shirts
How do you turn a plain tee into a canvas for tween creativity and skill-building? Start with pre-washed cotton shirts, a clear plan for t shirt designs, and age-appropriate tools.
Sketch ideas on paper, then transfer with light pencil or washable marker. For fabric painting, choose non-toxic, washable paints and label-safe markers; set up ventilation and cover surfaces. Teach color mixing, spacing, and symmetry—skills tied to visual planning and fine motor control.
Use stencils or tape for crisp lines, and encourage iterative testing on scraps. Heat-set following manufacturer instructions, supervising ironing.
Promote autonomy: let your tween select a theme, set a time limit, and present their process. Finish with a gentle wash to check durability, then reflect—what worked, what to adjust next time?
DIY Stop-Motion Films
Fresh off customizing tees, channel that same planning and precision into DIY stop‑motion films—a project that builds storytelling, patience, and problem‑solving.
Start by co-writing a simple three‑scene script to guide animation storytelling. Gather safe materials: clay, paper cutouts, or blocks; use a stable phone on a tripod; add consistent light to reduce flicker.
Practice basic stop motion techniques: move figures slightly, capture a frame, repeat. Aim for 8–12 frames per second for smoother motion without overwhelming tweens.
Assign roles—director, animator, photographer, and sound designer—to keep everyone engaged and reduce conflicts. Record dialogue after filming to avoid handling hazards and shaky shots.
Encourage iteration: review, reshoot short segments, and celebrate small improvements. Keep sessions under 45 minutes, provide brain breaks, and store small pieces safely.
Teen DIYS With Style and Purpose
While trends shift fast, teens still crave projects that reflect identity and do real good. You can guide them toward DIYS that build skills, confidence, and community ties.
Create stylish decor with removable wall decals cut from contact paper; it personalizes rooms without damage. Paint thrifted frames with low-VOC paints, then add printed affirmations backed by evidence for boosting motivation.
Design purposeful gifts: assemble self-care kits with fragrance-free lotion, lip balm, and a handwritten coping-strategies card; or make bookmarks with crisis text numbers for school libraries. Stitch simple tote bags and include a kindness note inside.
Set up a safe workspace: ventilate, use non-toxic adhesives, wear cut-resistant gloves for blades, and follow tool instructions.
Keep projects timed (45–90 minutes) to match teen attention and celebrate progress, not perfection.
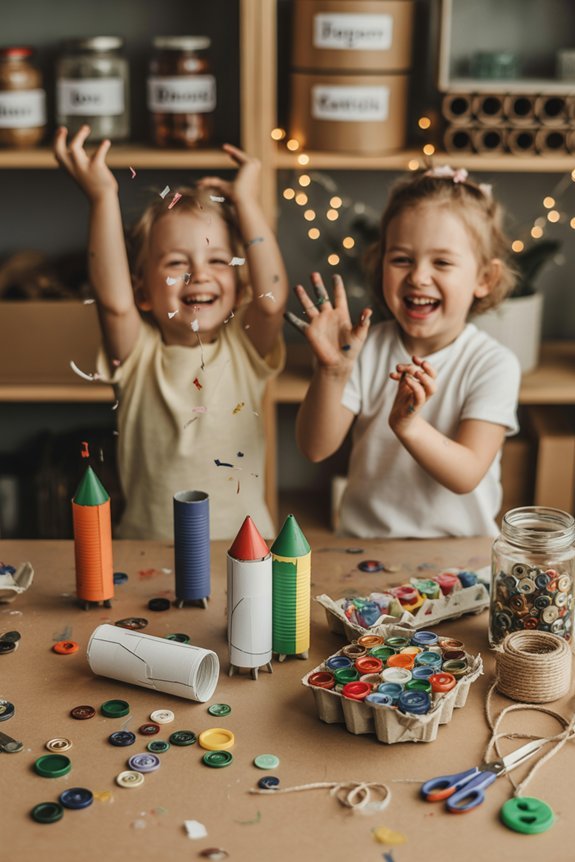
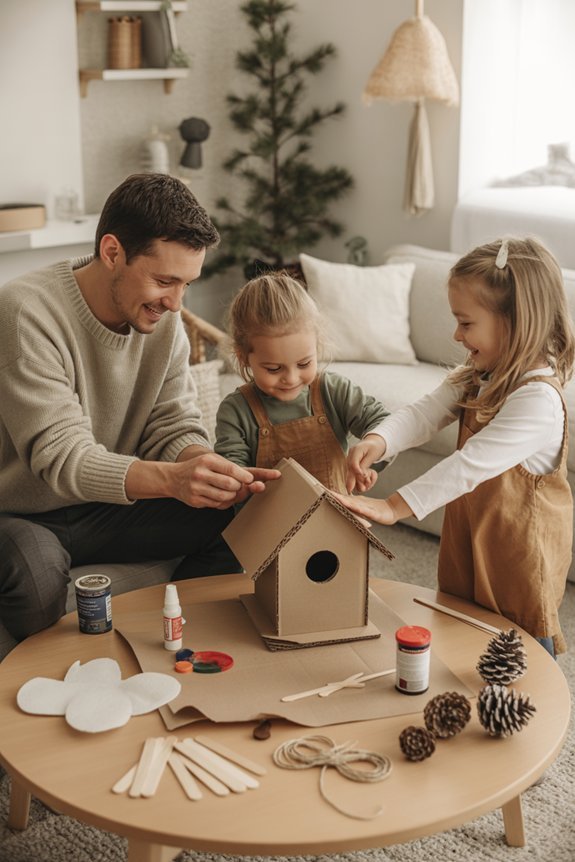
Upcycled Creations From Everyday Materials
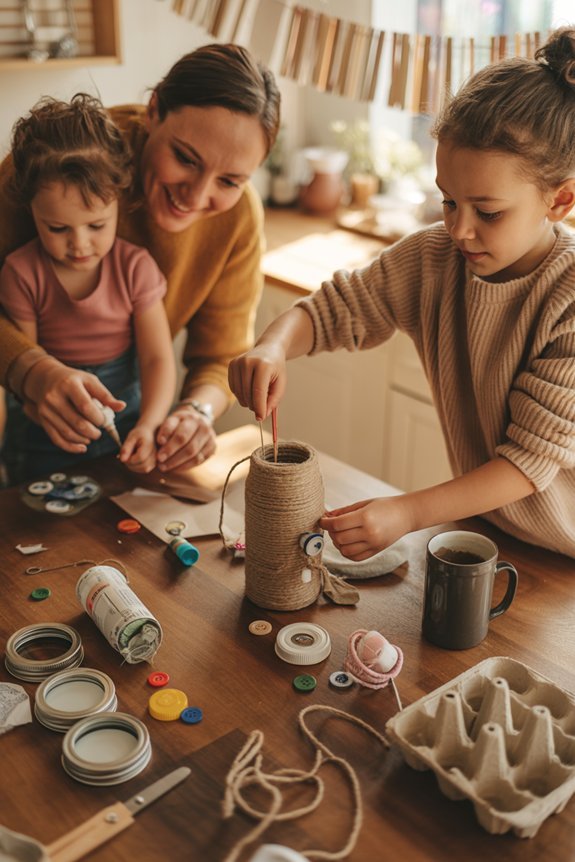
Turn cardboard boxes into playsets or organizers, reinforcing folds with tape and using child-safe scissors.
Repurpose jars and tins as planters or supply holders after washing, removing labels, and adding tape to cover sharp edges.
Use fabric scraps for no-sew bookmarks or patchwork art, checking fiber content for fray risk and supervising hot-glue use.
Cardboard Box Transformations
Because cardboard boxes are sturdy, lightweight, and easy to cut, they’re ideal for kid-friendly upcycling projects like playhouses, marble runs, and costume armor. You can sketch simple plans, then build together to practice measuring, sequencing, and problem-solving.
Try cardboard castles with detachable towers to encourage imaginative play and fine-motor skills. Create robot sculptures using scored folds, tabs, and slot joints; kids can test stability and revise designs—a core engineering habit.
Prioritize safety: adults handle box cutters; kids use blunt scissors. Pre-score lines with a craft knife and metal ruler, cut away from hands, and sand rough edges. Use nontoxic glue sticks or paper tape; add tempera paint or markers once structures dry.
Label recyclable scraps, and model cleanup routines. Photograph builds, invite stories, and celebrate iteration.
Jar and Tin Repurposing
After cardboard builds dry and get photographed, shift to glass jars and tin cans for sturdy, long-lasting upcycles that teach sorting, measuring, and fine-motor control.
Wash containers, remove labels, and sand sharp edges on cans; supervise closely and use kid-safe gloves.
Create jar lanterns: measure twine lengths, count glass pebbles, and practice patterns while attaching wire handles. Use battery tea lights, not candles.
For tin planters, tap drainage holes with a nail and block, then fill with soil using a scoop to reinforce volume concepts. Let kids choose herb seeds, track sprouting, and chart watering.
Decorate surfaces with non-toxic paint or adhesive vinyl; avoid small embellishments for children under three.
Store tools safely, and teach cleanup routines to build responsibility.
Fabric Scrap Crafts
One basket of fabric scraps can become a low-mess maker station that builds cutting skills, patterning, and early design thinking.
Set out blunt-tip scissors, glue sticks, cardstock, and masking tape. Offer short tasks: sort by color, match textures, and arrange simple patterns. Research shows categorizing and sequencing strengthen executive function and fine-motor control.
Make fabric scrap bookmarks by layering small rectangles on cardstock; press with a heavy book to dry flat. Add a ribbon loop and clear tape edging for durability.
For fabric scrap wall art, sketch a simple shape, then fill it with contrasting swatches, teaching composition and negative space.
Prioritize safety: pre-cut tiny pieces, keep irons and hot glue for adults, and supervise snipping.
Clean up with labeled envelopes and a lint roller.
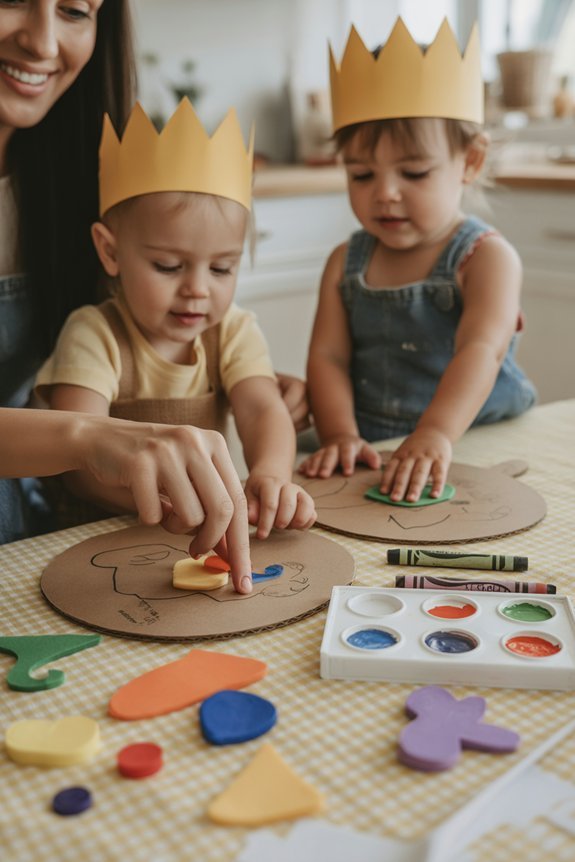
Seasonal and Holiday Keepsakes to Treasure
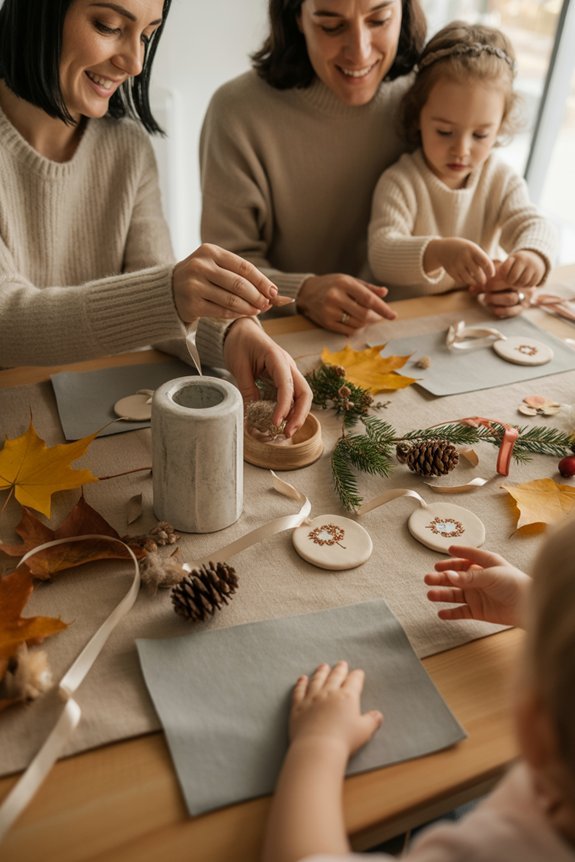
While seasons shift and holidays come and go, you can turn simple materials into keepsakes that preserve family memories and kids’ growth. Choose age-appropriate steps: toddlers press handprints; older kids cut, thread, and write dates. Favor non-toxic glue, air-dry clay, and shatterproof pieces for safer handling. Rotate tasks so everyone contributes and learns.
- Press tiny handprints into salt dough, punch a hole, bake per recipe, and paint. Seal, add the year, and hang as holiday ornaments that mark growth.
- Create seasonal decorations with felt leaves or snowflakes; stitch simple lines, then glue to ribbons for door hangers or garlands.
- Design photo tags by mounting snapshots on cardstock, laminating with clear tape, and adding a loop—sweet for gift toppers or yearly tree keepsakes.
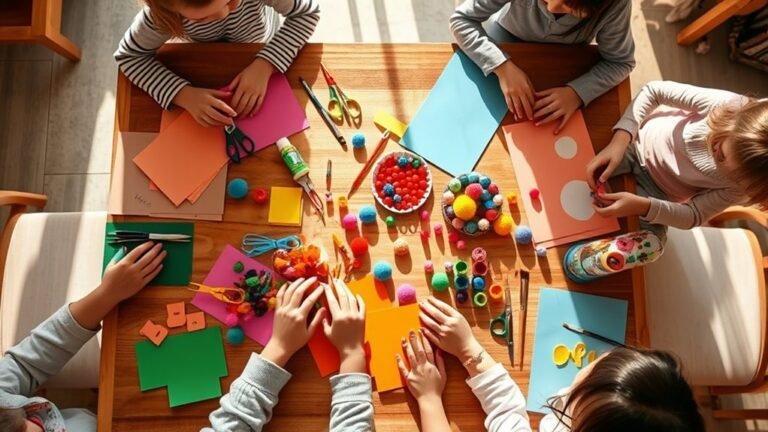
Tips for Setting Up a Family Craft Station
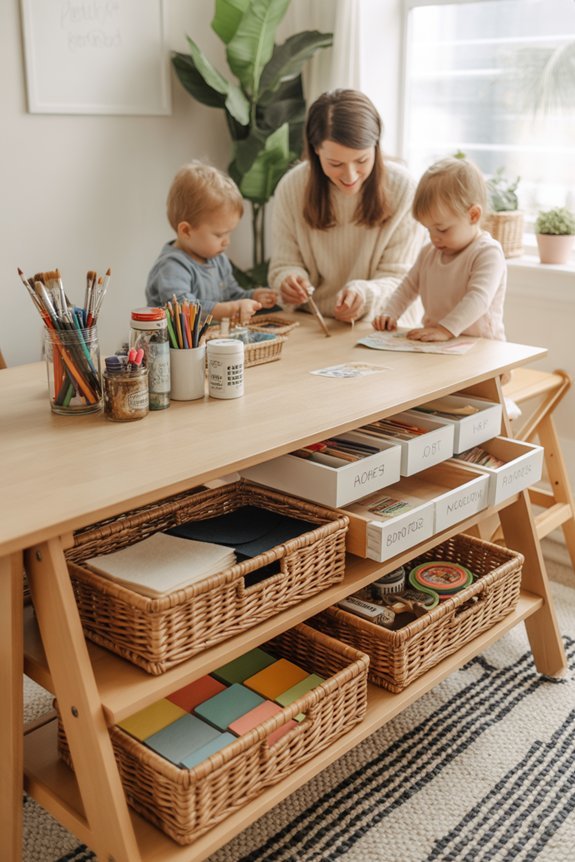
Start with a small, well-lit zone you can keep tidy fast, then stock it with safe, age-appropriate basics in clear, labeled bins.
Place scissors with rounded tips, washable glue, non-toxic paints, and varied paper at child height; keep hot tools and sharp blades locked higher.
Use creative organization: color-code labels, add picture icons for pre-readers, and store crafting supplies in stackable containers to reduce visual clutter and decision fatigue.
Use color-coded labels, picture icons, and stackable bins to cut visual clutter and decision fatigue.
Set a wipeable surface and a mat for spills. Provide child-sized stools to support posture and attention.
Post simple rules—ask before using tools, clean as you go, hands washed after painting.
Rotate materials weekly to spark novelty while reinforcing skills. Keep a small “in-progress” tray so projects pause safely and resume smoothly.
In case you were wondering
How Can We Craft Together Virtually With Distant Family Members?
Schedule virtual craft sessions on Zoom, share supply lists, and pick shared project ideas. Keep instructions age-appropriate, use non-toxic materials, and supervise tools. Rotate hosts, screen-share steps, and photograph progress. End with a brief show-and-tell and cleanup checklist.
What’s a Good Budget for Monthly Family Crafting?
Aim for $20–$50 monthly. You’ll balance Family crafting goals, materials, and safety gear. Prioritize non-toxic supplies, reuse recyclables, buy in bulk, and track costs. Evidence suggests planned Crafting budgets reduce waste, support skill growth, and sustain consistent creative practice.
How Do We Store and Display Finished Projects Attractively?
Right off the bat, you combine display options like floating shelves, shadow boxes, and rotating gallery frames with labeled bins, clear totes, and flat files as storage solutions. You ensure child-height access, non-toxic materials, secured hardware, and periodic decluttering.
How Can Crafts Support Kids With Sensory Sensitivities?
Use crafts to build sensory integration by offering predictable, low-intensity textures, weighted tools, and rhythmic actions. You’ll scaffold choices, limit stimuli, and model pacing. Prioritize safety, washable materials, and breaks. Track reactions; adapt for calming effects and gradual tolerance.
What Safety Certifications Should Craft Supplies Have for Children?
Picture tiny hands gripping bright markers: you check child safety labels first. Prioritize ASTM D-4236, EN71, CPSIA compliance, AP/CL seals, and non-toxic claims. Verify age grading, choking warnings, ventilation guidance, and material certification from reputable brands and third-party labs.
Conclusion
You might worry crafts take too long, but research shows even 20–30 minutes of shared, hands-on activity boosts kids’ confidence and family closeness. Start small: quick Saturday makes, then co-create a Sunday project. Pick developmentally appropriate tasks—toddler-safe, low-mess options; tweens’ skill-builders; teens’ style-driven DIYS. Set up a simple, labeled station and use non-toxic supplies, scissors with rounded tips, and supervision for hot tools. You’ll spark creativity, teach problem-solving, and create keepsakes you’ll all be proud of.