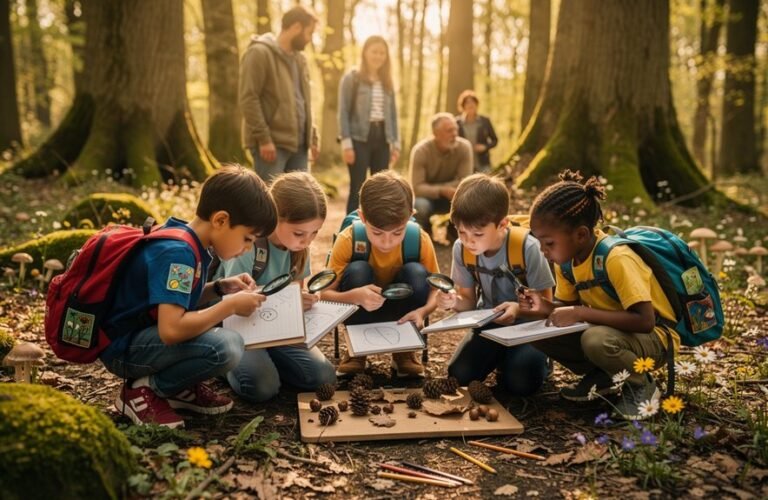
17 Nature Crafts to Make During Family Hikes
You can transform family hikes into creative adventures with nature crafts like pinecone animals, rock painting, and nature mandalas arranged from trail finds. Decorate walking sticks with yarn and feathers, create leaf rubbings with crayons, or build pebble towers along the path. Try making feather bookmarks, nature crowns from flowers and leaves, or preserve memories through trail collages combining photos with pressed materials. Each craft uses simple supplies and materials you’ll discover naturally, turning outdoor exploration into hands-on art that keeps kids engaged throughout your journey.
Key Takeaways
- Pinecone crafts transform natural finds into woodland creatures using paint, googly eyes, and pipe cleaners for campsite decorations.
- Nature weaving with Y-shaped sticks, yarn, and collected leaves creates textured artwork while developing fine motor skills.
- Nature mandalas arrange stones, petals, and twigs into symmetrical patterns that can be photographed for lasting memories.
- Fairy houses built from twigs, moss, and bark encourage imaginative play and can be left for others to discover.
- Walking stick decorations personalize hiking experiences by wrapping branches with yarn, feathers, and ribbons for functional art.
Pinecone Animals and Creatures
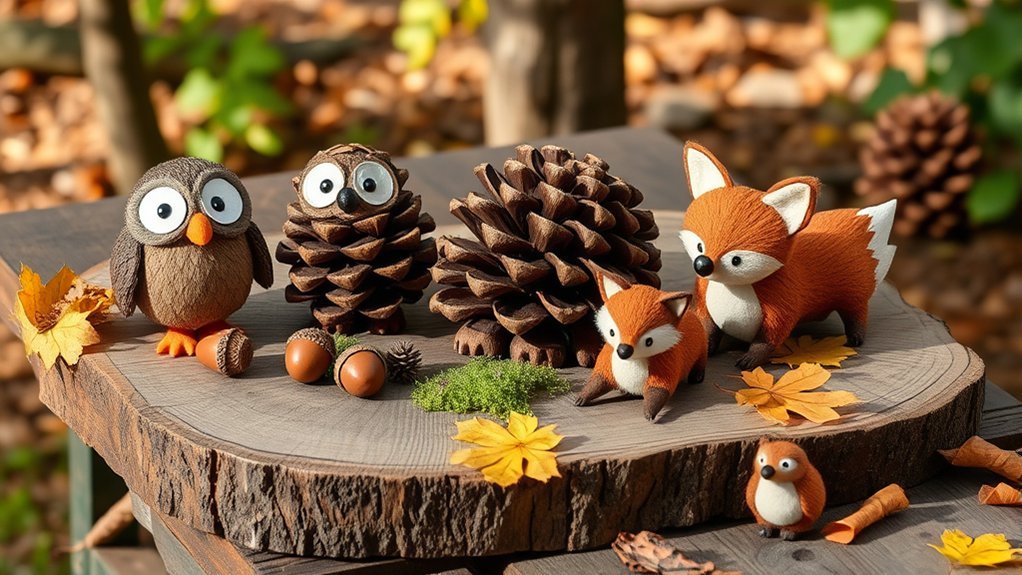
Pinecones transform into delightful woodland creatures with just a few simple additions. You’ll find that googly eyes, pipe cleaners, and felt scraps turn ordinary pinecones into owls, hedgehogs, or foxes.
Collect various sizes during your hike—larger ones work perfectly for owl bodies, while smaller cones create mice or squirrels.
Consider pinecone painting to add vibrant colors and personality to your creatures. Let kids choose their favorite shades and patterns. Acrylic paints work best and dry quickly on the trail.
Once you’ve created several animals, string them together as pinecone garlands to decorate your campsite or take home. These garlands make wonderful seasonal decorations and preserve memories of your outdoor adventure.
Store extra pinecones in your backpack for future crafting sessions.
Leaf Rubbings With Crayons
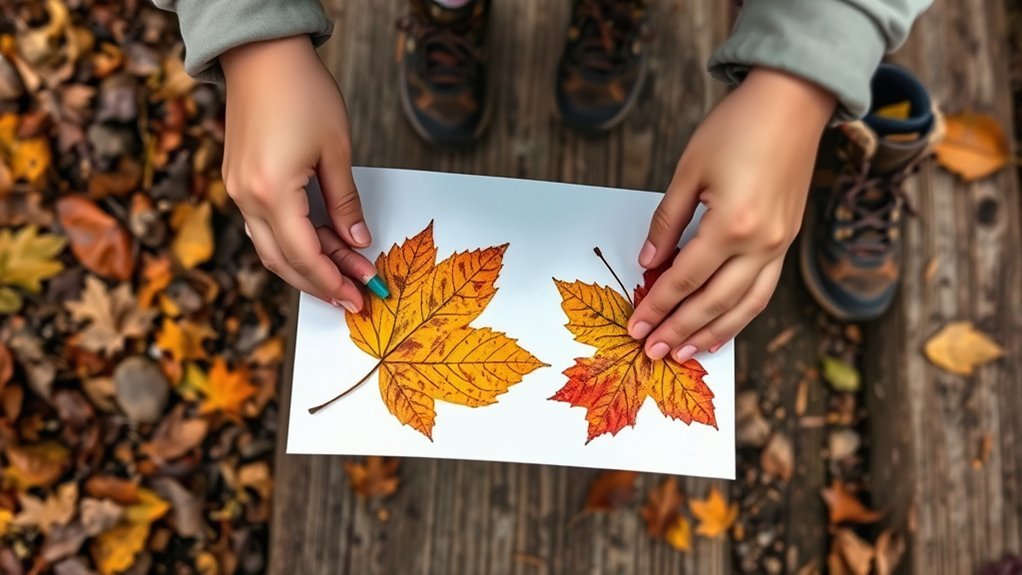
While pinecones offer three-dimensional crafting fun, leaf rubbings provide a simple way to capture nature’s intricate patterns on paper.
You’ll need unwrapped crayons, plain paper, and freshly collected leaves. Place your leaf vein-side-up beneath the paper, then rub the crayon’s side across the surface using firm, even strokes. The leaf’s texture transfers beautifully onto your page.
Gather unwrapped crayons and paper, position leaves vein-side-up underneath, then rub firmly with the crayon’s side to reveal nature’s hidden textures.
Experiment with different leaf types—oak, maple, and fern each reveal unique vein patterns and shapes. Create artistic color palettes by layering multiple crayon colors or using contrasting hues for visual interest.
You can arrange several rubbings on one sheet to design nature collages. This portable activity requires minimal supplies and works perfectly during rest breaks. Kids develop observation skills while discovering the hidden details within everyday leaves.
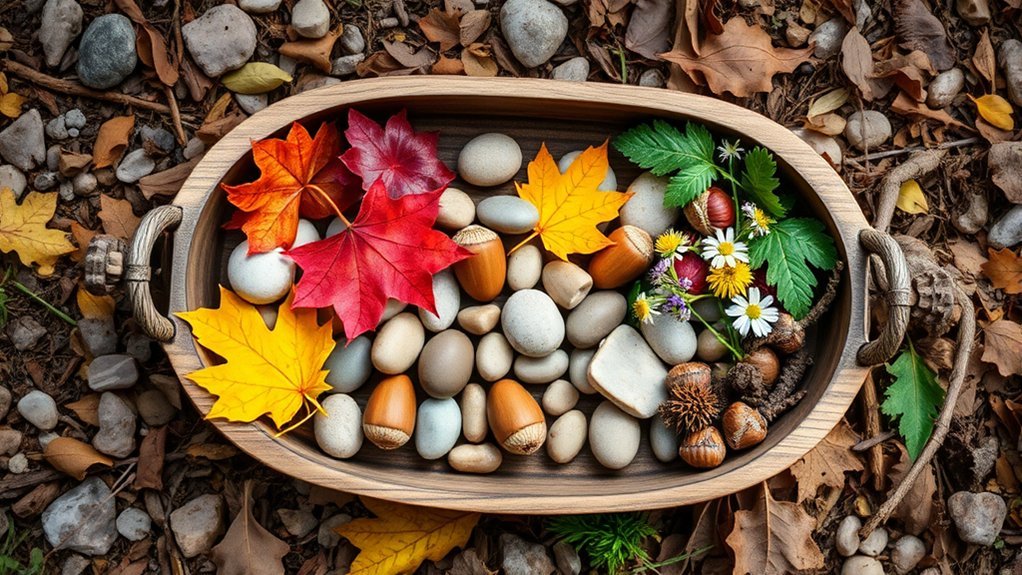
Nature Mandalas From Trail Finds
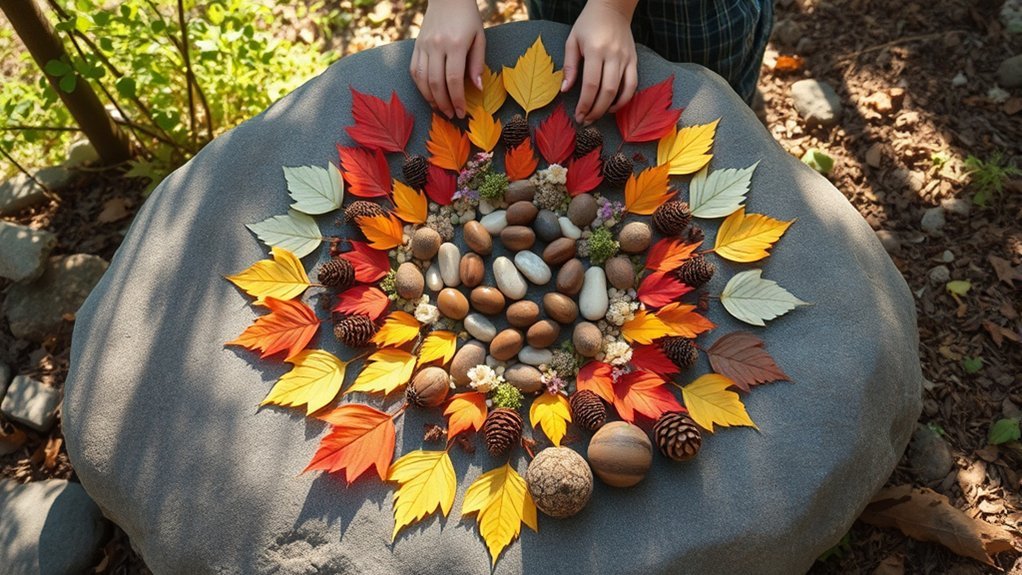
Creating symmetrical patterns with natural objects transforms ordinary trail finds into stunning circular artwork. You’ll discover that mandala patterns emerge naturally when you arrange items by size, shape, and color radiating from a central point.
Start by selecting a flat area and placing a distinctive stone or pinecone at the center. Then build outward in concentric circles, letting natural colors guide your design choices.
Essential materials to collect:
- Pebbles and small stones for sturdy base layers
- Flower petals, leaves, and seed pods for vibrant accents
- Twigs, acorns, and pine needles for textural variety
Encourage your kids to experiment with different arrangements before committing to their final design. Photograph the completed mandala before continuing your hike, preserving their temporary masterpiece digitally while leaving nature undisturbed.
Decorated Walking Sticks and Hiking Wands
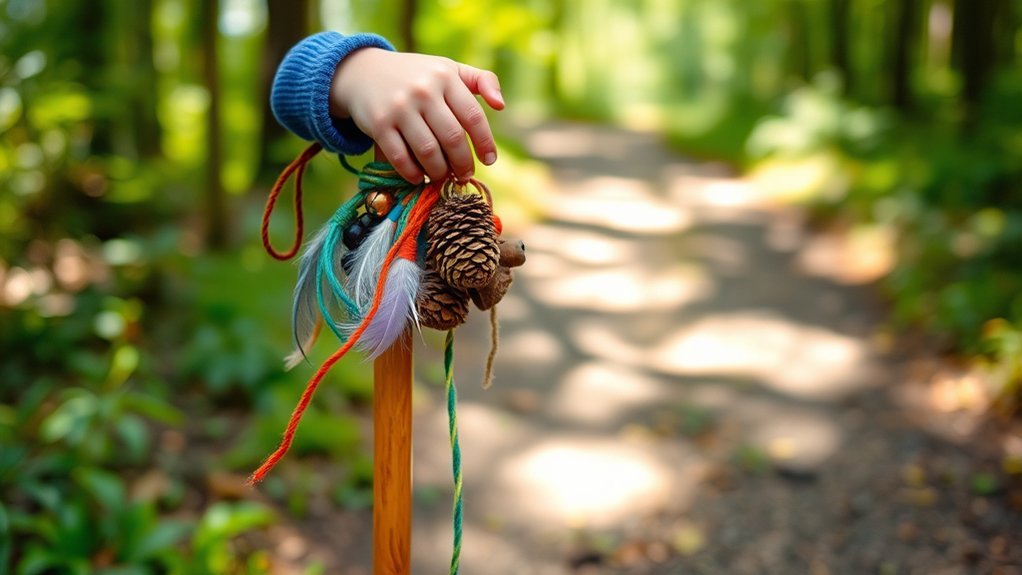
Finding the perfect stick along the trail opens up opportunities for a craft project your children will treasure long after the hike ends. Look for sturdy, straight branches that feel comfortable in small hands.
A simple branch discovered on the trail can become a cherished memory your child carries home from nature.
Once you’ve found suitable sticks, let your kids explore walking stick decorations by wrapping colorful yarn around the handles or attaching found feathers with twine.
Hiking wand personalization transforms simple sticks into magical keepsakes. Secure lightweight ribbons in favorite colors to the top, creating flowing streamers that dance while walking.
Attach small bells that jingle with each step, or tie on interesting seed pods and pine cones collected along the way. These decorated sticks become hiking companions that encourage children to keep moving while sparking imaginative play throughout your outdoor adventures.
Rock Painting and Stone Art
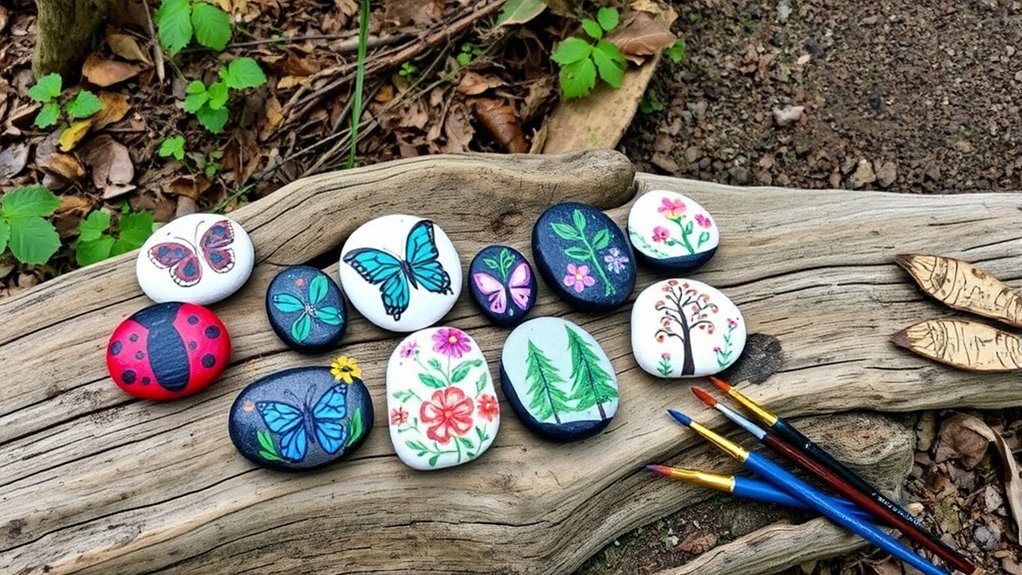
Smooth river rocks and weathered stones become miniature canvases that transform ordinary hikes into treasure hunts.
You’ll discover perfect painting surfaces along creek beds and trails, where each stone’s unique shape sparks creativity. Pack washable paints and small brushes in your daypack for impromptu art sessions during rest stops.
Essential rock painting activities:
- Stone texture exploration – Feel different surfaces to find smooth stones for detailed designs or rough ones for abstract patterns.
- Rock color techniques – Layer paint colors, create dots with cotton swabs, or use natural pigments from crushed berries and charcoal.
- Theme collections – Paint matching sets like woodland animals, trail markers, or inspirational words to hide along paths.
Leave your finished stones as surprise discoveries for fellow hikers, spreading joy throughout nature.
Bark Texture Prints
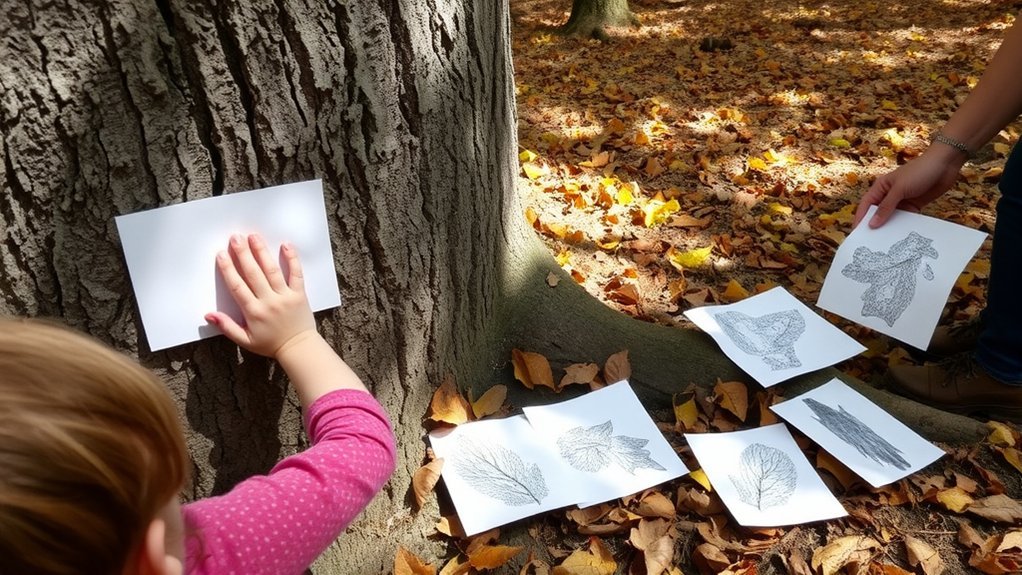
Trees reveal hidden patterns when you press paper against their trunks and rub crayons across the surface. This simple technique transforms ordinary bark into stunning bark art that captures nature’s intricate designs.
Bark rubbings transform nature’s hidden textures into tangible art, making the invisible patterns of trees visible through simple crayon strokes.
You’ll need unwrapped crayons or soft pencils and thin white paper. Hold the paper firmly against the tree trunk while your child rubs the crayon horizontally across it. The natural textures emerge like magic, revealing ridges, grooves, and unique patterns specific to each tree species.
Oak trees display deep, rough furrows while birch bark creates delicate, paper-like impressions. Collect prints from different trees during your hike to compare their distinct characteristics.
These rubbings make excellent journal pages, bookmarks, or frames. Label each print with the tree species and date to create educational keepsakes from your outdoor adventures.
Flower and Leaf Pressing
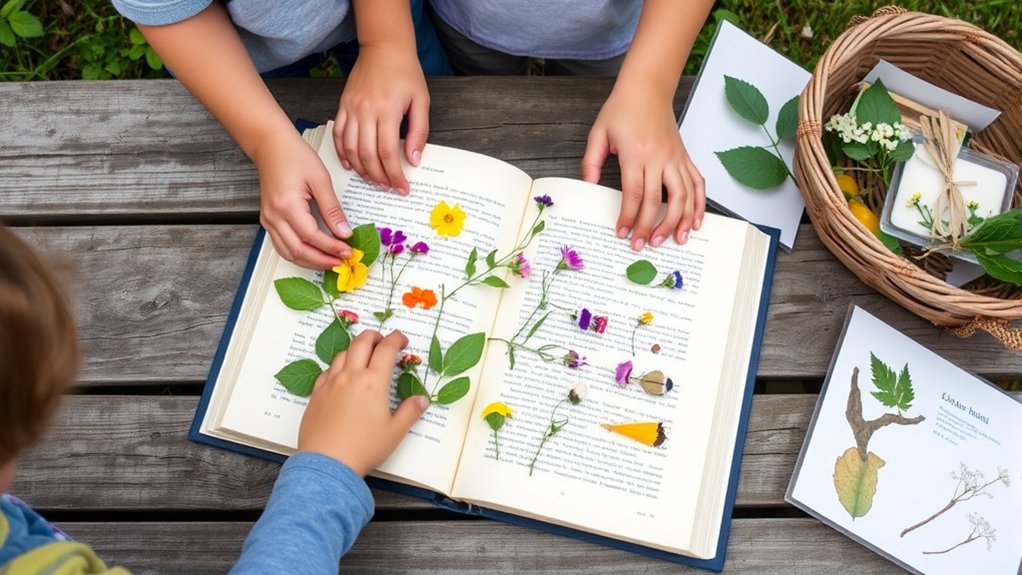
While hiking trails showcase countless botanical treasures, preserving them through pressing lets you bring nature’s beauty home.
You’ll create lasting keepsakes while teaching children about leaf identification and botanical structure.
Essential Pressing Steps:
- Select specimens wisely – Choose flat, unblemished flowers and leaves during dry conditions. Avoid thick blooms that won’t press well.
- Press immediately – Place specimens between parchment paper inside heavy books. Stack additional weight on top and wait 2-3 weeks.
- Display creatively – Mount dried specimens in frames, create bookmarks, or design a custom flower arrangement under glass.
Remember to collect responsibly by taking only abundant species and never harvesting from protected areas.
You’ll soon have a beautiful pressed collection documenting your family’s hiking adventures.
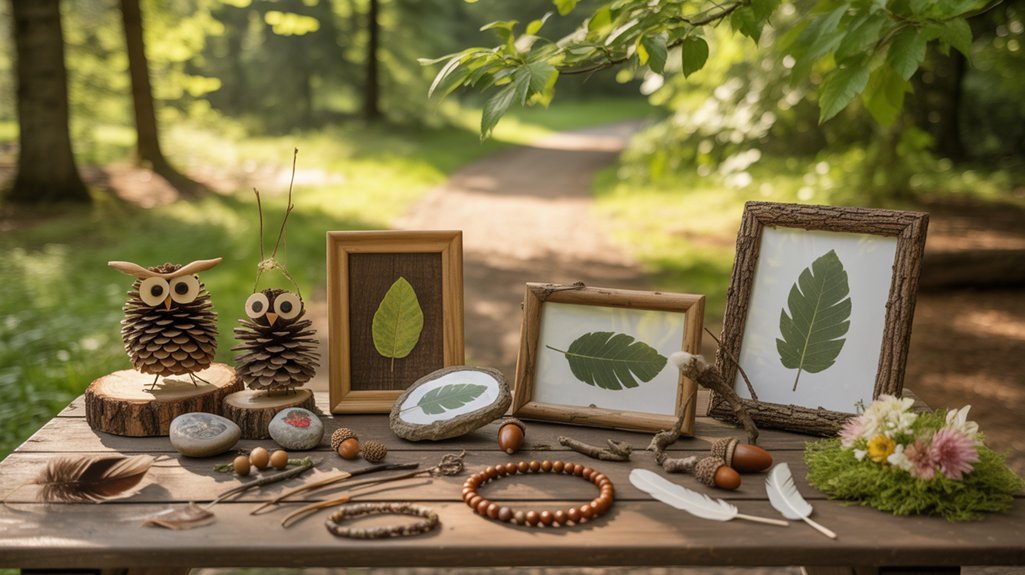
Twig Picture Frames
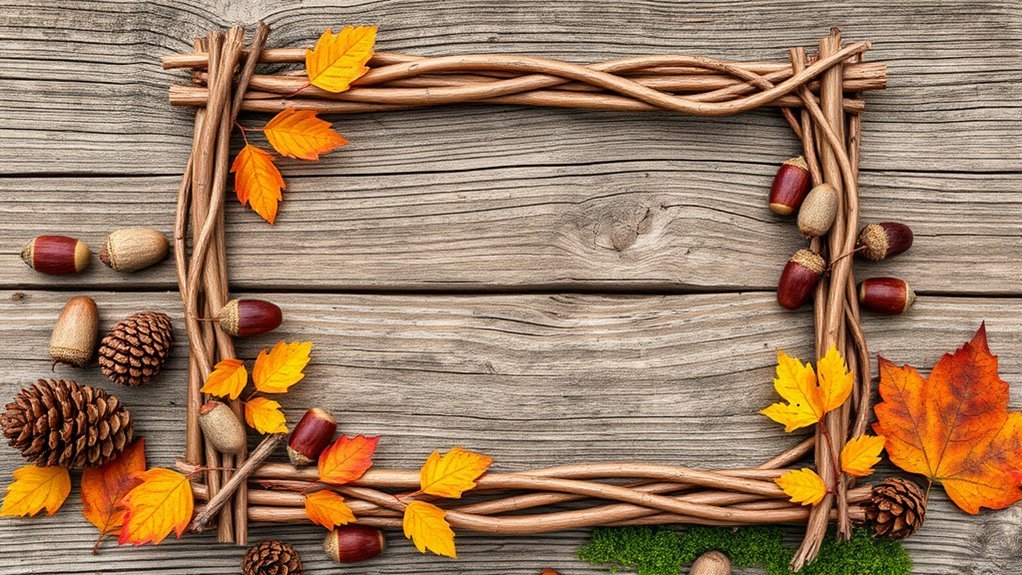
Collecting fallen twigs transforms into an engaging scavenger hunt when you’re crafting rustic frames to display your family’s favorite trail photos.
You’ll need straight twigs of similar thickness, hot glue, and cardboard backing. Arrange four twigs into a square or rectangle, securing corners with glue. Let your kids explore different twig frame designs by creating hexagons or layering branches for dimensional effects.
Attach the backing and add a photo sleeve or directly glue your hiking picture. Enhance your creation with natural embellishments like acorn caps, pinecones, or seed pods collected along the trail.
These frames make thoughtful gifts for grandparents or create a gallery wall documenting your outdoor adventures throughout the seasons.
Acorn Cap Miniatures
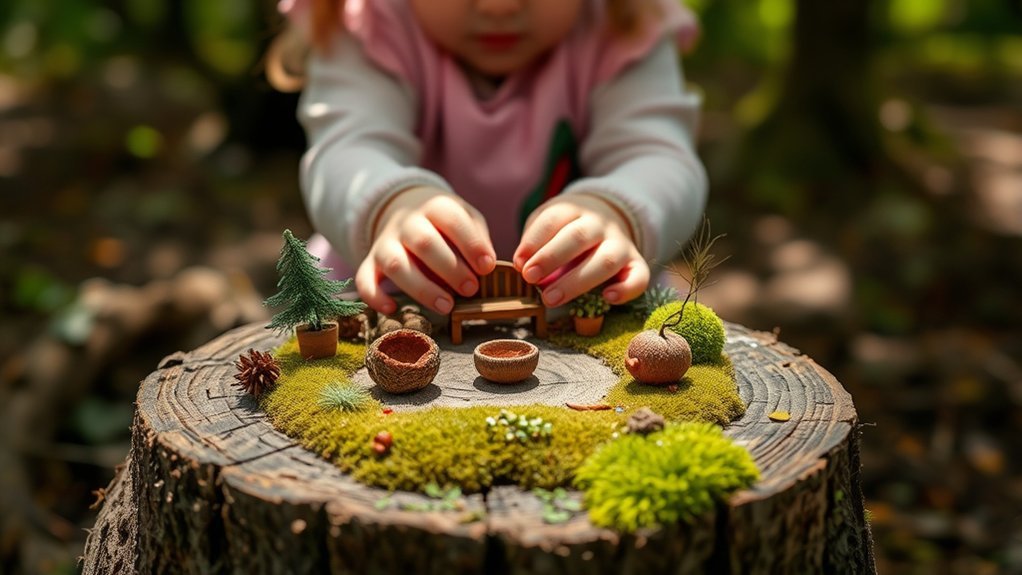
Tiny acorn caps become charming vessels for creating whimsical woodland scenes that’ll captivate kids of all ages. Transform these natural treasures into miniature bowls, hats, or fairy teacups using simple materials you’ve packed along.
Acorn cap art encourages children to observe nature’s details while developing fine motor skills.
Working with acorn caps strengthens hand-eye coordination while teaching children to notice the intricate patterns and textures found in natural materials.
Three ways to enhance acorn cap storytelling:
- Mini characters – Add tiny pebbles or berries inside caps to represent woodland creatures having a feast.
- Fairy furniture – Attach caps to small twigs using tree sap to create mushroom-style stools and tables.
- Nature dioramas – Arrange multiple caps on flat bark pieces to build complete miniature villages.
These pocket-sized creations travel easily in your backpack, letting kids continue their imaginative play throughout the hike or back home.
Nature Weaving With Sticks
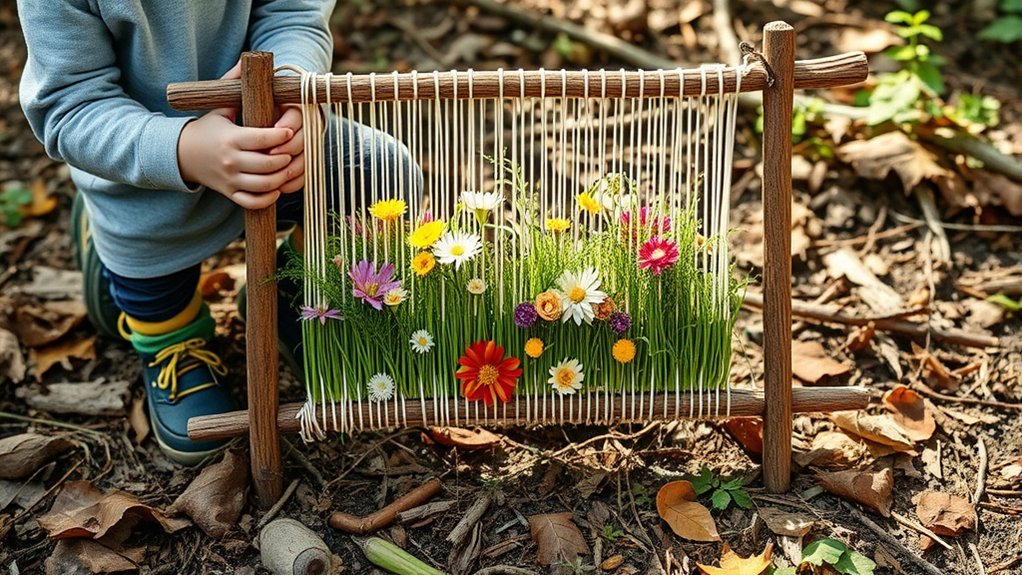
When your kids discover a Y-shaped stick on the trail, you’ve found the perfect frame for nature weaving—a portable craft that transforms foraged materials into rustic artwork.
Show them basic weaving techniques by wrapping yarn or long grass around the fork’s arms, creating a foundation. Then let them collect leaves, flowers, wildflowers, and thin twigs to weave through the strings.
Encourage experimentation with different stick patterns—alternating colors, layering textures, or creating symmetrical designs.
Younger children can simply tuck items into the gaps, while older kids master over-under weaving sequences. The beauty lies in imperfection; loose petals and drooping grasses add organic charm.
These finished pieces become trail mementos you’ll actually want to display at home, preserving memories from your outdoor adventure.
Seed Pod Sculptures
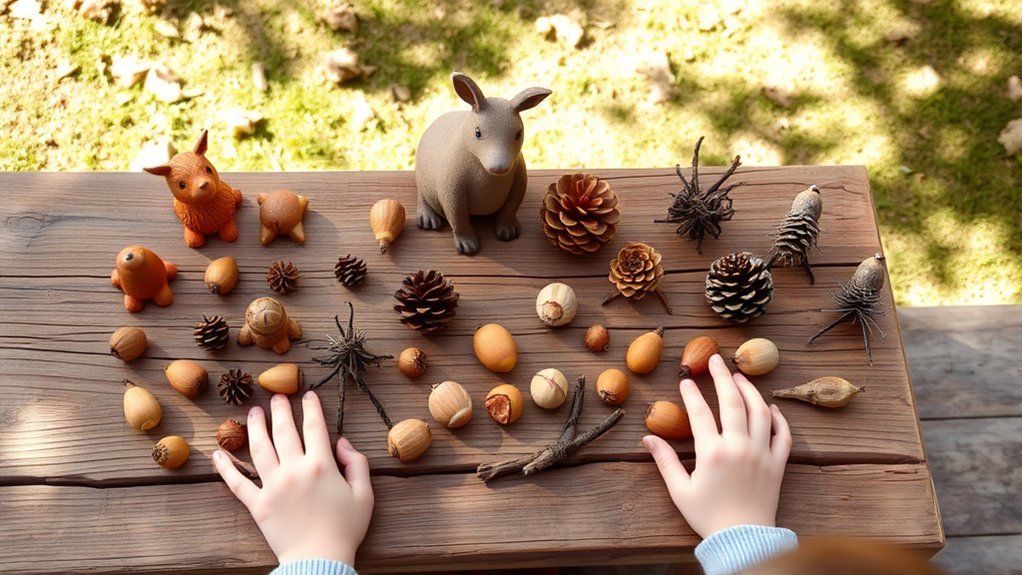
While weaving captures nature’s flat textures, three-dimensional seed pods offer sculptural possibilities that spark your child’s spatial creativity.
During your hike, collect different seed pod varieties like acorns, pinecones, maple helicopters, and sweet gum balls. These natural materials become building blocks for creative sculpting projects.
Nature’s treasury of acorns, pinecones, and seed pods transforms ordinary hikes into sculpture-hunting adventures for young creative minds.
Encourage your children to experiment with these techniques:
- Balance stacking – Stack pods of varying sizes to create towers and abstract figures
- Character creation – Combine different pods with small sticks to form animals or imaginary creatures
- Pattern building – Arrange pods in geometric designs or mandalas on flat surfaces
Let your kids explore connections between shapes without glue initially. This hands-free approach develops problem-solving skills and spatial reasoning while they discover how different forms interact naturally.
Fairy Houses From Forest Materials
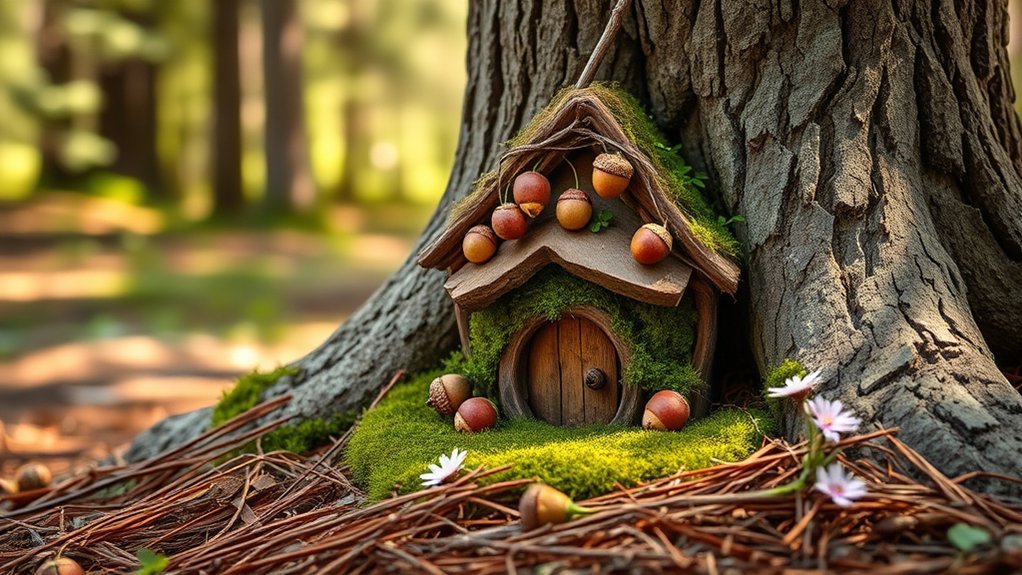
Forest floors transform into magical construction sites when children gather materials to build miniature fairy dwellings.
You’ll find everything needed along the trail: twigs for walls, moss for roofs, bark for doors, and pebbles for pathways. Show your kids how to lean sticks against tree bases or nestle structures between roots to create stable foundations.
Encourage them to design enchanted pathways using small stones leading to their creations. Acorn caps become bowls, leaves transform into blankets, and pinecones serve as decorative elements.
These tiny homes can expand into an entire fairy garden community along your hiking route.
Remember to use only fallen materials—never pull anything from living plants. Leave these whimsical structures for other hikers to discover and enjoy.
Grass Whistles and Natural Instruments

Beyond visual creativity, nature offers countless opportunities to make music during your hikes. Teaching your children grass instrument techniques transforms ordinary meadow plants into whistles and reeds. Simply stretch a wide blade of grass between your thumbs and blow across it to create vibrating sounds.
Outdoor sound exploration extends beyond grass whistles:
- Percussion sticks: Tap different wood types against rocks or logs to discover varying tones and pitches.
- Seed shakers: Fill hollow pinecones or seedpods with pebbles to create natural maracas.
- Wind chimes: Suspend flat stones or bamboo pieces from branches using natural cordage.
These activities sharpen listening skills while encouraging experimentation. You’ll find each material produces unique sounds, turning your family into a traveling nature orchestra.
Pebble Towers and Cairns

Stone stacking creates one of hiking’s most meditative and rewarding activities for families. You’ll find flat rocks near streams and beaches work best for cairn balancing, teaching kids patience and focus as they carefully position each stone. Start with larger, stable bases before adding progressively smaller pieces.
Pebble stacking challenges your family to slow down and observe nature’s details. You’ll discover that slightly textured surfaces grip better than smooth ones, and damp stones often balance more easily than dry. Each tower becomes a temporary sculpture that won’t harm the environment when it eventually tumbles.
Remember to build away from established trail cairns used for navigation. Dismantle your creations before leaving, ensuring you leave no trace while giving everyone the satisfaction of collaborative achievement.
Feather Bookmarks
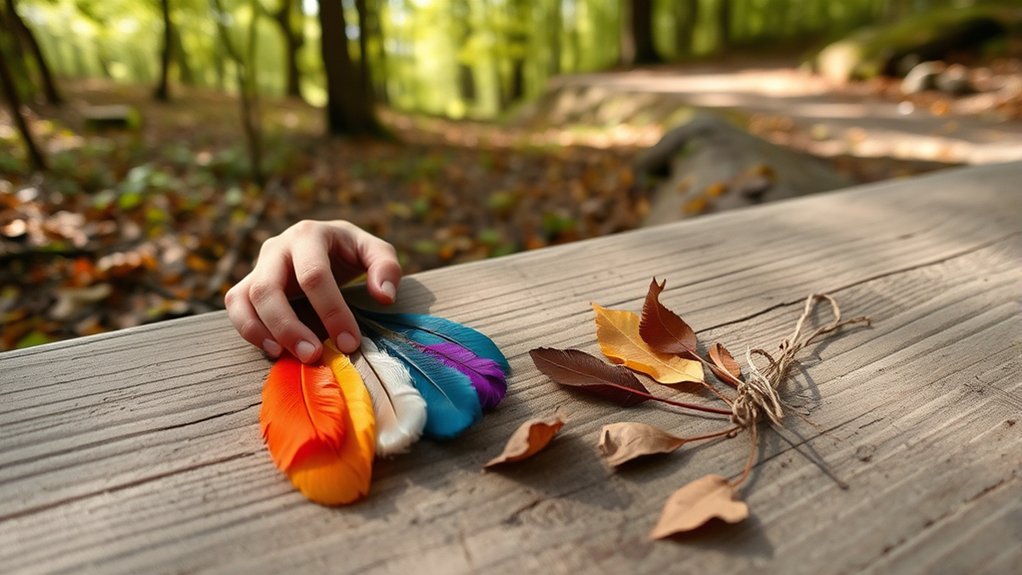
While exploring trails, you’ll often spot feathers that make perfect natural bookmarks for young readers. Different feather types offer unique bookmark designs, from sleek crow feathers to fluffy dove plumes.
Teaching children to identify birds by their feathers adds an educational element to your crafting.
Learning to match feathers with their bird species transforms a simple craft project into an engaging nature lesson for curious minds.
Transform found feathers into lasting keepsakes with these simple steps:
- Clean and press the feather between book pages for 24 hours to flatten and preserve it.
- Laminate or seal with clear contact paper to protect against wear and moisture damage.
- Add decorative elements like colorful ribbons, beads, or painted patterns that reflect your child’s personality.
Always collect feathers from the ground rather than disturbing nesting sites, and check local regulations about protected species before gathering.
Nature Crowns and Headbands

Feathers aren’t the only treasures that can adorn your favorite things—they also make stunning wearable art.
You’ll transform into woodland royalty by crafting nature crowns and headbands during your hike. Start with a flexible vine or long grass stem as your base, measuring it around your head before weaving.
For flower crowns, tuck wildflower stems through the base, securing each bloom by wrapping its stem around the band. Create leaf headbands by overlapping leaves in a circular pattern, using small twigs as natural pins.
Dandelions, clover, and daisies work beautifully for flower crowns, while maple and oak leaves provide durability for headbands.
You can wear your creation immediately or preserve it by pressing it flat between heavy books when you return home.
Trail Memory Collages
Every hike tells a story, and trail memory collages let you capture those moments in a tangible keepsake.
Trail memory collages transform fleeting outdoor moments into lasting keepsakes that preserve your family’s hiking adventures for years to come.
You’ll transform collected items into nature photo journals that preserve your family’s adventures. Start by gathering flat materials like pressed flowers, leaves, feathers, and grass during your walk.
Create lasting trail memory stories with these steps:
- Photograph your findings – Snap pictures of landscapes, trail markers, and interesting discoveries alongside your collected items.
- Arrange and attach – Glue natural materials onto cardstock or in a scrapbook, leaving space for photos and notes.
- Add details – Include the date, location, weather conditions, and memorable moments from your hike.
These collages become cherished family records, documenting growth, seasonal changes, and shared experiences on the trails you’ve explored together.
In case you were wondering
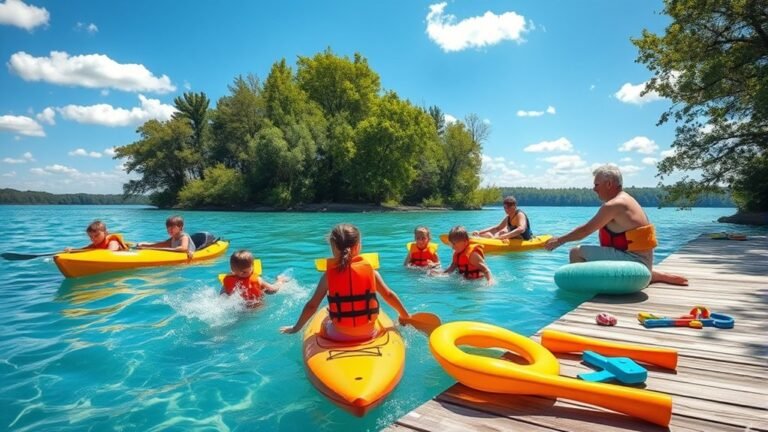
What Safety Precautions Should Families Take When Hiking With Young Children?
You’ll need proper hiking gear like sturdy shoes and sun protection. Prioritize child safety by staying on marked trails, packing plenty of water, carrying a first-aid kit, and keeping kids within sight at all times during your hike.
How Long Should a Family Hike Be for Different Age Groups?
You’ll want to consider age considerations when planning hiking duration. Toddlers handle 30-minute walks, while preschoolers manage one hour. Elementary-aged kids can hike two hours, and teens easily tackle three-plus hours on trails.
What Essential Supplies Should We Pack for a Family Hiking Trip?
You’ll need essential hiking gear like comfortable shoes, weather-appropriate clothing, and a first-aid kit. Don’t forget plenty of water, family snacks for energy, sun protection, a map, and bags for collecting nature crafting materials along the trail.
Which Trails Are Best for Nature Crafts and Beginner Families?
Look for nature trails with wide, flat paths and frequent rest stops—you’ll watch your five-year-old’s eyes light up discovering pinecones. Family friendly options include local state parks with short loops under two miles featuring varied natural materials.
How Do We Practice Leave No Trace While Collecting Nature Materials?
Practice sustainable collecting by gathering only fallen items like twigs, leaves, and rocks from the ground. Never pick living plants or disturb wildlife habitats. These nature ethics ensure you’ll leave trails pristine for future hikers while enjoying crafts.
Conclusion
You’ll discover that the best things in life truly are free when you’re creating art with nothing but nature’s treasures and your family’s imagination. These simple crafts transform ordinary hikes into creative adventures your kids will remember for years. Don’t wait for the perfect moment—grab your backpack, head outside, and let the trail become your canvas. You’re not just making crafts; you’re building memories that’ll last a lifetime.