10 Best Valentine’s Day No-Bake Treats for Kids
Valentine’s Day treats don’t need to involve an oven—or a kitchen disaster—when you’ve got a lineup of no-bake recipes that kids can actually help make. You can whip up chocolate-dipped strawberries, pink puppy chow, Oreo truffles in candy melts, or festive trail mix with zero baking required. Most take under 20 minutes, and the mess stays minimal. From yogurt-covered pretzel rods to white chocolate popcorn, these sweet ideas will make your little Cupids very happy.
What you will leave with
- Valentine’s Trail Mix combines M&Ms, yogurt raisins, pretzels, dried strawberries, and heart-shaped graham crackers for easy classroom treats.
- Pink Puppy Chow coats Rice Chex in pink-tinted peanut butter and white chocolate, then dusted with powdered sugar.
- Chocolate-dipped strawberries let kids dip fresh berries in melted chocolate and decorate with colorful Valentine’s sprinkles.
- Heart-shaped Rice Krispie Treats are cut with cookie cutters and dipped in pink candy melts for festive presentation.
- Valentine’s Oreo Truffles blend crushed cookies with cream cheese, then coat in pink candy melts with decorative drizzles.
Valentine’s Trail Mix for Easy Class Treats
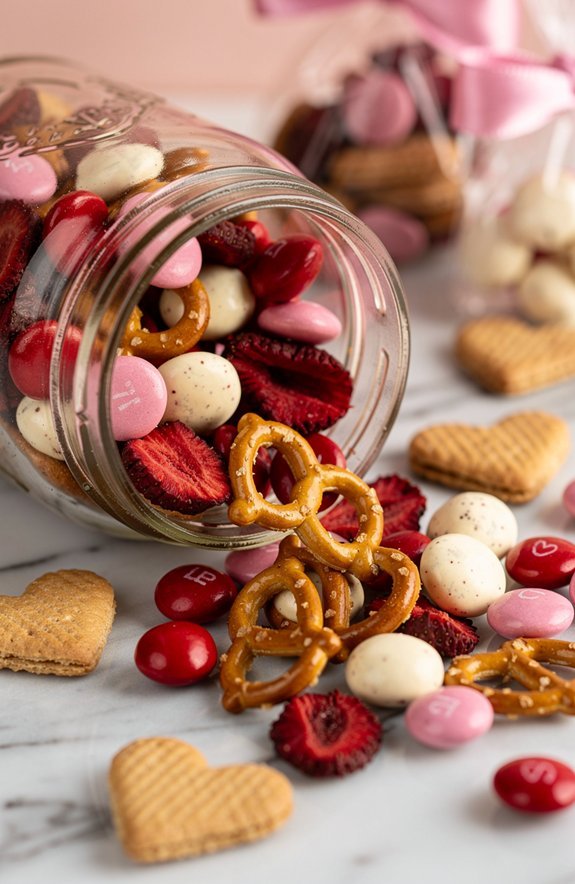
Valentine’s Trail Mix is the perfect no-fuss treat for classroom parties or playdates, requiring zero cooking skills and just minutes to assemble.
Valentine’s Trail Mix is a simple, no-bake treat that comes together in minutes—perfect for busy parents and eager little helpers.
Kids absolutely love getting involved in making this colorful snack, and parents appreciate how simple it’s to prepare in large batches for an entire class.
This festive mix combines sweet, salty, and chewy elements that appeal to children of all ages.
The vibrant pink and red colors make it instantly recognizable as a Valentine’s Day treat, and the individual portions are easy to package up as party favors or lunchbox surprises.
- 1/2 cup pink and red M&Ms
- 1/2 cup yogurt-covered raisins
- 1/2 cup small pretzels
- 1/4 cup dried strawberries
- 1/4 cup heart-shaped graham crackers
Pour all five ingredients into a large mixing bowl and gently toss everything together until the components are evenly distributed throughout the mixture.
Once combined, divide the trail mix into small mason jars, cellophane treat bags, or individual snack cups, then tie each portion with a pink or red ribbon for a festive presentation that’s ready to hand out.
When preparing this trail mix for a classroom setting, always check with teachers about potential nut allergies before including certain ingredients.
Consider swapping yogurt-covered raisins for white chocolate chips if dairy sensitivities are a concern.
For the freshest results, assemble the trail mix no more than one to two days before serving, as the pretzels can become soft if stored too long with the other ingredients.
You can also let kids customize their own portions by setting up a trail mix bar with all the ingredients in separate bowls.
Chocolate-Dipped Strawberries Kids Can Make Themselves

Chocolate-dipped strawberries are one of the most iconic Valentine’s Day treats, and they’re simple enough for kids to make with minimal adult supervision. The combination of juicy fresh fruit and rich melted chocolate creates an elegant dessert that children feel proud to present to family members or friends, making this recipe perfect for building kitchen confidence.
This kid-friendly version uses just a few pantry staples and comes together in under 20 minutes from start to finish. The addition of colorful sprinkles transforms these classic treats into festive Valentine’s creations that look like they came from a fancy chocolate shop, yet require no baking skills whatsoever.
- 10-12 fresh strawberries
- 1/2 cup semi-sweet chocolate chips
- 1 tsp coconut oil
- Pink and red sprinkles
- White chocolate drizzle (optional)
Wash the strawberries thoroughly and pat them completely dry with paper towels, as any moisture will cause the chocolate to seize up and become grainy. Melt the chocolate chips with coconut oil in a microwave-safe bowl using 20-second intervals, stirring between each burst until the mixture is smooth and glossy. Hold each strawberry by its green stem and dip it into the melted chocolate, allowing the excess to drip back into the bowl, then place the dipped berry on a parchment-lined baking sheet and immediately scatter sprinkles over the wet chocolate before it begins to set. Let the strawberries cool at room temperature for about 15 minutes or refrigerate for 10 minutes until the chocolate is completely firm.
For the best results, choose strawberries with long, sturdy stems that give little hands something easy to grip while dipping, and make sure the berries are at room temperature rather than cold from the refrigerator. If you want to add the optional white chocolate drizzle, melt a small amount of white chocolate chips separately and use a fork to create zigzag patterns across the set dark chocolate coating. These treats are best enjoyed the same day they’re made, as strawberries release moisture over time that can cause the chocolate coating to become sticky or slide off.
Pink Yogurt-Covered Pretzel Rods With Sprinkles

Pink yogurt-covered pretzel rods combine the irresistible contrast of salty and sweet in a handheld treat that kids absolutely love to decorate.
The satisfying crunch of a pretzel rod coated in creamy pink-tinted white chocolate makes these an instant favorite at classroom parties, playdates, or family celebrations, and children can easily customize each one with their favorite Valentine’s sprinkles.
This no-bake recipe requires just five simple ingredients and takes about 30 minutes from start to finish, including setting time.
The process of dipping and decorating gives kids a hands-on creative activity that results in professional-looking treats they’ll be excited to share with friends, teachers, or loved ones.
Kids love the hands-on fun of dipping and decorating their own treats to share with friends and family.
- 6 pretzel rods
- 1 cup white chocolate chips
- Red food coloring
- Valentine’s sprinkles
- 1 tsp coconut oil
Melt the white chocolate chips with coconut oil in a microwave-safe bowl, heating in 20-second intervals and stirring between each until the mixture is completely smooth and pourable.
Add 2-3 drops of red food coloring to the melted chocolate and stir thoroughly to create an even pink hue, adding more color drop by drop if you prefer a deeper shade.
Dip each pretzel rod about three-quarters of the way into the pink chocolate, turning to coat evenly, then hold it over the bowl for a few seconds to let the excess drip off before transferring to a parchment-lined baking sheet.
Immediately scatter Valentine’s sprinkles over the wet chocolate coating before it begins to set, then let the pretzel rods rest undisturbed for 20 minutes until the chocolate is completely firm.
For the smoothest chocolate coating, make sure your pretzel rods are fresh and haven’t absorbed any humidity, as stale pretzels can cause the chocolate to set unevenly or develop a cloudy appearance.
Work quickly when adding sprinkles since white chocolate sets faster than dark chocolate, and consider setting up an assembly line where one person dips while another adds the decorations.
These pretzel rods can be stored in an airtight container at room temperature for up to one week, making them an excellent make-ahead treat for Valentine’s Day gifting.
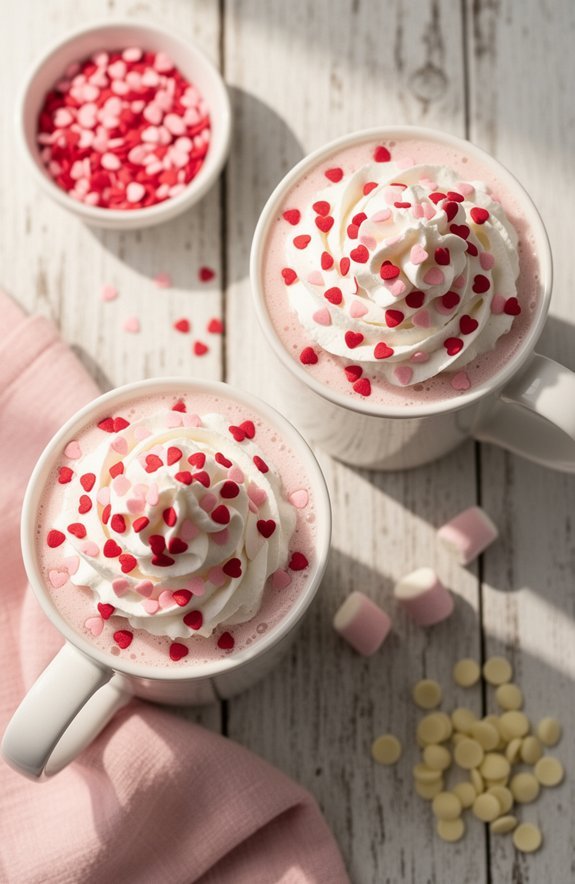
Valentine’s White Chocolate Popcorn With Heart Sprinkles

Valentine’s white chocolate popcorn delivers the perfect combination of light, crunchy texture and sweet candy coating that kids find completely irresistible, making it an ideal treat for classroom parties or movie night celebrations.
The billowy popcorn pieces get drizzled with creamy white chocolate and showered with festive heart sprinkles, creating a snack that’s as beautiful as it’s delicious and disappears almost as quickly as you can make it.
This effortless no-bake recipe comes together in under 15 minutes of active time and requires no special equipment beyond a microwave and baking sheet.
The generous yield makes it perfect for sharing at Valentine’s gatherings, packaging in cellophane bags as party favors, or simply enjoying by the handful during a cozy family celebration at home.
- 4 cups popped popcorn
- 1/2 cup white chocolate chips
- 1 tsp coconut oil
- Valentine’s heart sprinkles
- Pinch of salt
Spread the popped popcorn on a parchment-lined baking sheet, carefully picking out any unpopped kernels that could crack a tooth, then melt the white chocolate chips with coconut oil in a microwave-safe bowl using 20-second intervals and stirring between each until completely smooth.
Drizzle the melted white chocolate generously over the popcorn using a spoon or fork, moving back and forth to create even coverage, then immediately scatter the Valentine’s heart sprinkles over the wet chocolate and add a pinch of salt to enhance all the flavors.
Allow the popcorn to cool completely at room temperature for about 15-20 minutes until the chocolate has fully set, then break the popcorn into clusters and transfer to a serving bowl.
For best results, use freshly popped popcorn that has cooled completely, as residual steam or moisture can cause the white chocolate to seize and become grainy instead of smooth.
Air-popped or lightly buttered microwave popcorn both work well, though heavily buttered varieties may prevent the chocolate from adhering properly.
Store any leftover popcorn in an airtight container at room temperature for up to five days, keeping it away from humidity and heat sources that could cause the chocolate coating to become sticky or discolored.
Pink Valentine’s Puppy Chow
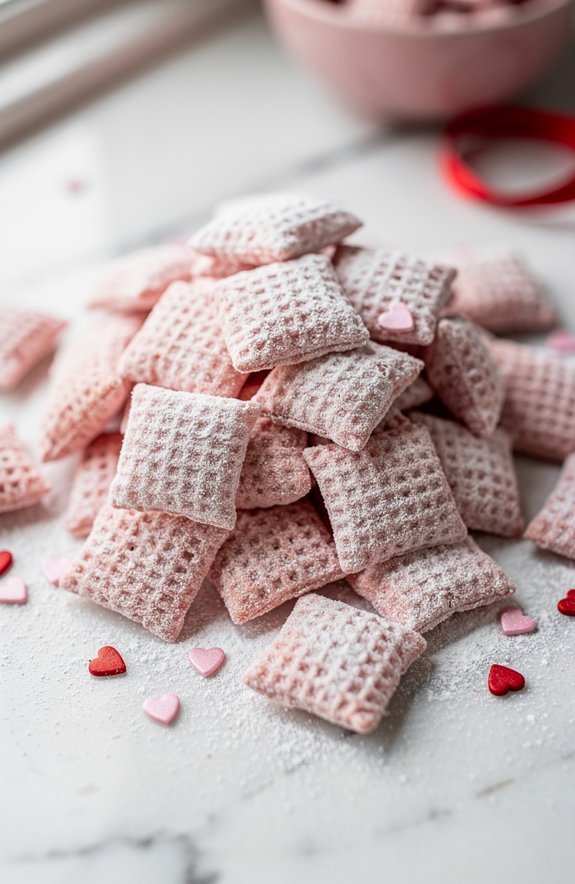
Pink Valentine’s puppy chow transforms the classic sweet and crunchy snack into a festive treat that kids absolutely adore, with its rosy pink coating and irresistible combination of peanut butter and white chocolate flavors.
The powdered sugar finish gives each piece that signature melt-in-your-mouth sweetness while the cereal maintains its satisfying crunch, making this the perfect handheld treat for Valentine’s parties or after-school snacking.
This simple no-bake recipe requires just five ingredients and comes together in about 20 minutes, most of which is hands-off cooling time while the coating sets.
The pink-tinted white chocolate and peanut butter mixture coats every square of cereal evenly.
The final shake in powdered sugar creates that classic puppy chow appearance with a Valentine’s Day twist that kids will be begging you to make again.
- 2 cups rice Chex cereal
- 1/4 cup peanut butter
- 1/4 cup white chocolate chips
- 1/2 cup powdered sugar
- Pink food coloring
Melt the peanut butter and white chocolate chips together in a microwave-safe bowl using 30-second intervals and stirring between each until completely smooth.
Then add 2-3 drops of pink food coloring and stir until the color is evenly distributed throughout the mixture.
Pour the pink coating over the Chex cereal in a large bowl and gently toss with a spatula until every piece is evenly coated, being careful not to crush the delicate squares.
Then add the powdered sugar to the bowl, cover tightly with a lid or plastic wrap, and shake vigorously until the cereal is completely coated in the sweet powder.
Spread the coated cereal on a parchment-lined baking sheet and let it set for about 15 minutes before transferring to a serving bowl or treat bags.
For the smoothest coating, make sure your peanut butter is well-stirred and at room temperature before melting, as separated or cold peanut butter can create a grainy texture in the finished product.
If you need to accommodate nut allergies, substitute sunflower seed butter or soy nut butter for equally delicious results that are classroom-safe.
Store the puppy chow in an airtight container at room temperature for up to one week, though it rarely lasts that long once kids discover the stash.
Heart-Shaped Rice Krispie Treats With Candy Melt Tops
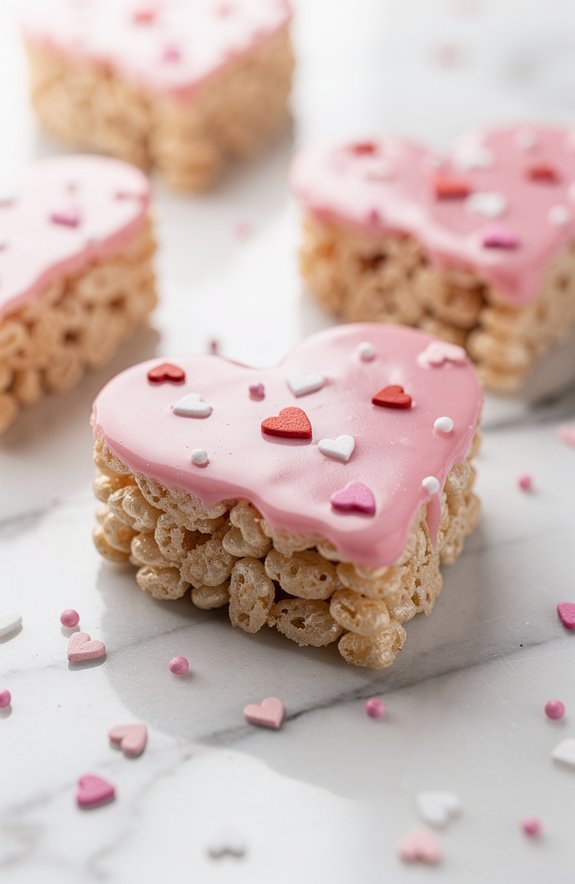
Heart-shaped Rice Krispie treats with candy melt tops bring the beloved classic marshmallow cereal squares into Valentine’s Day territory with their adorable shapes and glossy pink coating that kids find absolutely irresistible.
The combination of gooey marshmallow-bound cereal with a smooth candy melt finish creates a textural contrast that elevates these simple treats into something truly special, perfect for classroom exchanges or family dessert tables.
This charming no-bake treat requires minimal hands-on time and uses just five pantry-friendly ingredients to create show-stopping results that look like they came from a fancy bakery.
The traditional buttery marshmallow base provides that familiar nostalgic flavor while the pink candy melt topping and festive heart sprinkles transform each piece into a Valentine’s Day masterpiece that kids will proudly share with friends.
- 2 cups Rice Krispies cereal
- 1 cup mini marshmallows
- 1 tbsp butter
- 1/2 cup pink candy melts
- Heart sprinkles
Melt the butter and mini marshmallows together in a large microwave-safe bowl for 1 minute, stirring until completely smooth and combined, then quickly stir in the Rice Krispies cereal until every piece is evenly coated with the marshmallow mixture, working fast before it begins to set.
Press the mixture firmly into a greased 8×8 pan using a spatula or your hands lightly coated with cooking spray, let cool for 10 minutes until firm enough to hold its shape, then use a heart-shaped cookie cutter to cut out shapes and transfer them to a parchment-lined surface.
Melt the pink candy melts according to package directions, dip the top of each heart into the melted candy, let the excess drip off, immediately add heart sprinkles while the coating is still wet, and allow the treats to set completely before serving.
Greasing your hands or spatula with cooking spray makes pressing the mixture into the pan much easier and prevents frustrating sticky situations that slow down the process.
Work quickly when cutting shapes, as Rice Krispie treats become harder to cut cleanly once they cool completely, and warming your cookie cutter under hot water between cuts helps create cleaner edges.
Store finished treats in a single layer in an airtight container at room temperature for up to three days, separating layers with parchment paper to prevent the candy melt tops from sticking together.
Valentine’s Oreo Truffles in Pink Candy Melts

Valentine’s Oreo Truffles in pink candy melts transform ordinary chocolate sandwich cookies into elegant bite-sized confections that look like they belong in a high-end candy shop yet require absolutely no baking skills to create. These creamy, decadent truffles feature a rich Oreo and cream cheese center encased in a beautiful pink candy shell, making them the perfect treat for kids to help prepare and gift to classmates, teachers, or family members during the Valentine’s Day season.
The magic of these truffles lies in their simplicity and stunning presentation, requiring only five ingredients and about thirty minutes of hands-on time to produce professional-looking results that will impress everyone who receives them. The contrast between the dark, cookies-and-cream filling and the vibrant pink exterior creates visual appeal that rivals any store-bought Valentine’s candy, while the addition of heart sprinkles and white chocolate drizzle takes these treats from homemade to absolutely spectacular.
- 8 Oreo cookies
- 3 oz cream cheese (softened)
- 1/2 cup pink candy melts
- Heart sprinkles
- White chocolate for drizzling
Crush the Oreo cookies in a food processor or place them in a sealed plastic bag and crush with a rolling pin until fine crumbs form with no large pieces remaining, then transfer to a mixing bowl and add the softened cream cheese, mixing thoroughly until a thick dough forms that holds together when pressed, roll the mixture into 8-10 small balls using your hands and place them on a parchment-lined tray, freeze for 15 minutes until firm enough to handle without losing their shape, melt the pink candy melts according to package directions, dip each chilled truffle into the melted candy using a fork or toothpick while letting the excess drip back into the bowl, return the coated truffles to the parchment paper and immediately add heart sprinkles before the coating sets, and once all truffles are dipped and decorated, drizzle with melted white chocolate in a zigzag pattern for an elegant finishing touch.
Ensuring your cream cheese is properly softened to room temperature before mixing prevents lumps in your truffle filling and creates a smoother, more cohesive dough that rolls easily into uniform balls. Chilling the rolled truffles before dipping is essential because warm truffle centers will cause the candy melt coating to slide off or crack, and using a fork to lift truffles from the melted candy allows excess coating to drip through the tines for a cleaner finish. Store finished truffles in an airtight container in the refrigerator for up to one week, allowing them to sit at room temperature for five minutes before serving for the best creamy texture.
Strawberry Cheesecake Bites on Graham Crackers

Strawberry Cheesecake Bites on Graham Crackers deliver all the indulgent flavors of a classic strawberry cheesecake in a perfectly portioned, no-bake format that kids can assemble almost entirely on their own with minimal adult supervision. These adorable two-bite treats feature a fluffy strawberry-swirled cream cheese topping perched on a crispy graham cracker base, creating a satisfying crunch-to-cream ratio that makes them irresistible at Valentine’s Day parties, classroom celebrations, or as a special after-school snack.
The beauty of these cheesecake bites lies in their elegant simplicity and the way the pink-streaked filling naturally creates a Valentine’s aesthetic without any artificial coloring or complicated decorating techniques.
With just five ingredients and fifteen minutes of preparation time, children can produce a tray of desserts that look sophisticated enough for an adult gathering yet taste like the beloved cheesecake flavors that kids universally adore, making them an ideal recipe for building confidence in young bakers.
- 4 oz cream cheese (softened)
- 2 tbsp powdered sugar
- 1/4 cup strawberry jam
- 6 graham cracker squares
- Fresh strawberry slices
Beat the softened cream cheese and powdered sugar together in a medium bowl using a hand mixer or wooden spoon until light and fluffy with no lumps remaining,
then add the strawberry jam and gently swirl it through the mixture using just two or three strokes of a spoon to create beautiful pink streaks rather than mixing it completely,
spoon or pipe the strawberry cream cheese mixture onto each graham cracker square in generous mounds, top each bite with a fresh strawberry slice positioned at an angle for visual appeal, and refrigerate the assembled bites on a parchment-lined tray for 15 minutes to allow the topping to firm up before serving.
Allowing your cream cheese to soften at room temperature for at least 30 minutes before mixing ensures a smooth, lump-free filling that spreads beautifully and holds its shape on the graham crackers.
For the prettiest presentation, resist the urge to fully incorporate the strawberry jam into the cream cheese mixture, as those visible pink swirls create the signature cheesecake look that makes these bites so visually appealing, and if you want to prepare these ahead of time, assemble everything except the fresh strawberry slices and add those just before serving to prevent the graham crackers from becoming soggy.
No-Bake Valentine’s Strawberry Energy Balls
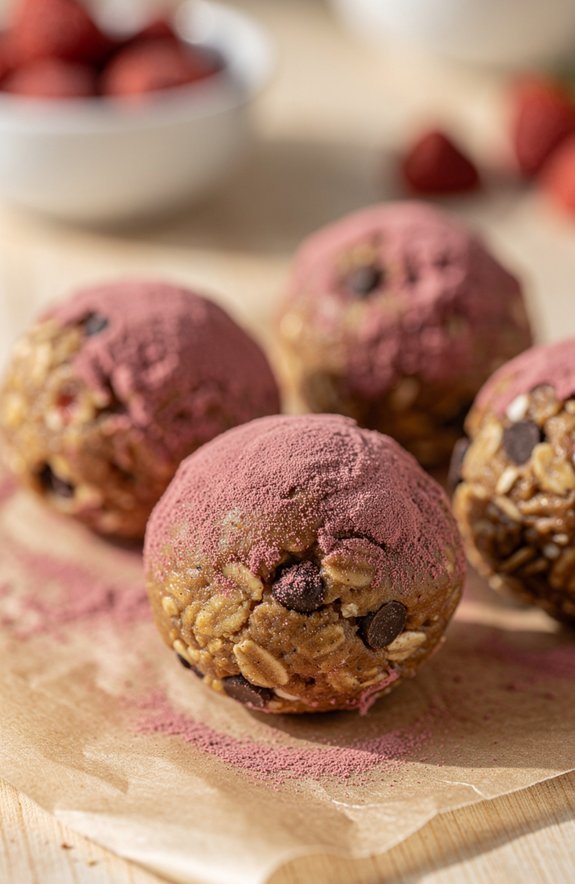
No-Bake Valentine’s Strawberry Energy Balls offer a wholesome alternative to candy-laden treats while still delivering the festive pink color and sweet flavors that make Valentine’s Day celebrations special for children of all ages.
These nutrient-packed bites combine the natural sweetness of honey with protein-rich peanut butter and fiber-filled oats, then get rolled in vibrant freeze-dried strawberry powder that transforms them into rosy spheres perfect for tucking into lunchboxes, sharing with classmates, or enjoying as a pre-activity snack that provides sustained energy without the sugar crash.
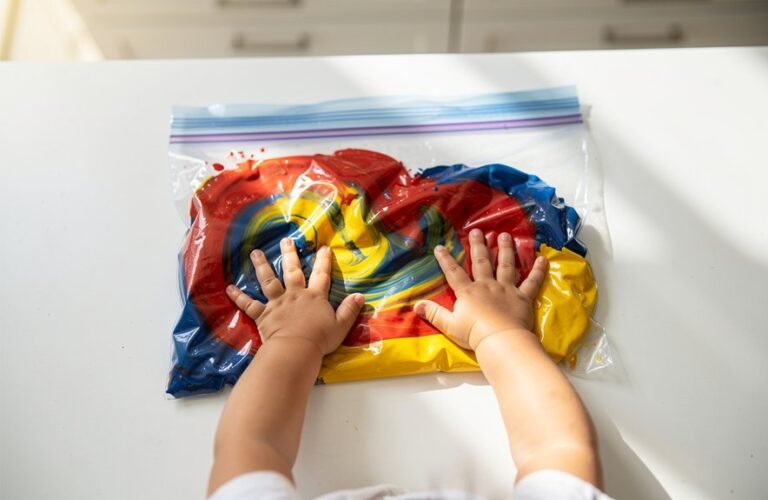
What makes these energy balls particularly appealing for family cooking sessions is their completely hands-on preparation method that lets kids measure, mix, and roll without any heat or sharp tools involved, building kitchen confidence while creating something genuinely delicious and nutritious.
Little hands can do all the work here — no oven mitts or supervision required.
The freeze-dried strawberry powder coating not only provides that essential Valentine’s pink hue but also adds an intense burst of real fruit flavor that elevates these simple bites from basic snack to special occasion treat, and the hidden mini chocolate chips throughout ensure that even the pickiest eaters will reach for seconds.
- 1/2 cup old-fashioned oats
- 1/4 cup peanut butter
- 2 tbsp honey
- 2 tbsp freeze-dried strawberry powder
- 1 tbsp mini chocolate chips
Combine the oats, peanut butter, and honey in a medium mixing bowl and stir vigorously until the mixture forms a thick, uniform dough that holds together when pressed, then fold in the mini chocolate chips until evenly distributed throughout, scoop out tablespoon-sized portions and roll each one between your palms to form smooth balls, place the freeze-dried strawberry powder in a shallow dish and roll each ball through the powder until completely coated in pink, then arrange the finished energy balls on a parchment-lined tray and refrigerate for 20 minutes to firm up before serving or storing.
If your mixture feels too dry and crumbly to roll into balls, add an extra teaspoon of honey or peanut butter to help it bind together, and if it seems too sticky, refrigerate the dough for 10 minutes before rolling to make it more manageable. You can find freeze-dried strawberry powder in the baking aisle of most grocery stores, or make your own by crushing freeze-dried strawberries in a sealed plastic bag until finely ground, and these energy balls will keep in an airtight container in the refrigerator for up to one week, making them an excellent make-ahead option for busy Valentine’s party preparation.
Sweet Stuffed Dates With Strawberry Cream Cheese
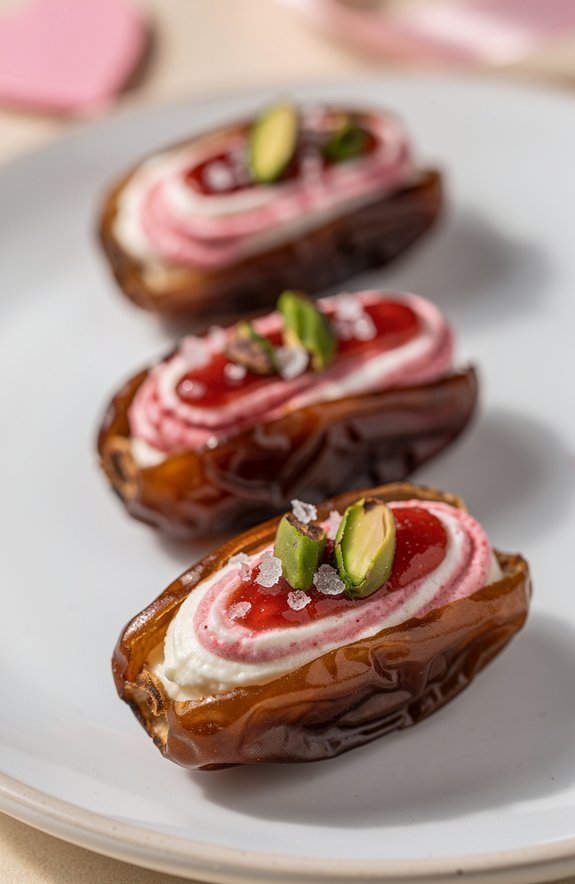
Sweet Stuffed Dates With Strawberry Cream Cheese bring an unexpectedly elegant touch to Valentine’s Day celebrations while remaining completely accessible for young cooks who want to create something impressive without any baking required. These naturally sweet Medjool dates become little treasure chests when split open and filled with a creamy pink strawberry mixture, offering a sophisticated flavor combination that appeals to both children and adults, making them perfect for family gatherings or as a special homemade gift that shows genuine care and creativity.
The beauty of this no-bake treat lies in its simplicity and the way it introduces kids to new textures and flavors while still feeling festive and fun for the Valentine’s season. The contrast between the caramel-like sweetness of the dates, the tangy cream cheese filling swirled with strawberry jam, and the satisfying crunch of chopped pistachios creates a multi-sensory eating experience that feels far more special than the minimal effort required, and the natural pink streaks from the jam provide that essential Valentine’s color without any artificial dyes.
- 8 Medjool dates
- 3 tbsp cream cheese (softened)
- 1 tbsp strawberry jam
- Chopped pistachios
- Flaky sea salt
Slice each date lengthwise along one side and carefully remove the pit to create a small pocket for filling, then mix the softened cream cheese and strawberry jam together in a small bowl until just combined while leaving visible pink streaks for visual appeal, spoon or pipe the strawberry cream cheese mixture generously into each date cavity, sprinkle the tops with chopped pistachios and finish with a tiny pinch of flaky sea salt, then arrange on a serving plate and either serve immediately or refrigerate until ready to enjoy.
Make sure your cream cheese is fully softened at room temperature before mixing to achieve the smoothest filling, and if you want cleaner-looking stuffed dates, transfer the cream cheese mixture to a small plastic bag, snip off one corner, and pipe it directly into each date for more precise control. For nut-free classrooms or allergies, substitute the pistachios with unsweetened coconut flakes or simply omit them entirely, and these stuffed dates can be prepared up to 24 hours in advance and stored covered in the refrigerator, making them an excellent make-ahead option for busy Valentine’s Day celebrations.
In case you were wondering
How Far in Advance Can I Make These No-Bake Valentine’s Treats?
You can make ahead most of these treats 2-3 days before Valentine’s Day. Your preparation window varies—chocolate-dipped strawberries stay fresh 1-2 days, while trail mix and Oreo truffles last up to a week refrigerated.
Are These Valentine’s Treats Safe for Kids With Nut Allergies?
Not all treats are safe—some contain peanut butter. For nut safety, choose recipes like Chocolate-Dipped Strawberries or White Chocolate Popcorn. Always check allergen labeling on ingredients, and you’ll keep allergic kids protected.
What Age Group Can Safely Help Make These No-Bake Treats?
You’ll find these treats work for various age groups—kids as young as 4 can help with mixing and adding sprinkles, while older children handle dipping tasks. Always provide adult supervision around melting chocolate and microwaves.
How Should I Store Leftover No-Bake Valentine’s Treats?
Store your leftover treats in airtight containers to keep them fresh. Place chocolate-dipped items and cream cheese-based treats in the fridge temperature between 35-40°F. Trail mix and puppy chow stay fine at room temperature.
Can I Substitute Dairy-Free Ingredients in These Valentine’s Recipes?
Yes, you can make dairy substitutions easily! Use dairy-free cream cheese, vegan chocolate chips, and coconut oil-based candy melts. These allergen swaps work well in most recipes without changing the festive look or taste.
Conclusion
You did it! Ten treats, zero oven drama, and your kitchen isn’t covered in flour. That’s a win.
Now grab those sprinkles, round up your tiny helpers, and get messy together. Will there be chocolate fingerprints everywhere? Absolutely. Will your kids remember this forever? You bet.
Skip the stress this year. These no-bake goodies prove that the sweetest memories don’t require preheating anything.