10 Fun Rainy Day Art Activities for Kids
Stuck inside? Turn your home into an art playground! Try rainbow suncatchers, bubble wrap stomp painting, watercolor resist with crayons and tape, and raindrop drip art with pipettes. Build a cardboard city, craft recycled robot sculptures, and finger-paint weather scenes. Make nature collages from backyard finds and bake DIY salt dough keepsake ornaments. Keep setups quick, mess manageable, and creativity bold with simple tools, bright colors, and playful prompts. Want smart tips, step-by-steps, and pro cleanup tricks next?
Key Takeaways
- Make rainbow suncatchers with tissue paper on contact paper and hang them in a bright window.
- Try watercolor resist using white crayons and painter’s tape to reveal hidden designs.
- Build a cardboard city: plan roads, assemble box buildings, then paint and add tiny details.
- Do bubble wrap stomp painting or weather scene finger painting for energetic, brush-free fun.
- Create raindrop drip art with pipettes and salt, or bake salt dough keepsake ornaments to decorate.
Rainbow Suncatchers With Tissue Paper
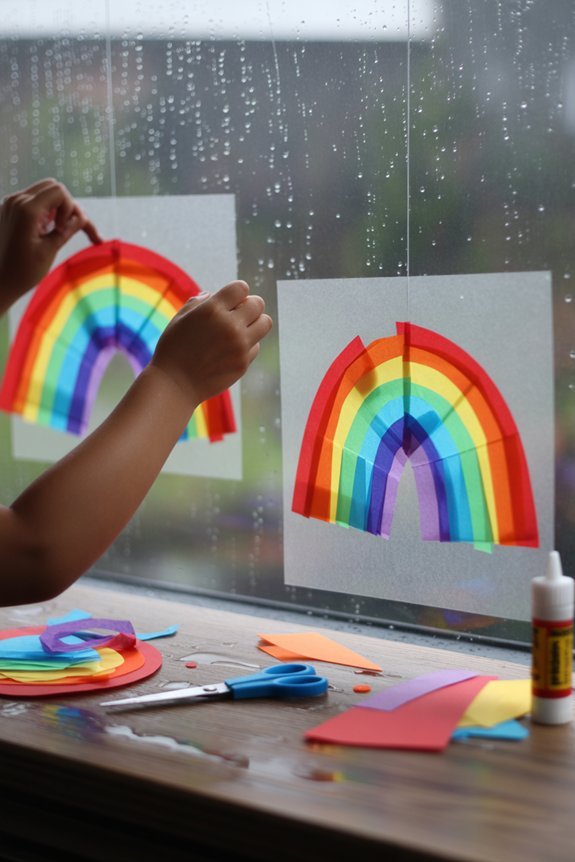
Even when the sky’s gray, you can spark color indoors with easy rainbow suncatchers made from tissue paper.
Grab clear contact paper or a laminating sheet, cut a simple cloud or arch frame, and stick it sticky-side up. Tear or snip small squares of tissue paper in ROYGBIV shades. Invite kids to layer pieces so light shines through—this is where color blending feels like magic.
Stick up a clear frame and layer ROYGBIV tissue—watch colors blend like magic.
Overlap yellow and blue to make green, red with blue for purple, and watch hues shift.
Fill the frame edge to edge, seal with another sheet, then trim the outline. Punch a hole, add string, and hang it in a bright window.
You’ll get glowing rainbows that brighten the room and spark quick, cheerful creativity.
Bubble Wrap Stomp Painting

Grab bubble wrap, washable paint, tape, and a big sheet of paper, then set up a stomp zone with old towels or a plastic tablecloth.
Show kids how to stomp with soft knees, hold hands for balance, and keep feet inside the taped area so prints pop and slips don’t.
When you’re done, do a quick towel wipe, rinse feet, trim the best sections, and tape them up for a bubbly gallery wall.
Materials and Setup
Before the stomping starts, gather a few simple supplies so cleanup stays easy and the fun lasts.
Lay down a plastic tablecloth or flattened trash bags to protect floors. Tape edges so nothing slides.
Pull together art supplies: washable tempera paints, shallow trays, a roll of bubble wrap, scissors, painter’s tape, and large paper.
For smart workspace organization, set a “paint zone,” a “stomp zone,” and a “drying zone.” Keep wipes, rags, and a small bin handy for quick resets.
Label trays with color names to reduce mess and mix-ups.
1) Cut bubble wrap to shoe-size pieces and tape the bumpy side out.
2) Pour small amounts of paint into trays; refresh as needed.
3) Pre-tear tape strips and stage paper sheets for rapid swapping.
Safe Stomping Techniques
With your zones set and paints ready, it’s time to stomp smart. Strap bubble wrap snugly around little feet or shoes, leaving toes free to flex. Choose safe footwear with tread so kids don’t slide.
Test the proper surface first: a flat, non-slip mat or taped-down canvas that won’t shift. Keep paint pools shallow; light dips give great pops without slippery puddles.
Demonstrate the rhythm: step down, press, lift straight up. Encourage small steps before big hops. Space kids like checker pieces so no one bumps. Remind them to watch where they land and keep hands off the floor.
Assign a “freeze” word—say it, and everyone pauses. Rotate turns for high-energy stompers. Celebrate crisp bubble prints and steady, confident feet.
Cleanup and Display
A quick tidy keeps the fun going and the art shining. Slide a tray under the bubble wrap, peel it up in one swoop, and blot spills with old towels. Keep a “paint parking lot” for brushes and a damp rag nearby for speedy wipes.
With simple cleanup tips, you’ll save energy for the best part—showing off those stomped masterpieces.
- 1) Fast reset: Put a plastic tablecloth down first, use a bin for soggy supplies, and label a bag for trash so kids can sprint through cleanup.
- 2) Kid jobs: One rolls bubble wrap, one caps paint, one wipes shoes—quick teamwork, big win.
- 3) Smart display ideas: Hang a clothesline gallery, frame favorites with painter’s tape borders, or collage smaller prints into a giant “rain dance” mural.
DIY Salt Dough Keepsake Ornaments

Turn a soggy afternoon into a sweet memory with DIY salt dough keepsake ornaments you can bake at home.
Mix 1 cup flour, 1/2 cup salt, and 1/2 cup water until the salt dough is smooth. Roll it 1/4-inch thick, then cut shapes with cookie cutters. Press little hands, pet paws, or stamps for texture. Use a straw to make a hanging hole.
Mix 1 cup flour, 1/2 cup salt, 1/2 cup water into smooth dough; roll, cut, imprint, and straw-poke for hanging.
Bake on a lined sheet at 200°F (95°C) for 2–3 hours, flipping halfway, until dry. Let ornaments cool completely before painting or sealing.
Lean into ornament personalization: add names, dates, and tiny doodles with paint pens; glue on glitter or beads; tie with ribbon or twine.
Seal with clear varnish to protect. Hang them, gift them, or stash them for future tree-trimming smiles.
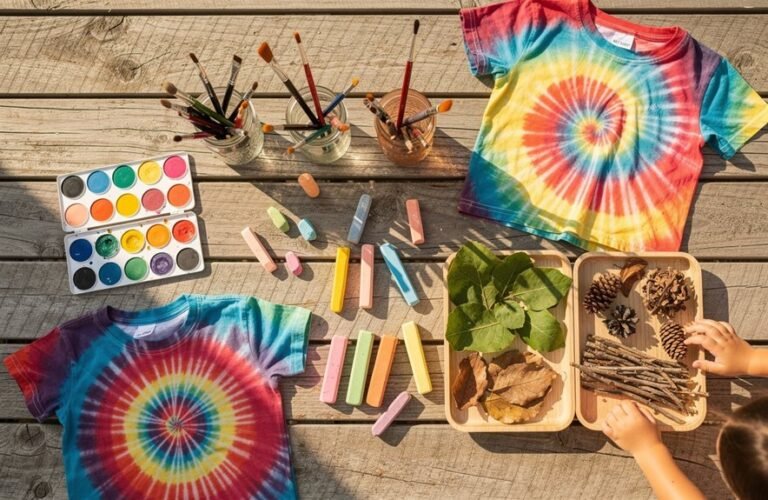
Watercolor Resist With Crayons and Tape

Once the ornaments are drying, pull out white crayons, painter’s tape, and a tray of watercolors for a magic trick on paper. Show kids how wax resists paint. Draw zigzags, stars, or secret messages using simple crayon techniques. Press tape into bold stripes or shapes, then brush watery color across the page and watch bright watercolor effects appear as the paint slides off wax and tape.
- 1) Try patterns: chevrons, spirals, and dotted paths. Peel tape to reveal crisp, dramatic lines.
- 2) Explore blends: load a wet brush, drop in two colors, and tilt the page for soft gradients.
- 3) Add details: once dry, outline with darker crayon for pop, or splatter paint for energy.
Dry flat, sign it, and display your mini masterpiece.
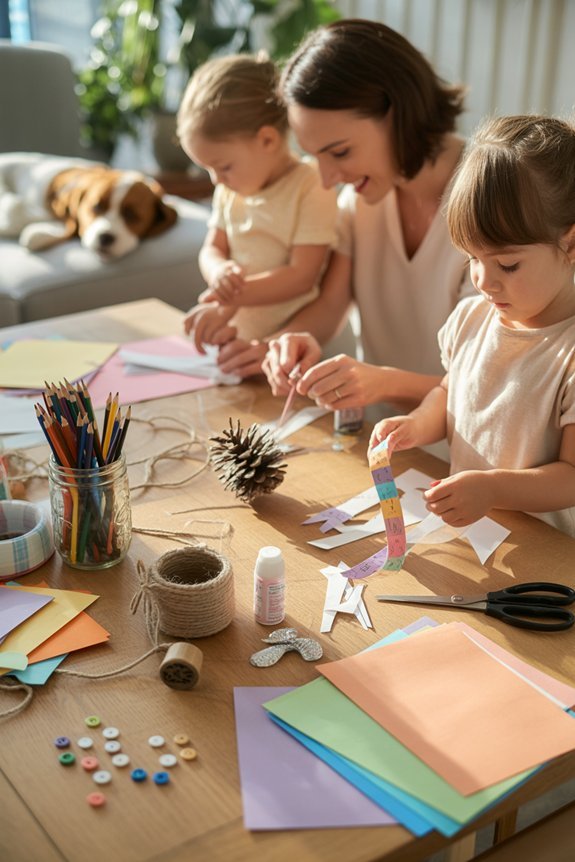
Nature Collage From Backyard Finds
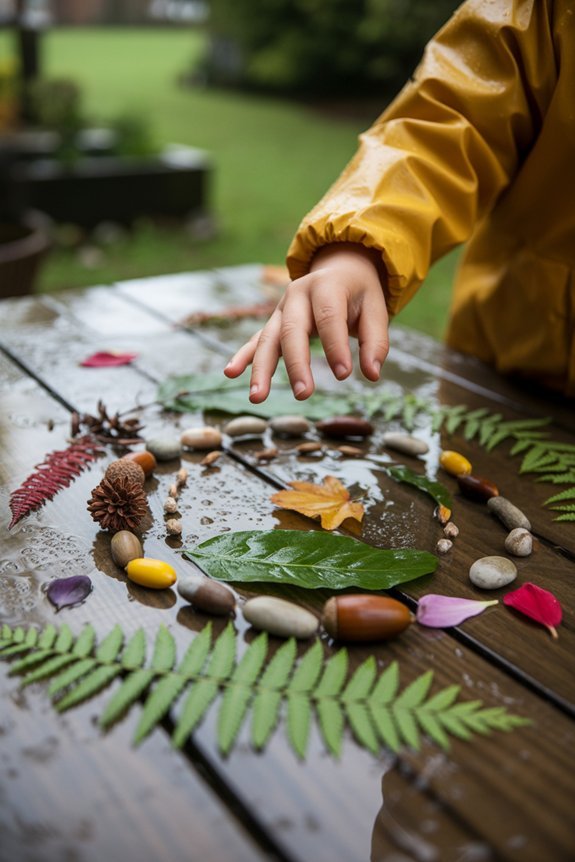
While rain taps the windows, grab a basket and go on a mini treasure hunt: leaves, pinecones, bark, petals, pebbles, even a stray feather.
Become a nature scavenger together, then spread your finds on the table like treasure. Let kids sort by color, texture, or shape. That simple step sparks collage inspiration.
Go on a nature hunt, then sort your treasures—color, texture, shape—to spark collage magic.
Tape a sheet of cardstock or a recycled box lid to the surface. Brush on glue, then layer big pieces first—bark and leaves—adding petals and tiny stones for detail. Press firmly so everything sticks.
Encourage patterns: spirals of seeds, a feather sun, a pebble path. Add names or dates with a marker.
Seal with a light glue wash, let it dry, and display your rainy-day masterpiece.
Shaving Cream Marbled Paper
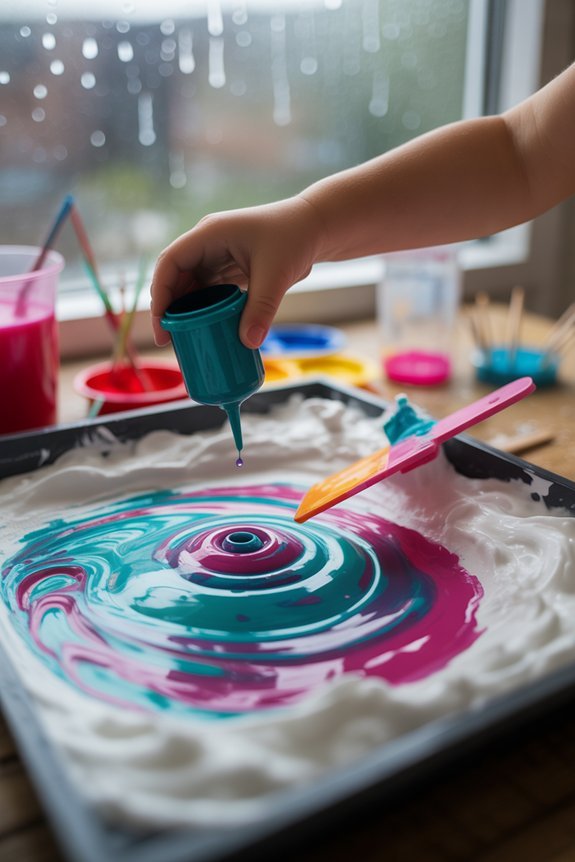
Because rainy days beg for a little magic, you’ll whip up swirling, candy-colored designs with just shaving cream and food coloring.
Spread a fluffy layer of shaving cream on a tray, dot it with colors, and drag a skewer through to create marbled waves. Press a sheet of paper on top, lift, then squeegee off the foam to reveal a dazzling print.
You’ll practice playful art techniques while keeping mess manageable and spirits bright.
- Try color families—cool blues and teals for ocean vibes, or warm pinks and oranges for sunset swirls.
- Experiment with tools: a fork for fine lines, a popsicle stick for bold curves, a toothpick for delicate veining.
- Reprint once or twice for softer, dreamy variations without resetting the tray.
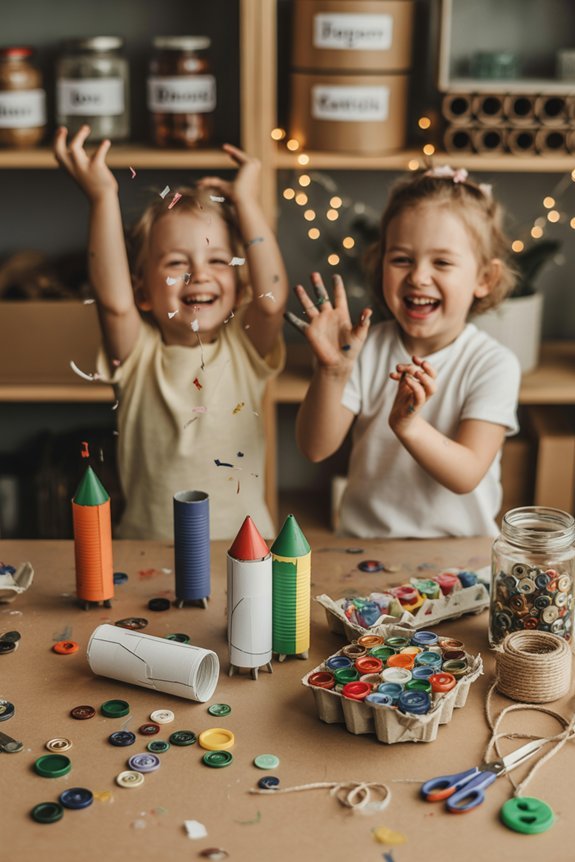
Cardboard City Build-and-Paint
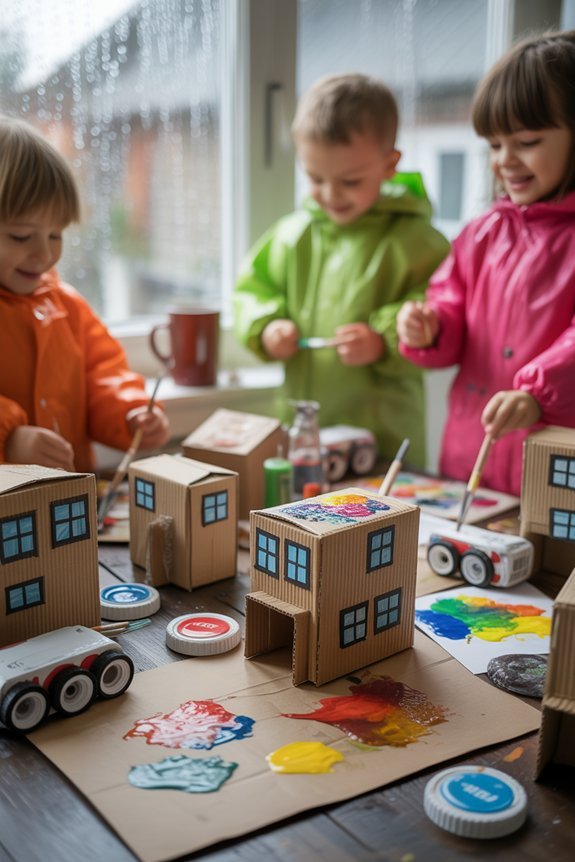
Gather cereal boxes, tubes, and lids from your recycling bin to stock your mini construction site.
Sketch a simple city layout—roads, parks, and building spots—then cut, fold, and tape your structures into place.
Paint bold base colors, add windows, signs, and road lines, and watch your cardboard city come to life.
Gather Recyclable Materials
Two minutes of scavenging can unlock a whole cardboard city. Open the recycling bin and grab boxes, paper tubes, egg cartons, and clean containers. You’re hunting for sturdy shapes and textures.
Prioritize lightweight, stackable pieces that kids can cut, paint, and tape safely. Celebrate creative reuse by turning everyday recyclable materials into towers, tunnels, and tiny landmarks. Keep a bag or bin labeled “City Parts” so little builders can pick fast and stay focused.
- Flatten and trim: Break down boxes, clip off flaps, and save smooth panels for walls and roofs.
- Sort by shape: Tubes for columns, cartons for rooftops, lids for windows, trays for plazas.
- Prep tools: Child-safe scissors, masking tape, glue sticks, washable paint, and a drop cloth for mess control.
Design City Layout
Once your “City Parts” bin is brimming, sketch a simple map to guide the build. Give kids a marker and invite some creative mapping: roads, rivers, parks, and a town square. Keep it bold and simple so they can place pieces easily.
Talk about urban planning like it’s a playground puzzle—where should homes go so school’s nearby? Where do buses turn? Add sidewalks, crosswalks, and a bike loop. Use arrows to show traffic flow and dots for bus stops.
Lay out major streets with tape, then set rough zones: residential, shops, green space, and a teeny industrial corner. Add a bridge or tunnel if you’ve got boxes to spare.
Label blocks lightly, leave space for surprises, and tweak the plan together as you build.
Paint and Detail
With your city mapped and streets taped, it’s time to splash on character. Grab washable paints and try simple paint techniques: dab clouds with sponge tips, drag dry brushes for brick texture, and stamp windows with eraser ends.
Encourage quick color mixing on a palette—blend blue and white for rooftops, then warm it with a whisper of yellow for sunrise glows. Outline roads with thin lines, add crosswalks, and pop in tiny signs. Keep strokes bold, then layer details once the base dries.
1) Try three paint techniques:
- Dry-brush bricks
- Sponge clouds
- Dot windows
2) Speedy color mixing ideas:
- Leafy greens (blue + yellow)
- Sunset orange (red + yellow)
3) Detail boosters:
- Tiny shop names
- Park benches
- Bike lanes
Finger-Painted Weather Scenes

Although the rain taps at the windows, you can turn the day bright by guiding kids to finger-paint their own weather scenes. Invite tiny hands to swirl skies, dab clouds, and streak lightning. You’ll spark weather themed creativity and joyful artistic expression without needing brushes.
Set out primary colors, then mix tints for sunbursts, stormy blues, and lilac sunsets. Encourage experimentation: fingertip dots for raindrops, palm prints for suns, and knuckle marks for rolling clouds. Name the moods—calm, breezy, blustery—and let kids match textures to feelings.
| Sky Idea | Finger Move | Color Mix |
|---|---|---|
| Misty morning | Soft swirls | Blue + white |
| Sunny afternoon | Firm circles | Yellow + orange |
| Thunderstorm | Zigzags | Blue + black |
| Rainbow fade | Gentle arcs | Full spectrum |
Display, dry, and celebrate.
Recycled Robot Sculptures

A rainy day becomes a robot workshop when you turn clean recyclables into quirky bots. Gather boxes, bottle caps, foil, and cardboard tubes, then sketch a quick robot design. You’ll puzzle pieces together with tape or glue, add marker details, and name your bot. Encourage kids to test moving arms with brads or bendy straws and celebrate every wobbly step.
- Sort and select: Choose sturdy recycled materials for bodies, lighter bits for arms, and shiny accents for control panels.
- Build and balance: Stack pieces, check stability, then secure joints before decorating with stickers, yarn, or washers.
- Power with imagination: Invent your robot’s job, create a badge, and present a mini launch.
Snap a photo lineup—your upcycled crew is mission-ready.
Raindrop Drip Art With Pipettes

After your robot crew rolls off the table, switch gears to raindrop drip art that splashes color in the best way. Set out watercolor paper, diluted liquid watercolors, and pipettes. Show kids simple pipette techniques: squeeze, dip, release, then drip from a few inches up to make bold splats. Tilt the paper to guide rivers, or blow gently through a straw for branching streams. Encourage color blending by dropping two hues side by side and letting them meet.
| Action | Result | Tip |
|---|---|---|
| High drop | Big splat | Cover clothes |
| Low drop | Small dot | Add details |
| Tilt left | Long run | Tape corners |
| Tilt right | Zigzag | Work over tray |
| Layer drops | Rich blend | Wait between |
Finish with salt sprinkles for starry textures. Let dry flat.
In case you were wondering
How Do I Protect Surfaces and Floors From Paint and Glue Spills?
Cover floors with paint tarps or reusable floor coverings, then tape edges tight for surface protection. Set trays for spill containment, keep wipes handy, and corral supplies in bins. Work small, clean as you go, celebrate mess-managed creativity!
What’s the Best Way to Organize and Store Finished Kid Artwork?
Use an art portfolio for flat pieces, label by date, and rotate favorites on a gallery wall. Photograph 3D creations, use digital storage or a shared album, and curate yearly photo books. Recycle drafts together, guilt-free.
How Can I Adapt Activities for Toddlers Versus Older Kids?
Balance tiny hands and bold plans: you simplify steps for toddler friendly adaptations—big tools, fewer choices, quick wins—while you boost older kid challenges—layered tasks, open-ended prompts, real tools, longer projects. You model, scaffold, then cheer independence.
Which Non-Toxic, Washable Materials Are Safest for Indoor Use?
Choose non toxic paints, washable markers, water-based glue sticks, and dye-free modeling dough. You’ll check AP-certified, fragrance-free labels, avoid solvents, and use smocks and table covers. Keep wipes handy, ventilate lightly, and store supplies sealed.
How Do I Handle Kids With Sensory Sensitivities to Textures or Smells?
Coincidentally, you handle sensitivities by offering choice. Start with scent-free materials and gradual texture exploration strategies. Use gloves, tools, or barrier creams. Provide sensory friendly alternatives, quiet corners, and timers. Celebrate tiny tries, model calm breathing, and let kids lead.
Conclusion
You’ve splashed, you’ve squished, you’ve snipped—now keep the creative storm rolling. When clouds linger, you reach for color; when boredom strikes, you reach for brushes; when mess happens, you reach for giggles. Save your suncatchers, gift your ornaments, display your robots, and celebrate every drip, stamp, and swirl. Keep curious, keep brave, keep playful. Turn rainy days into bright days, quiet hours into bold hours, simple scraps into joyful art. You’ve got this—now go make more magic.