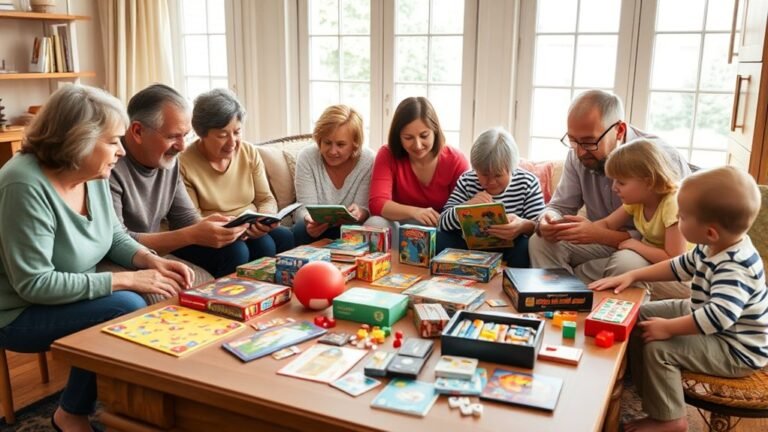
What Safe Kitchen Science Activities Excite Kids Most?
You want big “WHOA” moments without burning the house down. Go for fizzing baking-soda volcanoes, color-changing “potions” with red cabbage juice, and glow-in-the-dark tonic water under a UV light. Make edible slime from marshmallows and cornstarch, jiggly gelatin shapes, or ice cream in a bag you shake till it freezes. Kids get messy, loud, and amazed, while you secretly sneak in science… and that’s just the start of what you can pull off in your kitchen.
Key Takeaways
- Fizzing volcanoes and color-changing cabbage potions wow kids with dramatic eruptions and vivid pH color shifts using safe pantry ingredients.
- Edible slime and jiggly gelatin shapes let kids squish, stretch, and eat their experiments, making science feel playful and rewarding.
- Homemade ice cream in a bag turns simple ingredients into a frozen treat, clearly showing liquids changing to solids through shaking and salt-cooled ice.
- Glow-in-the-dark chemistry with tonic water and UV light creates dazzling, safe luminescent “galaxies” that spark curiosity about light and energy.
- Clear safety rules, prep mats, and kid-led cleanup make messy kitchen experiments feel safe, controlled, and fun for repeated science play.
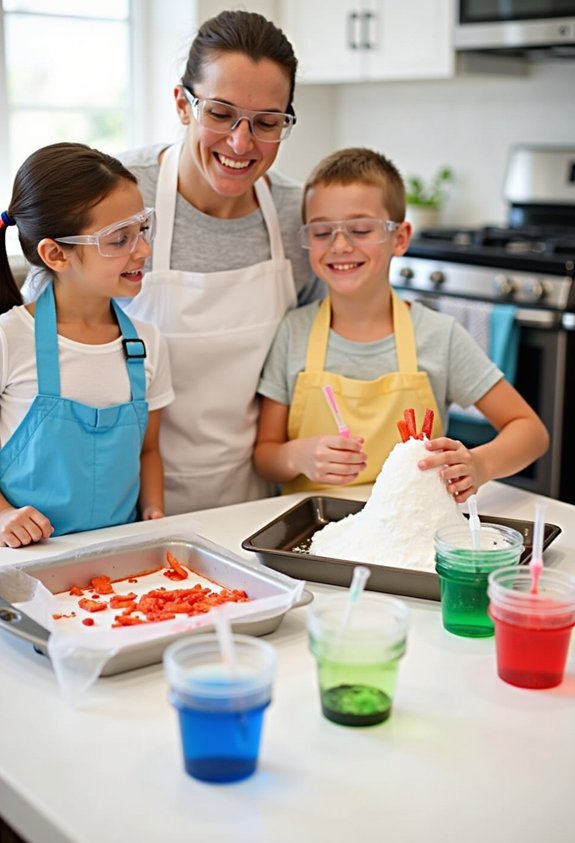
Fizzing Volcanoes With Everyday Pantry Staples
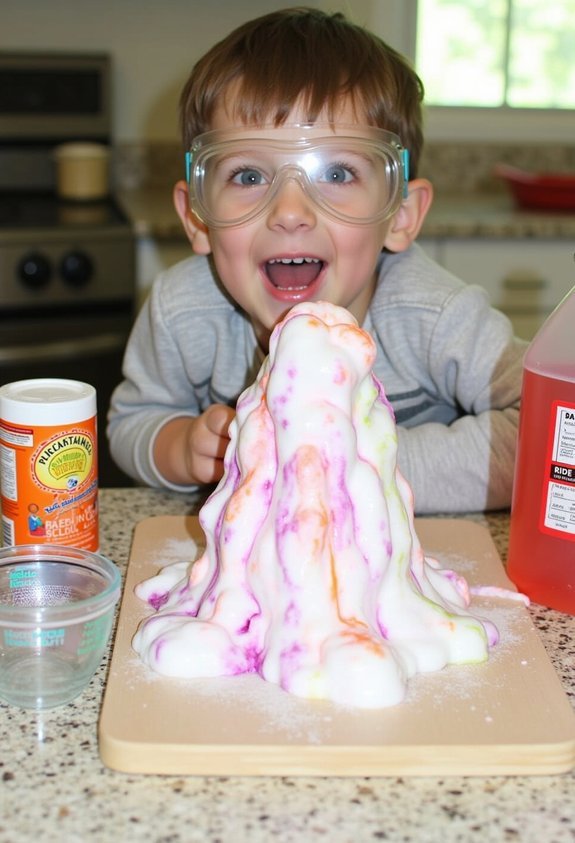
Even if your last science experiment was “What happens if I microwave this?” you can still pull off an epic fizzing volcano with stuff you’ve already got in your kitchen.
Turn leftover pantry odds and ends into a wildly dramatic kitchen‑counter volcano experiment
First, raid your pantry like a mad scientist. Grab baking soda, vinegar, dish soap, and food coloring. Pile clay, dough, or a mountain of foil around a cup to build your volcano. Load the cup with baking soda, a squirt of soap, and color.
When you’re ready, pour in vinegar and boom—instant volcano eruption. The foam bubbles, hisses, and oozes down the sides like lava on fast‑forward. Ask kids what they notice, then let them tweak amounts.
These pantry experiments turn “I’m bored” into “Let’s erupt another one!” Right away, everyone’s laughing and cheering.
Color-Changing Potions That Teach Acid–Base Reactions
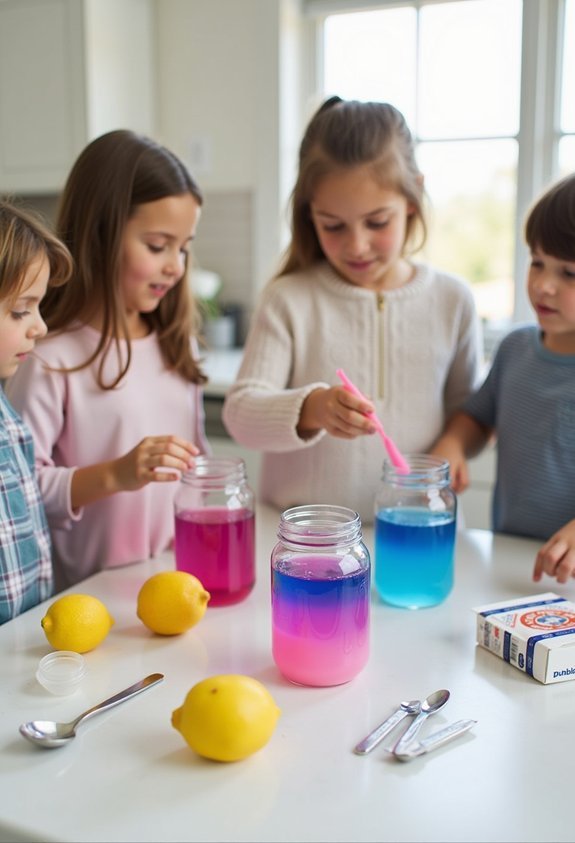
When you’re ready to feel like a real wizard with a grocery-store lab, color‑changing potions are where the magic happens. You grab a red cabbage, chop it, boil it, and boom: you’ve made a magic juice called a color indicator.
Pour it into clear cups, and you’ve built a rainbow factory that runs on chemistry, not unicorns.
Now you test stuff from your kitchen and watch the pH scale come alive:
- Lemon juice that turns your potion hot pink
- Baking soda water that shifts it blue-green
- Soapy water that goes purple
- Vinegar that blasts the color back to bright red
- Plain water that sits calm in the middle
Kids see color flips and acids and bases suddenly make sense.
Edible Slime and Safe Gels Kids Can Actually Taste
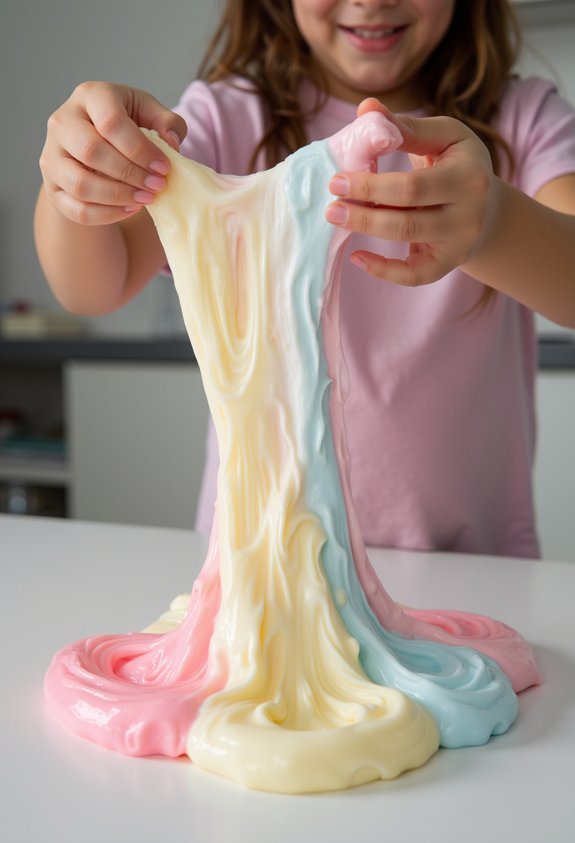
Those wild color‑changing potions are fun to *look* at, but now it’s time for science you can actually put in your mouth.
Meet edible slime and jiggly gels, the flavorful experiments your kids beg to taste. You grab marshmallows, cornstarch, and a splash of water, then suddenly you’re stretching a sweet, gooey rope that feels like alien snot but tastes like dessert.
They squeal, you pretend you’re grossed out, everyone keeps eating it anyway.
With gelatin and fruit juice, you pour bright liquid into molds and watch it set into wobbly shapes.
With fruit juice and gelatin, bright liquid transforms into wobbly, giggly shapes you can actually eat
Now you’ve got bouncy stars and cubes, real edible inventions that wiggle on the plate and vanish in seconds because “serious science” is delicious.
Way better than worksheets, and zero boring lectures.
Homemade Ice Cream in a Bag: States of Matter in a Snack
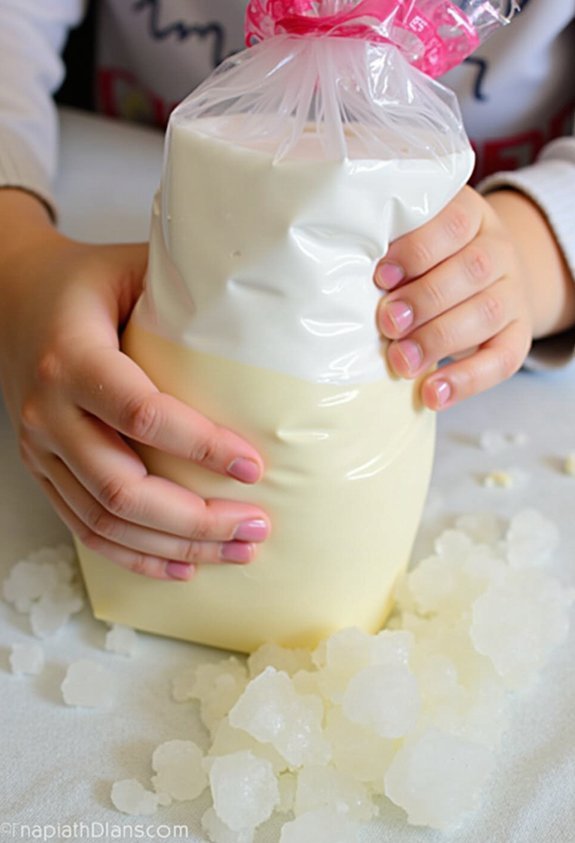
While most science lessons stay trapped in textbooks, this one ends with you eating straight out of a bag. You whip up ice cream using the bag method, and suddenly “states of matter” means “what’s happening to my snack?”
Fill a small bag with milk, sugar, and vanilla, then stick it inside a bigger bag loaded with ice and salt. Now shake like you’re trying to wake a sleeping dragon.
As you chill and shake, you can spot science in action:
- Liquid mix turning solid and creamy
- Salt making the ice way colder than 32°F
- Fast shaking freezing faster than slow shaking
- Tiny ice crystals vs sad, chunky ones
- Heat leaving the bag and chilling your hands
Then eat it, proud science wizard today.
Glow-In-The-Dark Kitchen Chemistry With Safe Ingredients
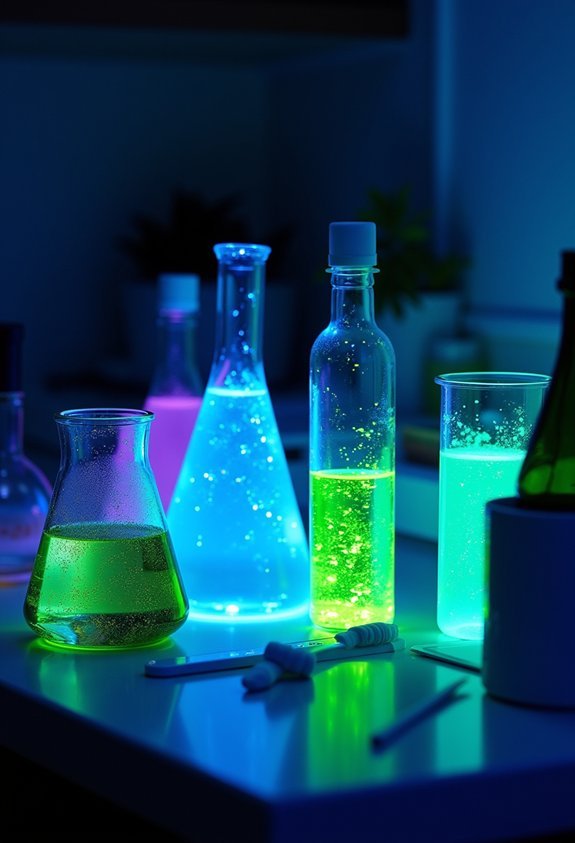
Your ice cream science was cool, but now it’s time to make the kitchen look like a mad scientist’s lab… without, you know, actually being dangerous.
Tonight you’re going full glow mode. Grab tonic water, a clear cup, and a flashlight with UV or “black light” bulbs. Kill the room lights, shine the UV through the cup, and boom—electric blue glow.
> Kill the lights, hit the blacklight, and watch your tonic water ignite in electric blue.
You’ve just met safe luminescence. No fire, no weird chemicals, just glow reactions from quinine in the drink. Kids see “magic potion,” you explain “science party.”
Try painting cotton balls with diluted tonic water and letting them dry. Under UV, they blaze like tiny moons.
Line a baking sheet with them and you’ve got a glowing galaxy for your tabletop space adventure tonight.
Balloon-Inflating Bottles: Capturing Invisible Gases
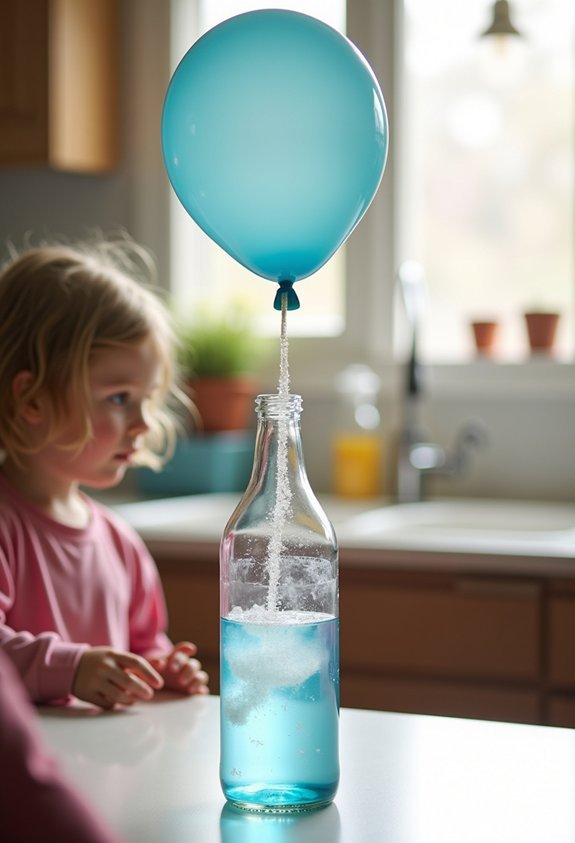
Ever seen a balloon blow itself up like it’s haunted? You can totally do that on your kitchen table, and no ghosts needed.
Slip a balloon over a bottle, mix safe stuff like vinegar and baking soda, and boom—balloon reactions right in front of your face.
Before you start, grab:
- A clean, dry plastic bottle
- A balloon that’s not full of old party sadness
- Vinegar, baking soda, and a small funnel
- Paper towels, because science can be messy
- A notebook to record what explodes (kidding… kind of)
When the fizz hits, it makes gas that has nowhere to go but up.
That gas expansion rushes into the balloon, stretching the rubber and blowing it up like drama in a group chat on a Tuesday.
Rainbow Density Jars That Stack Liquids Like Magic
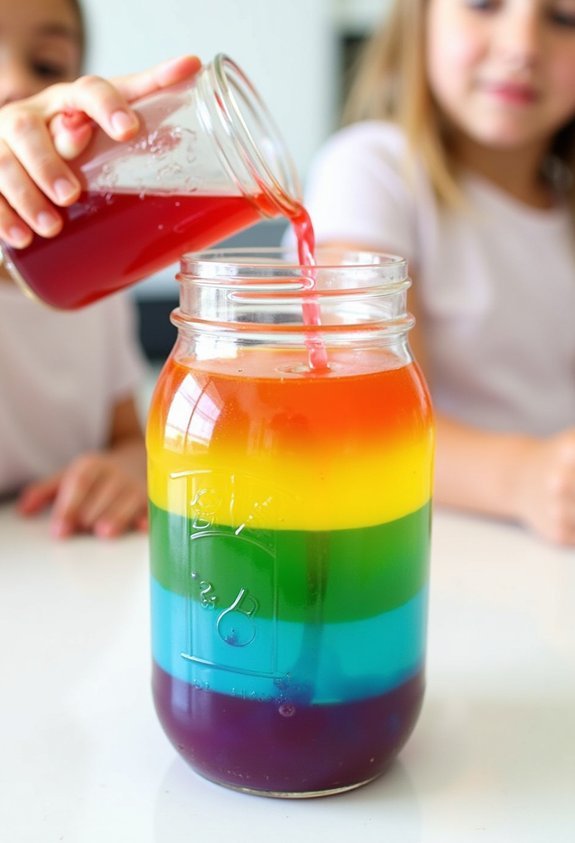
Gas exploding into balloons is cool, but now it’s time to stack liquids like a wizard making a rainbow smoothie—with zero chance you can drink it.
Grab a clear jar, then pour in honey, dish soap, water, oil, and rubbing alcohol, one slow layer at a time. Add food coloring to each liquid first, and boom: liquid layering.
The heavy stuff sinks, the light stuff floats, and your brain screams, “Gravity, explain yourself!” You’ll see sharp color separation, like a traffic light that went wild.
Drop in a grape, a plastic bead, maybe a tiny LEGO. Each one stops on a different level, like it picked its favorite couch cushion. It’s weird, bright, and oddly satisfying. You’ll never look at your kitchen the same.
Yeast-Powered Dough Experiments That Rise and Fall
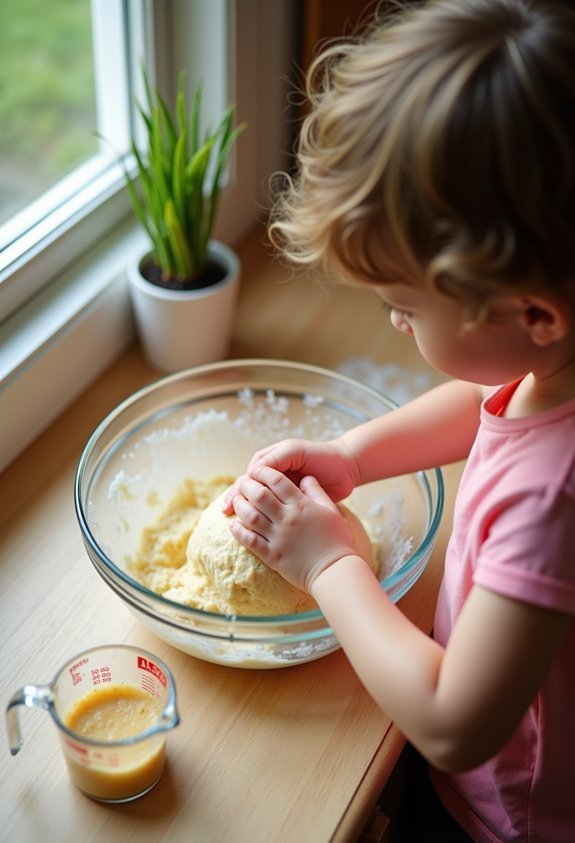
When you dump yeast into dough, it’s basically tiny kitchen monsters throwing a party and blowing up balloons inside your bread. You can totally spy on their yeast behavior with a simple rising-and-falling dough lab at your table.
Mix warm water, sugar, yeast, then stir in flour and a pinch of salt. Knead it; feel the dough elasticity stretch like a rubbery stress ball.
- Let the kids poke the dough and yell “It’s alive!”
- Time how fast different bowls rise in warm vs. cool spots.
- Punch the dough down and watch the air sigh out like a whoopee cushion.
- Shape tiny dough balls and see which size puffs up the most.
- Bake the best batch and hold a dramatic taste-test ceremony.
Science never tasted-better.
DIY Rock Candy and Sugar Crystal Science
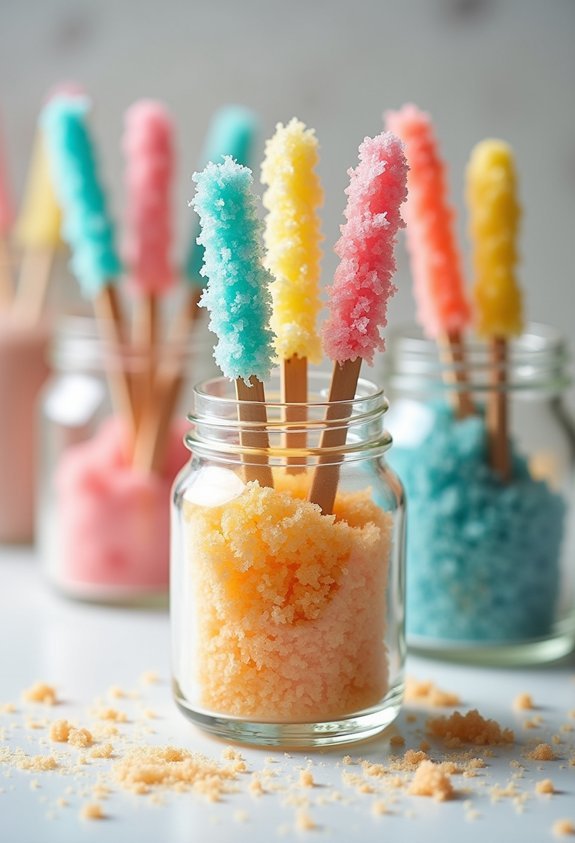
One of the coolest kitchen tricks ever is turning plain sugar into giant, sparkly “edible crystals” that look like they belong in a wizard cave.
You start by heating water and dumping in sugar until it stops dissolving. That’s called sugar saturation, and it’s basically water saying, “I’m full, no more snacks.”
Then you dip a stick in sugar, let it dry, and balance it in the jar. Now the waiting game starts. As the water cools and slowly evaporates, sugar has nowhere to hide. It grabs onto the stick and builds bigger and bigger shapes. That’s crystal formation in action.
Each day you peek in, the crystals look chunkier, shinier, and way more tempting to eat. Try not to lick the glass, though.
Minimal-Mess Setups and Safety Tips for Curious Kids
Before you unleash your tiny “mad scientist” on the kitchen, it helps to set things up so your house doesn’t look like a food hurricane hit it.
Think of this as disaster-proofing counters and teaching kitchen safety.
Set up one small “science zone” so explosions stay tiny and cleanup stays fast.
- Lay down a trash bag or tablecloth as a “science mat” so slime never bonds with your table.
- Use trays or baking sheets to catch spills before they sprint for the edge.
- Pre-measure ingredients into small cups; kids feel pro, and you dodge chaos.
- Mark a “no-go” hot zone around the stove; tape on the floor beats yelling.
- End with a fast reset: kids wipe, you sweep, mess management tamed for the day.
In case you were wondering
How Can I Adapt Kitchen Science Experiments for Toddlers With Shorter Attention Spans?
You adapt experiments by shortening steps, using big motions, and focusing on sensory exploration. Choose colorful, safe ingredients, let toddlers pour, stir, taste, rotate tasks quickly, and repeat toddler friendly activities to reinforce curiosity daily.
What Are Some Allergy-Friendly Substitutions for Common Ingredients in Kitchen Science Activities?
You can swap cow’s milk with oat or rice milk, wheat flour with cornstarch, butter with coconut oil, and eggs with baking soda-vinegar mixes; these allergen free alternatives safe substitutions while preserving fizz and color.
How Do I Turn These Experiments Into a Longer-Term Science Fair Project?
Treat each bubbling beaker like a chapter: you choose one experiment, refine your experimental design, control variables, collect data over weeks, adjust methods, document patterns, and build a project timeline that tells your scientific story.
Which Kitchen Science Activities Work Best for Large Groups or Classroom Settings?
You’ll find baking-soda volcanoes, oil-and-water density towers, and simple yeast balloon inflations work best; they scale easily, encourage rotating roles, spark discussion, and support group experiments that highlight observation, prediction, and collaborative learning for students.
How Can I Safely Store or Dispose of Experiment Leftovers and Materials Afterward?
Treat the aftermath kindly: you sort solids for composting leftovers, pour harmless liquids down the sink with water, seal chemicals in labeled containers, prioritize recycling materials, and follow safety guidelines for medicine-like substances and mixtures.
Conclusion
So now your kitchen isn’t just a place for snacks—it’s a full-blown science lab of epic, world-exploding, mind-melting greatness. You’ve got volcanoes, potions, glowing stuff, and ice cream. Honestly, what more could a kid want? Try one experiment, then let your kids “improve” it. Spoiler: they’ll add way too much food coloring. That’s fine. You’ll laugh, they’ll learn, and yeah, you might stain a few shirts. Worth it. Now go make something awesome bubble.